Karbon/Tutoriels/Forme artistique pour le texte
This tutorial will present you what you can do with the . While this tutorial was done using Karbon, the shape is available in other KOffice applications, and will work in a similar way. Ce tutoriel vous expliquera ce que vous pouvez faire avec le . Bien que ce tutoriel ait été réalisé en utilisant Karbon, cette forme est disponible dans d'autres applications Koffice, et fonctionnera de manière similaire.
Dans cette leçon, vous apprendrez à
- créer une forme texte
- associer une forme texte à un emplacement
Première étape avec une forme texte
 |
Pour ajouter une forme texte artistique, aller dans le menu , cliquer sur l'icône , et la tirer-déposer dans le canevas. |
After adding the shape, you might want to edit the text and display something more interesting. To do this, you need to activate the , either by double clicking on the newly created shape, or selecting  in the toolbox. Then you can change the text to something like this.

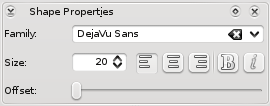
After changing the to "Steve", the to 30pt, and setting , you can have the following shape in your canvas:

Path follower
This is still a very straight, flat text. Now we want a curvy text. To do this, we will need to create a path, for instance, using the ![]() .
.
You should have something like this:

To associate the text with the curve, you need to activate the by double clicking on the text, or selecting  .
.
Then, if you move the mouse on top of the curve you will see the cursor changing to a hand, you will need to click on the curve. In the
docker, the icon ![]() is now enabled, and you need to click on it to attach the path. Using the offset in the docker, you can adjust the text to get the following result:
is now enabled, and you need to click on it to attach the path. Using the offset in the docker, you can adjust the text to get the following result:

You can detach the path by clicking on ![]() . You can , and the text. If you change the curve, then the text will be updated.
. You can , and the text. If you change the curve, then the text will be updated.


