Digikam/RoteAugen
Rote Augen aus Ihren Bildern entfernen mit DigiKam
Übertragen aus Mohamed Malik's Blog am 18. Februar 2011

Sehen Sie sich das obere Bild an: die Augen sind blutrot und erinnern an die der Vampire, die man aus dem Film Twilight kennt. Deshalb sollte dies verbessert werden. Die meisten dieser roten Augen entstehen auf Bildern, wenn der Blitz benutzt wird. Die meisten Kameras haben eine Option, diesen Rote-Augen-Effekt zu korrigieren; aber auch das kann in einigen Fällen fehlschlagen. Wie dem auch sei; Sie müssen sich keine Sorgen machen, digiKam löst das Problem.
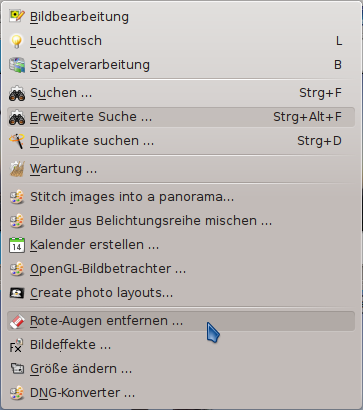
Wählen Sie das Bild aus, auf dem die roten Augen entfernt werden sollen und öffnen

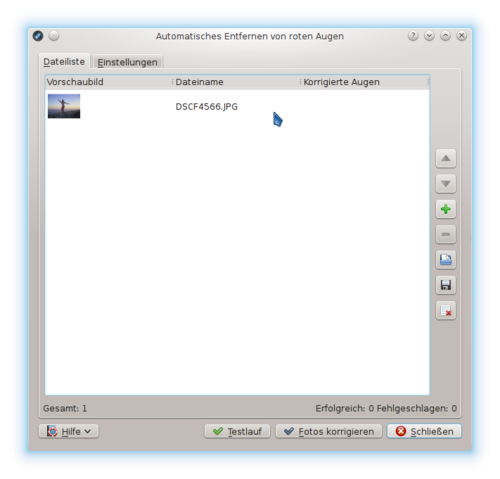
Dann sehen Sie dieses Fenster. Hier gibt es zwei Reiter, wovon einer die ist.

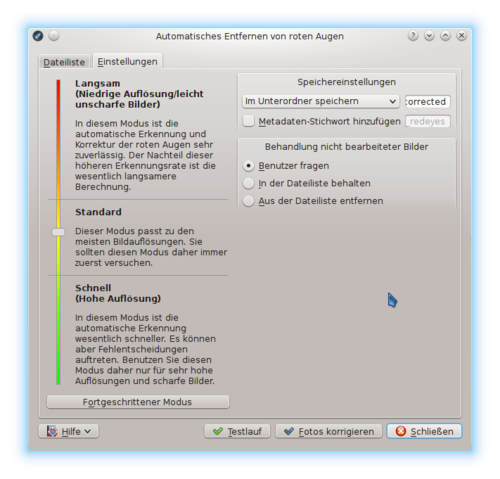
Der andere Reiter ist , bitte beachten und verstehen Sie diesen wichtigen Dialog bevor Sie fortfahren.

Auf der linken Seite werden viele Optionen angeboten:
- Langsam (Niedrige Auflösung/leicht unscharfe Bilder)
- - Entfernt rote Augen besser, ist aber langsamer
- Standard
- - Die Standard-Einstellungen werden benutzt
- Schnell (Hohe Auflösung)
- - der Prozeß läuft schneller ab... Der Autor hat selbst keine guten Ergebnisse damit erzielt.
On the right hand side it gives you the option about how to rename the files. When red eye reduction is applied to a file it creates a new file. You can add a prefix or a suffice or choose from the other options that are available.
Example : if you choose prefix...
- If the original had a file name “malik.jpg” then the corrected file will have the following name “correctedmalik.jpg”. If you choose suffix, then the vice versa.
If an image cannot be processed, which basically means that, red eyes cannot be removed it gives the user a few options, first one being ask the user then keep the file in the list or remove the file in the list. I have processed many files and no such thing has occurred to me so I leave it at ask the user.
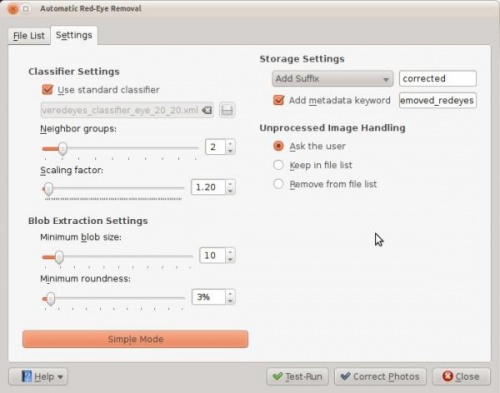
On the right hand side you can see a button named click this if you want to go advanced and you will be presented with the following window. You can use these setting to make more adjustments. When you are done adjusting, click .

This is not the only way to remove red eyes using digiKam but this option is very useful when you want red eyes to be removed from many pictures at once. However if you think you should do them individually select the image and press F4 and this will take you to the editor view. From there select the part where the eyes are red and got to .
Erinnern Sie sich an das Foto zu Beginn des Artikels? Hier ist das verbesserte Foto... hmm, die Augen erinnern doch nicht mehr an die, die wir aus Twilight kennen!
- davor...
- danach...

