Showfoto/Perspective/bg
Фото KDE Урок 1-5: Настройване на перспективата
Унай Гарро, Лято 2009
Здравейте отново. Да, за тези, които мислеха, че съм изчезнал- съжалявам ![]() Нямах интернет връзка няколко месеца, а и бях затрупан от допълнителна работа, но ето ме тук отново.
Нямах интернет връзка няколко месеца, а и бях затрупан от допълнителна работа, но ето ме тук отново.
За тези, които четат тези уроци за първи път, целта е да се запознаете със съществуващите "KDE" приложения с отворен код, за да можете да обработвате снимките си и да се гордеете с тях. В последния урок покрихме решаването на проблемите, свързани с наситеността на цветовете, контраста, осветеността и др.
Целта на този урок е да обърнем внимание на нещо, което повечето от нас пренебрегват, освен ако не обръщаме сериозно внимание на снимките. Нещо, което е също толкова досадно, колкото и лесно за оправяне: изкривяването в перспектива. Да- наистина- този урок ще е много по- лесен за възприемане от другите.
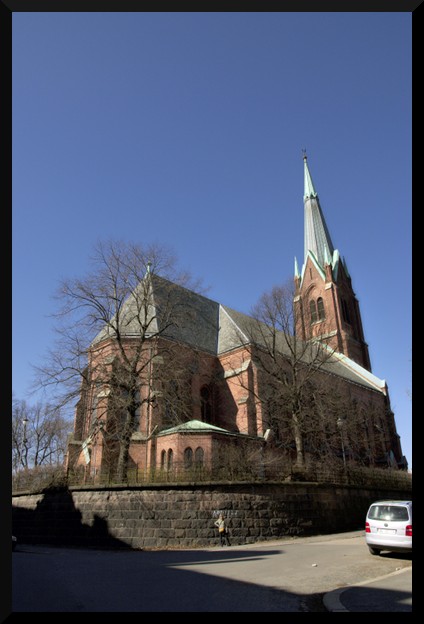
Ще използваме следната снимка, за да илюстрираме и поправим проблема:
|
На пръв поглед, може всичко да изглежда наред, но ако се загледате, не ви ли се струва, че сградата е огъната? Всякаш стените не са прави. Този проблем може да не ви прави впечатление, тъй като сме свикнали да го виждаме в повечето снимки, но сградите, реално, не изглеждат така.
Следвайте стъпките:
От къде идва проблемът? Някой ще каже, че обективът е бил лош. Е, аз казвам, че фотографът не струва... е- признавам- аз съм фотографът. ![]()
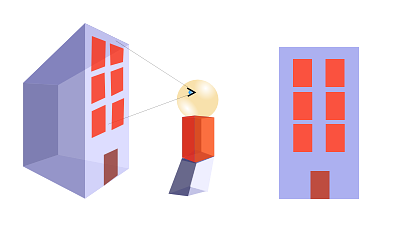
Проблемът не е в апарата или обектива. Този ефект е много очевиден, ако се замислите какво се случва, когато снимате сгради отблизо.
|
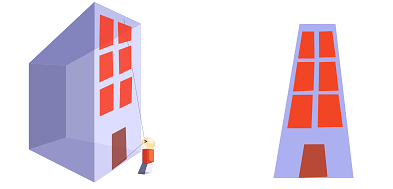
It looks correct right? Now lets approach the building more, look at it from the bottom part rather than front, and lets make the building much larger than us:
|
The further the building parts are, the smaller they look. So the top part looks smaller than the bottom part.
That's exactly what happens in our original photo too. In that photo, I was very close to the building, at the bottom of it. It may not look like that, but that's because I was using a wideangle lens.. Then, the closer you are to the building, and the larger being it, the more pronounced the effect is.
What would you have to do? Well, if at all possible, try avoiding this effect when taking the photograph. Position yourself further away from the building when taking the pic, and try looking perpendicular to the building, not looking up.
If everything fails, ... tadaaaah! yes, Showfoto comes to the rescue here!
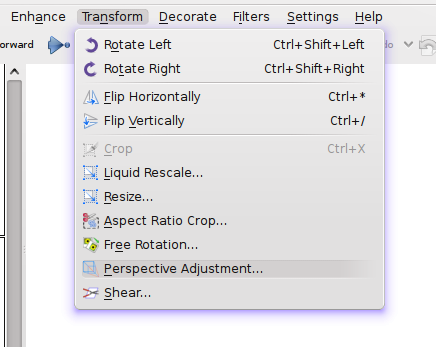
Let's open the picture in Showfoto, and look in the menu for
|
Once selected, you should see a dialog similar to the following:
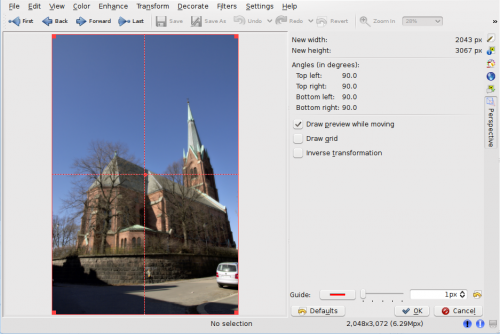
|
In this dialog, you can move around the corners and stretch the picture in any shape you want (it applies a transformation matrix). You can use the dotted guide in the picture to make sure that the parts you want straight are vertical or horizontal. In this photo, I took building walls and trees as reference, and tried straightening them:
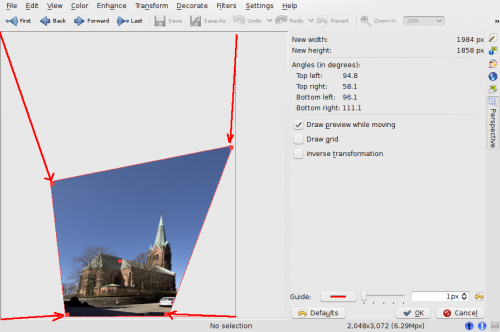
|
And there you go, press , and I got the following result:
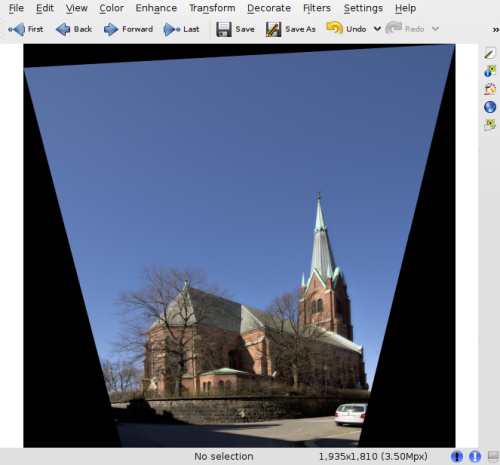
|
Obviously, after reshaping the image, the borders are no more square, and Showfoto has filled the missing parts with black. Now, we'll have to crop this ugly border off (take care when undistorting, because you may leave some image parts off for cropping!)
And yes, we are done. Doesn't it look more natural this way ![]()
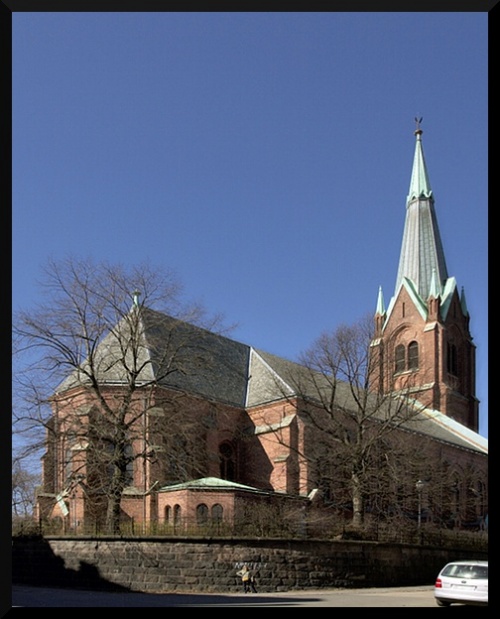
|
Well, I hope you enjoyed this tutorial. I know... you guys that followed the tutorials so far, thought that this tutorial would end up being much harder... that's life. As far as you got a bit of taste for photos, KDE and photography is damn easy. See ya all next time! ![]()
