digiKam/Усування ефекту «червоних очей»
Усування ефекту «червоних очей» з ваших фотографій за допомогою digiKam
Створено на основі допису у блозі Мохамеда Маліка (Mohamed Malik), 18 лютого 2011 року

Погляньте на наведене вище зображення: зіниці на ньому налиті кров’ю, а очі виглядають як очі вампірів у сутінках. Все це треба виправити. Здебільшого такі червоні очі з’являються на зображеннях у разі використання спалаху. У більшості цифрових фотоапаратів передбачено автоматичне усування цього ефекту, але іноді це автоматичне виправлення не спрацьовує. Щоб там не було, не переймайтеся: за допомогою digiKam ви зможете виправити недоліки зйомки.
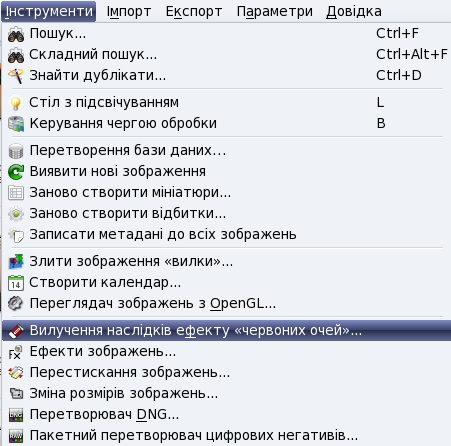
Позначте зображення, на яких слід виправити ефект червоних очей і скористайтеся пунктом меню .

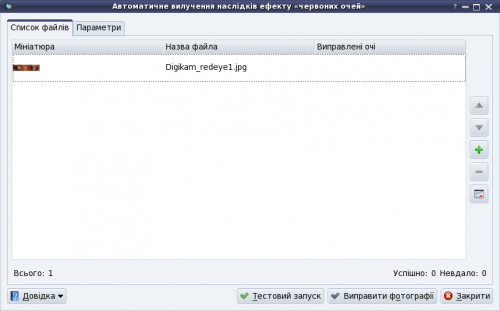
У відповідь буде відкрито вікно, подібне до наведеного вище. У вікні буде дві вкладки, однією з яких є вкладка .

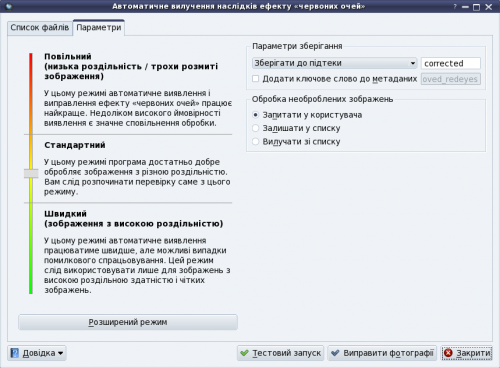
Інша вкладка має заголовок . Не забудьте зазирнути на цю вкладку, щоб переконатися, що інструмент налаштовано належним чином.

За допомогою лівої частини вікна ви зможете налаштувати інструмент:
- Повільний режим
- - кращі можливості з вилучення дефектів, але з уповільненням обробки
- Стандартний
- - використання стандартних значень параметрів
- Швидкий режим
- - швидша обробка, але результати можуть бути зовсім незадовільними
On the right hand side it gives you the option about how to rename the files. When red eye reduction is applied to a file it creates a new file. You can add a prefix or a suffice or choose from the other options that are available.
Example : if you choose prefix...
- If the original had a file name “malik.jpg” then the corrected file will have the following name “ malikcorrected.jpg” if you choose suffix then the vice versa.
If an image cannot be processed, which basically means that, red eyes cannot be removed it gives the user a few options, first one being ask the user then keep the file in the list or remove the file in the list. I have processed many files and no such thing has occurred to me so I leave it at ask the user.
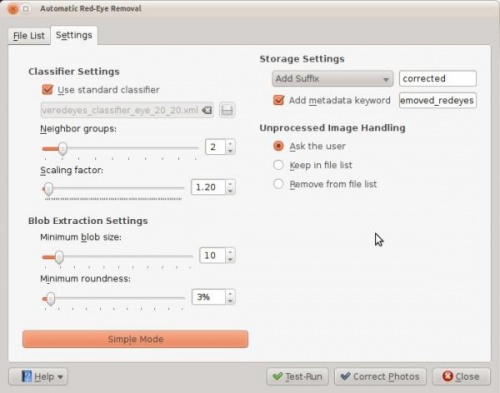
On the right hand side you can see a button named click this if you want to go advanced and you will be presented with the following window. You can use these setting to make more adjustments. When you are done adjusting click correct photos.

This is not the only way to remove red eyes using digiKam but this option is very useful when you want red eyes to be removed from many pictures at once. However if you think you should do them individually select the image and press f4 and this will take you to the editor view. From there select the part where the eyes are red and got to
Remember the picture in the top of the article? Here is the corrected photo…..hmm the eyes no longer look like the ones we see it twilight!!
- Before…
- After…

