Digikam/Wikimedia Commons
Export Photos to Wikimedia Commons with digiKam
Transcribed from Dmitri Popov's blog, 25th June, 2012
Sharing is caring, and there is probably no better way to share your photographic masterpieces with the world than adding them to the Wikimedia Commons pool. While the project’s website features its own tool for uploading photos, digiKam’s Wikimedia Export Kipi plugin can come in rather handy when you need to export multiple photos in one fell swoop without leaving the convenience of your favorite photo management application.

The plugin can be evoked by choosing the command. If you don’t see the command in the menu, then you are either using an older version of digiKam (the plugin has been introduced in version 2.6) or the plugin has not been enabled. In the latter case, you can activate the plugin by choosing . Switch then to the section and enable the plugin. Before you start using the plugin, you should also create an account with Wikimedia Commons.
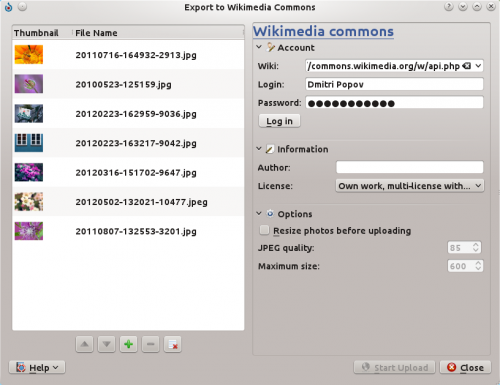
Using the plugin to upload photos to Wikimedia Commons couldn’t be easier. Select one or several photos in a digiKam album and choose . This opens the export dialog window. In the Wiki field, type the URL of Wikimedia Commons API (http://commons.wikimedia.org/w/api.php). Enter then your user name and password in the appropriate fields and press . In the , specify the author’s name and choose a license. If you want to resize photos before uploading them to Wikimedia Commons, check the check box, and adjust the quality and size settings. Hit the button, and the plugin takes care of the rest.
