Digikam/Panorama/ca: Difference between revisions
Created page with "center|500px|thumb|Inici de l'assistent" |
Importing a new version from external source |
||
| (12 intermediate revisions by the same user not shown) | |||
| Line 2: | Line 2: | ||
== Com crear panorames en digiKam 2.1 == | == Com crear panorames en digiKam 2.1 == | ||
Transcrit des | Transcrit des d'un article al blog d'en Mohamed Malik, l'11 de setembre de 2011 | ||
'''digiKam 2.1''' | El '''digiKam 2.1''' ha estat alliberat fa uns dies amb moltes noves característiques i millores. Una de les eines més interessants d'aquesta versió és l'eina <menuchoice>Panorama</menuchoice>. La qual és molt simple i força eficaç. | ||
Seleccioneu les imatges que voleu i aneu a <menuchoice>Eines -> Fusiona les imatges en un panorama</menuchoice> i s'obrirà l'assistent. | |||
| Line 15: | Line 15: | ||
Seleccioneu qualsevol format de sortida que preferiu i feu clic a <menuchoice>Següent</menuchoice>. I apareixerà aquesta finestra: | |||
| Line 21: | Line 21: | ||
Organitzeu les imatges en l'ordre correcte, utilitzeu les fletxes amunt i avall, feu clic a la <menuchoice>icona amb la creueta vermella</menuchoice> per eliminar qualsevol imatge i feu clic a <menuchoice>Següent</menuchoice>. | |||
| Line 27: | Line 27: | ||
Si voleu l'eina <menuchoice>Detecta el moviment del cel</menuchoice> feu clic a l'opció i premeu <menuchoice>Següent</menuchoice> per continuar. | |||
| Line 33: | Line 33: | ||
Per començar post-processarà i procedirà quan feu clic al botó <menuchoice>Següent</menuchoice>. | |||
| Line 39: | Line 39: | ||
En aquesta finestra les imatges s'estan processant! Quan feu clic a <menuchoice>Següent</menuchoice>. | |||
| Line 45: | Line 45: | ||
La fusió del panorama ja s'ha fet. Si voleu, podeu desar el vostre projecte. Es poden utilitzar els mateixos fitxers de projecte en '''hugin''', si no m'equivoco, ja que aquesta eina utilitza '''hugin'''! Feu clic a <menuchoice>Següent</menuchoice> i veureu la sortida a la mateixa carpeta que les fotografies originals. Això és el que tinc! | |||
[[Image:Panorama8.gif|center|500px|thumb]] | [[Image:Panorama8.gif|center|500px|thumb]] | ||
[[Category: | [[Category:Gràfics/ca]] | ||
[[Category: | [[Category:Fotografia/ca]] | ||
[[Category: | [[Category:Guies d'aprenentatge/ca]] | ||
Latest revision as of 13:24, 6 December 2013
Com crear panorames en digiKam 2.1
Transcrit des d'un article al blog d'en Mohamed Malik, l'11 de setembre de 2011
El digiKam 2.1 ha estat alliberat fa uns dies amb moltes noves característiques i millores. Una de les eines més interessants d'aquesta versió és l'eina . La qual és molt simple i força eficaç.
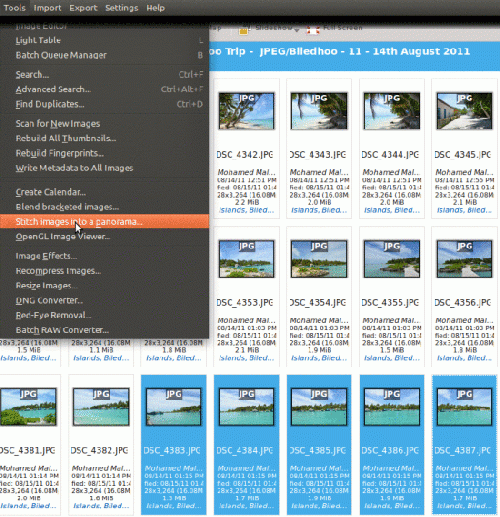
Seleccioneu les imatges que voleu i aneu a i s'obrirà l'assistent.
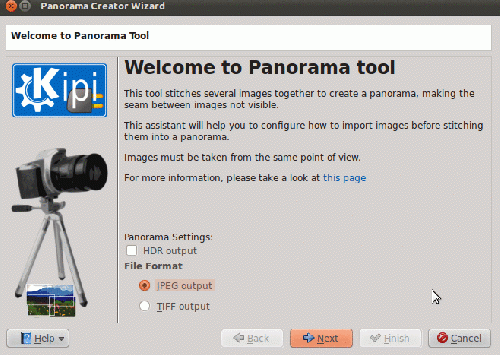
Seleccioneu qualsevol format de sortida que preferiu i feu clic a . I apareixerà aquesta finestra:
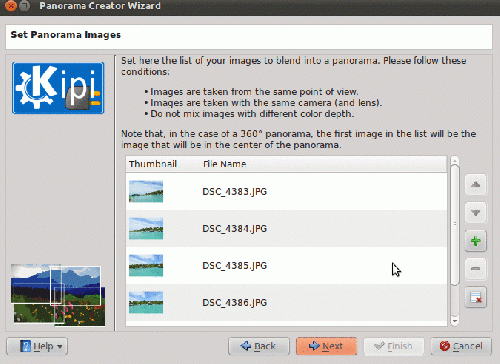
Organitzeu les imatges en l'ordre correcte, utilitzeu les fletxes amunt i avall, feu clic a la per eliminar qualsevol imatge i feu clic a .
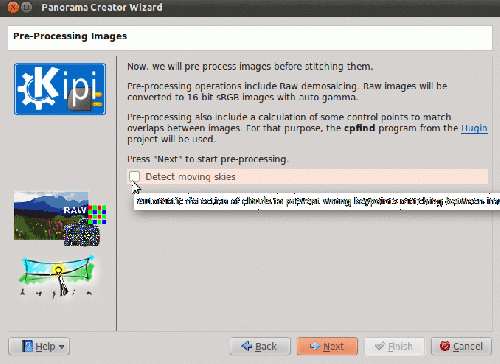
Si voleu l'eina feu clic a l'opció i premeu per continuar.
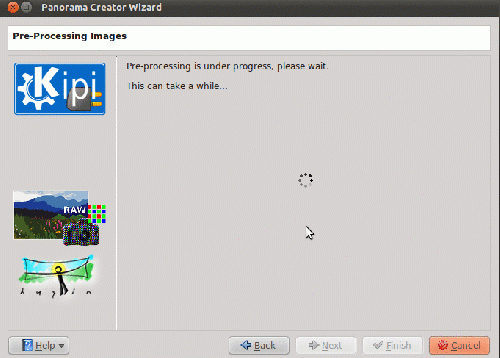
Per començar post-processarà i procedirà quan feu clic al botó .
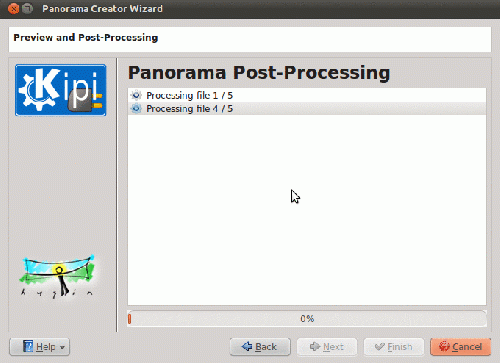
En aquesta finestra les imatges s'estan processant! Quan feu clic a .
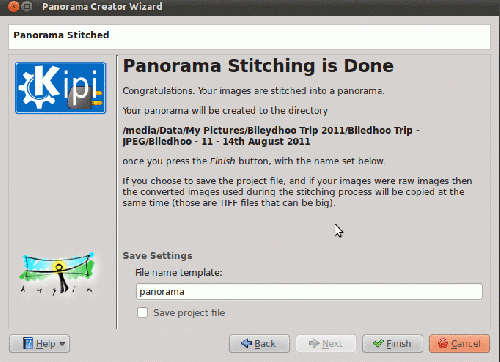
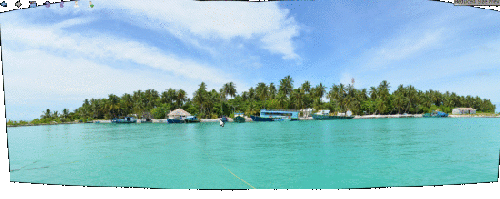
La fusió del panorama ja s'ha fet. Si voleu, podeu desar el vostre projecte. Es poden utilitzar els mateixos fitxers de projecte en hugin, si no m'equivoco, ja que aquesta eina utilitza hugin! Feu clic a i veureu la sortida a la mateixa carpeta que les fotografies originals. Això és el que tinc!
