Kaffeine-TV: Difference between revisions
No edit summary |
No edit summary |
||
| Line 1: | Line 1: | ||
{{Proposed deletion|reason=Is this | {{Proposed deletion|reason=Is this page still relevant? [[Kaffeine]] seems to still support watching tv, so perhaps | ||
this page should be brought up to date or merged with the main page.}} | |||
<languages /> | <languages /> | ||
Latest revision as of 07:37, 27 February 2024
![]() Kaffeine is a fully-featured media player, but one of its features that is not seen in many other players is the ability to play digital TV programmes on PCs equipped with the appropriate TV tuner cards / dongles.
Kaffeine is a fully-featured media player, but one of its features that is not seen in many other players is the ability to play digital TV programmes on PCs equipped with the appropriate TV tuner cards / dongles.
Setup
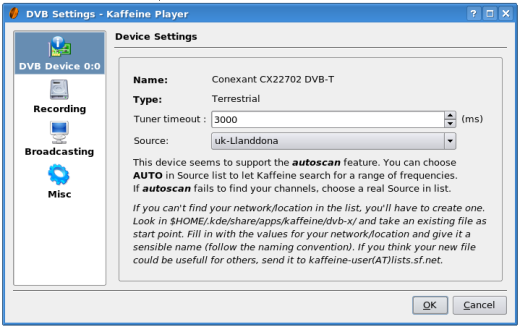
Kaffeine detects the presence of an appropriate tuner card and if it has done so you will see this reported if you click on the menu item in the section of the configuration called . Also in this settings dialog you can select the source (transmitter) of your DVB signal. Kaffeine seems to have pre-loaded information on several hundred terrestrial and satellite sources. There is also an choice here which, if your card supports this feature, means you do not have to know the name of your source.
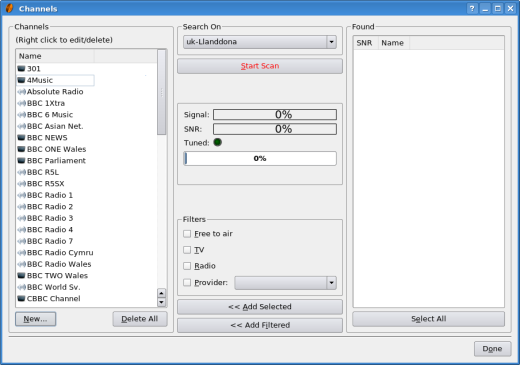
Having checked that you have a recognised tuner card and a source to scan for channels, move to the channels dialog ( in the main Kaffeine Menu). Here there is a prominent (red) button. Pressing this, causes the tuner card to scan for channels, which are then listed in the right hand area of the dialog (labelled "Found"). Both TV and Radio Stations should be picked up in the scan. After this the simplest way to proceed is to press successively the and buttons which will move all the channels found into the left hand area of the dialog (labelled "Channels").
That's it - you have set up the system and can start watching and listening.
Usage
To do so, go to the start-up window and click on the large Digital TV icon. The channel list you generated earlier then opens up on the left hand panel. Double-clicking on a channel in this list opens it up and it starts playing in the right hand panel. A single-click on a channel will provide an on-screen display with details of the programme currently showing on that channel.


