Digikam/Effects: Difference between revisions
No edit summary |
No edit summary |
||
| Line 6: | Line 6: | ||
<!--T:2--> | <!--T:2--> | ||
'''digiKam''' can apply various image effects to images as a batch process. To do this go to <menuchoice>Tools</menuchoice> menu and select <menuchoice> | '''digiKam''' can apply various image effects to images as a batch process. To do this go to <menuchoice>Tools</menuchoice> menu and select <menuchoice>Image Effects</menuchoice>. | ||
Latest revision as of 17:44, 7 March 2012
Applying Image Effects Using digiKam
Transcribed from Mohamed Malik's web post of 19 February 2011
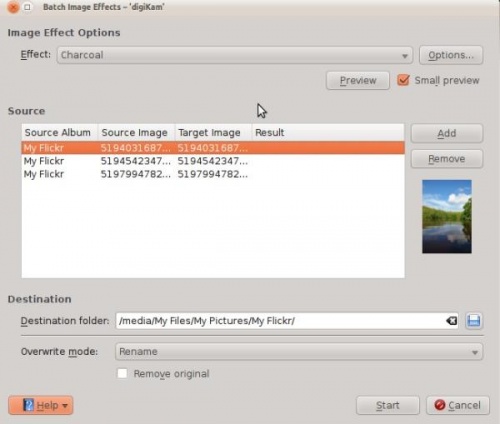
digiKam can apply various image effects to images as a batch process. To do this go to menu and select .

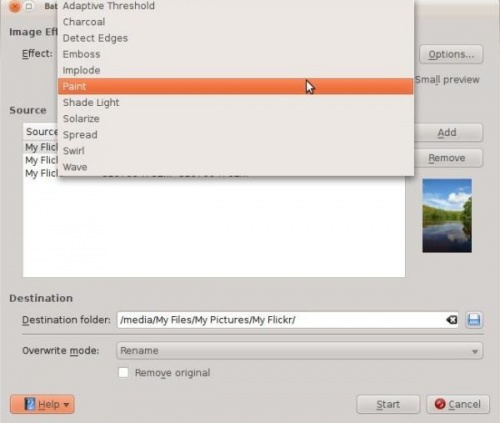
It gives you a few options, for an example on the above screen shot the specified image effect to be applied is , however that is not the only effect that is available. The screen shot below shows several effects which can be applied.

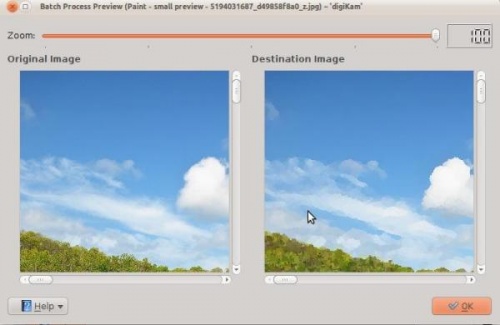
Choose any image effect from the list. If you want to adjust the settings press the button. I have chosen . When you are done press the button which give a glimpse of what you will get after the process is done. Example, see screen shot below. If you click option in the window your original files will be deleted. It is a better option to leave this off, since digiKam will create a new modified file, thereby leaving your original files untouched.

