Konversation/Configuring SASL authentication/da: Difference between revisions
Appearance
Importing a new version from external source |
Importing a new version from external source |
||
| Line 23: | Line 23: | ||
<li style="text-align:left;"><span id="step5"></span> | <li style="text-align:left;"><span id="step5"></span>Tilbage i dialogen '''Nyt netværk''' (eller '''Redigér netværk''' hvis du sprang herned fra [[Special:myLanguage/Konversation/Configuring SASL authentication#step2|punkt 2]]), er den nyligt tilføjede server dukket op i listen <menuchoice>Servere</menuchoice> for dette netværk. Klik nu på kanppen <menuchoice>Redigér...</menuchoice> ved siden af drop-ned-listen <menuchoice>Identitet</menuchoice> for at åbne dialogen '''Identiteter''':<br /> | ||
[[Image:Authconfig05.png]]</li> | [[Image:Authconfig05.png]]</li> | ||
Revision as of 08:28, 17 August 2012
Indstilling af SASL-autentificering
Dette dokument vil guide dig igennem opsætning af SASL-autentificering for et IRC-netværk med freenode-netværket som eksempel.
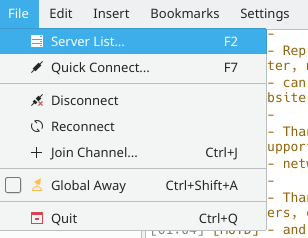
- Lad os begynde med at føje netværket til serverlisten. Åbn dialogen Serverliste ved at taste F2 eller vælge menuen :
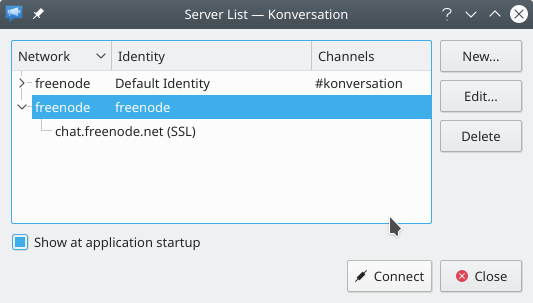
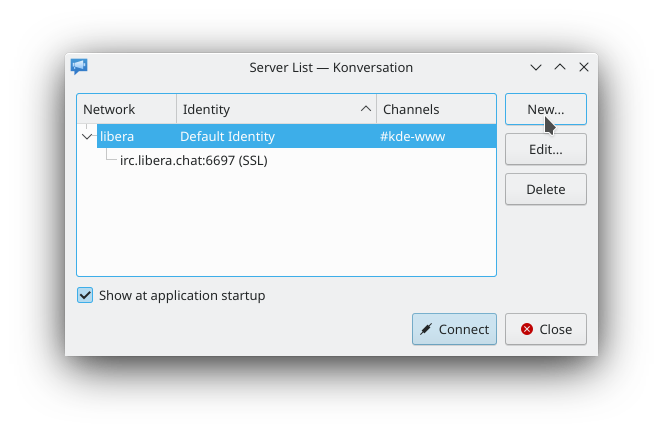
- Hvis du allerede har et punkt med freenode i Serverlisten, så vælg det og klik på knappen for at åbne dialogen Redigér netværk og hop til punkt 5 (eller punkt 4, hvis du er interesseret i at lære om opsætning af sikker transport med SSL for et netværks servere, hvilket komplementerer SASL-autentificering). Alternativt kan du klikke på knappen øverst til højre i dialogen for at åbne dialogen Nyt netværk:
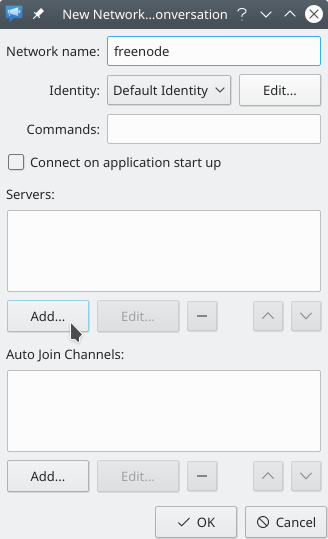
- I dialogen Nyt netværk giver du netværket et navn ved at udfylde feltet . Klik så på knappen for at åbne dialogen Tilføj server.
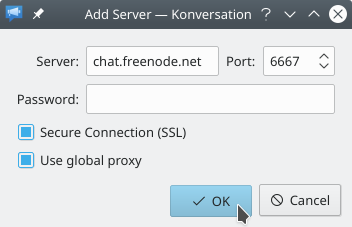
- Udfyld dialogen Tilføj server som vist i det næste skærmbillede. Bemærk, at vi har valgt at aktivere SSL for at bruge en sikker transport imellem os og serveren, da formålet med denne vejledning i sidste ende er at konfigurere en sikker autentificeringsmetode, (Du kan lære mere om freenodes servere og de porte de lytter på her.) Klik på for at gemme serveren og komme tilbage til dialogen Nyt netværk.
- Tilbage i dialogen Nyt netværk (eller Redigér netværk hvis du sprang herned fra punkt 2), er den nyligt tilføjede server dukket op i listen for dette netværk. Klik nu på kanppen ved siden af drop-ned-listen for at åbne dialogen Identiteter:
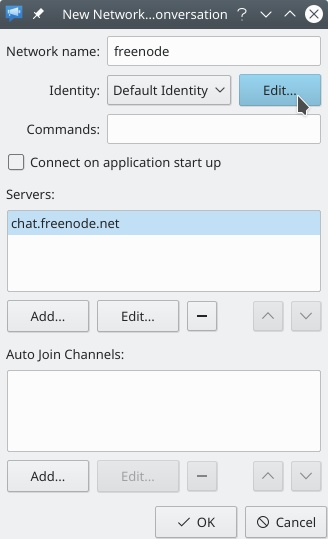
- Welcome to the Identities dialog window. This dialog window allows you to create and manage an unlimited number of Identities. An Identity is a way to store settings related to your person (such as your real name and nicknames) separately from the settings for a network, so you can for example reuse them for multiple different networks. It also makes it easy to switch between different Identity settings for a single network, by selecting the right Identity in the New Network dialog window from the preceding steps or in the similar Edit Network dialog window used to modify an existing network in the Server List. For added convenience, if you open the Identities dialog window from the New/Edit Network dialog window as we have done here (alternatively, you can open it any time by pressing ), the Identity you are viewing at the time you press the button will be automatically selected for the network.
Because Identities are such an important concept in Konversation, this guide will now take you through adding and filling in an entirely new Identity to use with freenode before turning to adding the authentication settings. If you're already familiar with managing Identities, you can skip to step 9 now.
Note that adding a new Identity is not strictly necessary. As long as you are only using a single IRC network, just filling in the Default Identity is of course enough. But even when using multiple IRC networks, using just the Default Identity for all of them can be enough, if there is no need for any of the Identity settings to differ from network to network. However because, as we will see later, the authentication settings are part of the Identity, it is usually good practice to use separate Identities for different networks, so you can use different passwords on each network for better security. Given this, click the button next to the drop-down selection labeled to open the Add Identity dialog window:
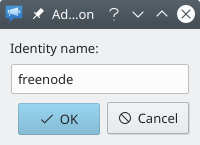
- In the Add Identity dialog window, enter a name for the new Identity and click the button to get back to the Identities dialog window. Note that the name "freenode" in the following screenshot is just a useful memory aid for the connection to the network; there is no need for the network and Identity name to be the same:
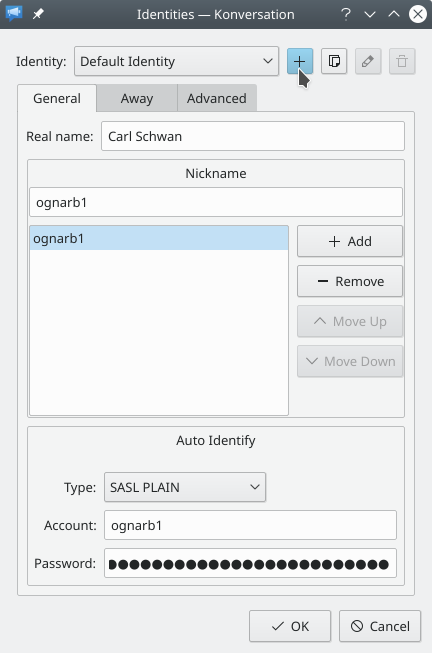
- Back in the Identities dialog window, fill in the basic settings for the newly-added Identity, which has been automatically selected in the dialog (notice the drop-down selection labeled at the top of the dialog window). Entering a and adding at least one are required:

- Now it's time to get to our final objective: Adding SASL authentication settings to the new Identity for use with the freenode network.
(A short interlude: For the sake of brevity, and because the best and most up-to-date documentation for the account creation process is available on freenode's own website, this guide assumes that you already have a freenode account. If you don't have an account yet, however, click now in the Identities dialog window and then in the New/Edit Network dialog window. You can then connect to freenode unauthenticated by selecting it in the Server List dialog window and clicking the button at the bottom of the dialog window. Once you are connected to freenode you can follow their instructions to create an account. Once you're done, open the Server List dialog window again (see step 1), select freenode and click the button to open the Edit Network dialog window and the button again to open the Identities dialog. Note that you will need to reconnect after adding the authentication settings to connect authenticated.)
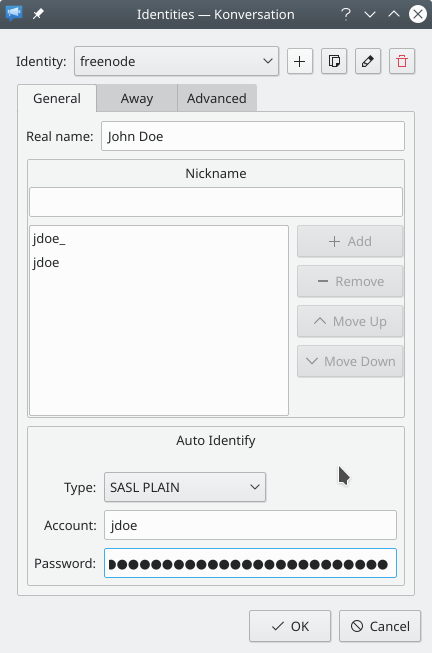
To add SASL authentication settings to the Identity, focus on the group of settings labeled Auto-Identify still on the tab of the Identities dialog window. The first step is to select in the drop-down selection labeled . Then all that's left to do is to enter your freenode account's name and password in the and fields below the drop-down selection and clicking the button to save the new Identity settings:
- Now click the button in the New/Edit Network dialog window to save the network and get back to the Server List dialog window.
- In the Server List dialog window you can now select freenode in the list and press the button at the bottom of the dialog window (or double-click the entry) to connect to freenode with SASL authentication:
