Adding an entry to the Create New menu/fr: Difference between revisions
Fredtantini (talk | contribs) Created page with "Ouvrez ce nouveau fichier et coller le contenu suivant à l’intérieur :" |
Fredtantini (talk | contribs) Created page with "Remplissez les champs de la manière suivante : * '''Name''' est le texte qui apparaîtra dans le menu <menuchoice>Create New</menuchoice>. *: Image:CustomCreateNewMenuEntr..." |
||
| Line 25: | Line 25: | ||
</source> | </source> | ||
Remplissez les champs de la manière suivante : | |||
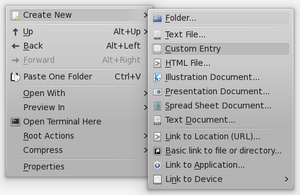
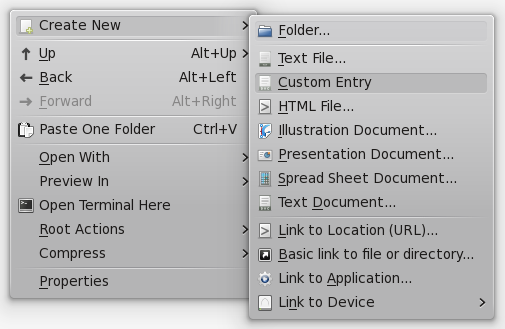
* '''Name''' | * '''Name''' est le texte qui apparaîtra dans le menu <menuchoice>Create New</menuchoice>. | ||
*: [[Image:CustomCreateNewMenuEntry.png]] | *: [[Image:CustomCreateNewMenuEntry.png]] | ||
*: "Custom Entry" | *: "Custom Entry" est la valeur du champ '''Name'''. | ||
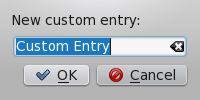
* '''Comment''' is the label for the new name of files of this type. When you select your custom entry in the <menuchoice>Create New</menuchoice> menu, a dialog shows up asking you for the name of your new file, and this text is the label of the field where you enter this new name. | * '''Comment''' is the label for the new name of files of this type. When you select your custom entry in the <menuchoice>Create New</menuchoice> menu, a dialog shows up asking you for the name of your new file, and this text is the label of the field where you enter this new name. | ||
Revision as of 16:54, 8 May 2016

|
Tutoriel qui décrit comment ajouter une entrée au menu des navigateurs de fichiers tels que Dolphin ou Konqueror |
Les entrées du menu sont appelés des templates. Ils sont définis au niveau du système, dans /usr/share/templates, ou seulement pour l'utilisateur courant, dans ~/.kde4/share/templates. Dans ce tutoriel, nous allons ajouter un nouveau template dans ~/.kde4/share/templates.
Définir les métadonnées
Créez un dossier templates dans ~/.kde4/share si un tel dossier n’existe pas , et entrez dans le dossier templates.
Dans ce dossier, créez un nouveau fichier avec l’extension .desktop. Par exemple : custom-file.desktop.
Ouvrez ce nouveau fichier et coller le contenu suivant à l’intérieur :
[Desktop Entry]
Name=
Comment=
Type=Link
URL=
Icon=
Remplissez les champs de la manière suivante :
- Comment is the label for the new name of files of this type. When you select your custom entry in the menu, a dialog shows up asking you for the name of your new file, and this text is the label of the field where you enter this new name.
- URL is the path to a file containing the initial content that new files of this type have. These files with the initial content are usually located within the hidden .source folder of the templates folder, so use a relative path that starts with .source/, such as .source/custom-entry.txt.
- Icon is the code of the icon that appears in the menu for your custom entry. The code is the filename of the icon to use. You can browse MIME type icon files at /usr/share/icons/<theme>/<size>/mimetypes/. For example, to use /usr/share/icons/<theme>/<size>/mimetypes/application-vnd.oasis.opendocument.text.png, fill Icon with "application-vnd.oasis.opendocument.text".
This is an example of a filled .desktop file:
[Desktop Entry]
Name=Custom Entry
Comment=New custom entry:
Type=Link
URL=.source/custom-entry.txt
Icon=application-vnd.oasis.opendocument.text
Translating the Name and Comment
The Name and Comment fields can be translated to any language. To provide a translation, include a new field in your .desktop file with the form "Field[language code]=Value" for each language that you want to support. For example:
[Desktop Entry]
Name=Custom Entry
Name[ca]=Entrada personalitzada
Name[gl]=Entrada personalizada
Defining the content
Create a .source folder in ~/.kde4/share/templates if such a folder does not exist already, and enter the hidden .source folder.
Create a new file with the same filename that you defined in the URL field of the metadata of your new entry, and fill the file with the default content that you want for new files created with your new entry.


