KOrganizer/Screenshots/de: Difference between revisions
Appearance
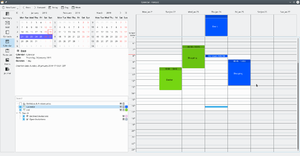
Created page with "{|class="tablecenter vertical-centered" style="border:1px solid darkgray;" |+ '''Das KOrganizer Hauptfenster''' |- |thumb|300px||Das ist das '''KOrganiz..." |
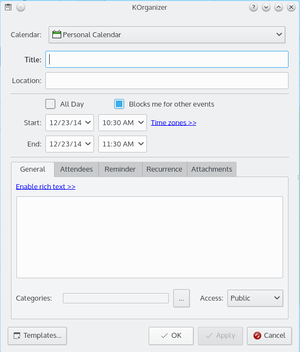
Created page with "{|class="tablecenter vertical-centered" style="border:1px solid darkgray;" |+ '''Hinzufügen eines neuen Termins''' |- |thumb|300px||Das hinzufügen eines..." |
||
| Line 11: | Line 11: | ||
{|class="tablecenter vertical-centered" style="border:1px solid darkgray;" | {|class="tablecenter vertical-centered" style="border:1px solid darkgray;" | ||
|+ ''' | |+ '''Hinzufügen eines neuen Termins''' | ||
|- | |- | ||
|[[Image:Event.png|thumb|300px]]|| | |[[Image:Event.png|thumb|300px]]||Das hinzufügen eines neuen Termins zu '''KOrganizer''' ist ganz einfach. Klicken Sie bitte hierzu auf den <menuchoice>Neuer Termin</menuchoice>-Knopf in der Werkzeugleiste oben und geben Sie einfach alle Informationen, die Sie zu diesem Termin speichern wollen, ein. | ||
|} | |} | ||
Revision as of 20:08, 8 August 2020
KOrganizer Bild-für-Bild Anleitung
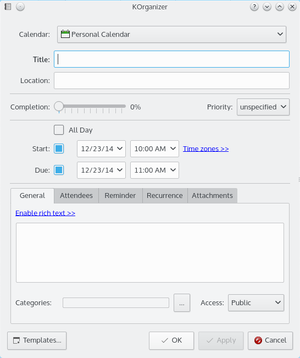 |
Adding a new todo item is just as easy and intuitive as adding a new appointment. Add a short summary of the todo, a time associated with it and also be reminded of that job. |
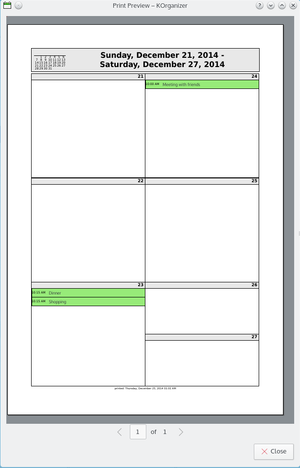 |
Sometimes it's quite helpful to have a hardcopy of your appointments and todo's with you. So just print it out, take it to your meeting and scribble down some notes ... |

