Digikam/Calendars/ca: Difference between revisions
Created page with "Digikam/Calendaris" |
Created page with "Category:Graphics Category:Fotografia/ca Category:Tutorials" |
||
| Line 59: | Line 59: | ||
[[Category:Graphics]] | [[Category:Graphics]] | ||
[[Category: | [[Category:Fotografia/ca]] | ||
[[Category:Tutorials]] | [[Category:Tutorials]] | ||
Revision as of 17:28, 25 February 2012
Creating Calendars Using Digikam
Transcribed from Mohamed Malik's web post, 18 February 2011
Did you know that you could create calendars using digiKam? It is very simple and easy to do this. First you need to select some photos, most preferably 12 photos so that those 12 photos corresponds to 12 months in the calendar.
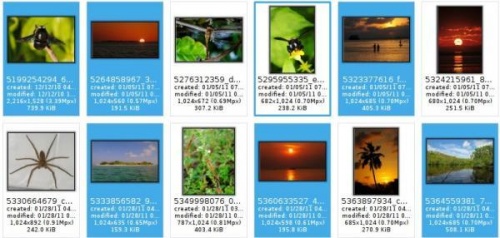
After selecting the pictures go to .
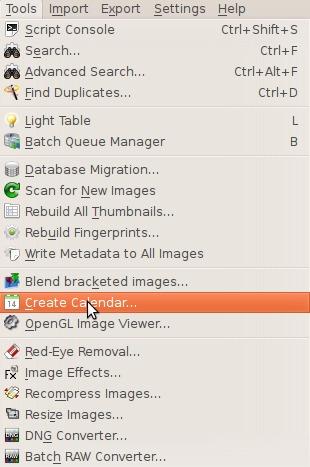
When you do this this window will appear.
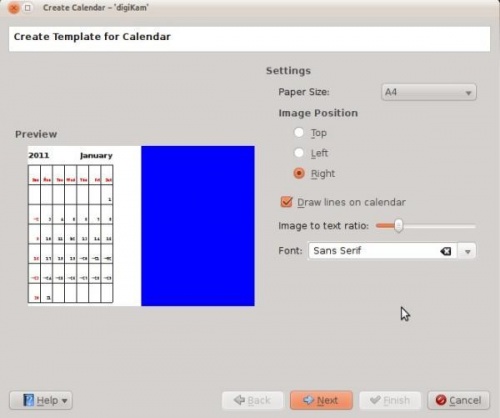
Here you can alter your settings.
- Paper size
- You have two choices standard A4 and US Letter size.
- Image position
- Set which position in which the images appear in the calendar.
- Draw lines on calendar
- Meaning that you can either disable or enable the lines which appear.
- Image to text ratio
- Increase the size of the image or decrease them according to the ratio, move the slider and the preview will change as you adjust it.
- Set your font
- Choose a default font to be used.
When you have completed this click in the wizard and you will be greeted with this window:
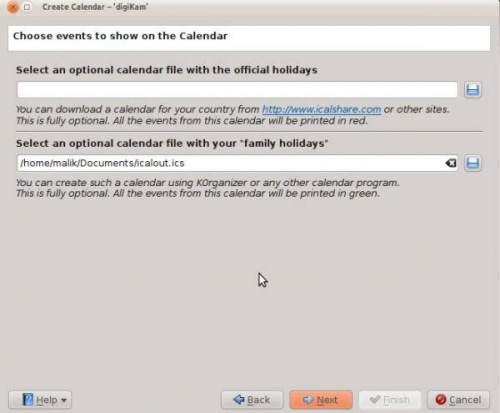
The website iCalshare has many great templates that can be used. They are free to use and download. All you need to do is register an account with them. It includes templates which contain much information on public holidays and events of many countries. I searched this website for Maldives, however I didn’t find anything about my country here so I skipped this.
If you are using KOrganizer to organise your daily work and if you have marked special days like birthdays of friends and relatives you could really use this feature. And it is a very simple process. Open up KOrganizer, go to and save the calendar file on to your computer. Then select the folder button on the window from the current screenshot and show it to the file manager and select . This will add that to your calendar. Then press in the wizard. And you will see this window.
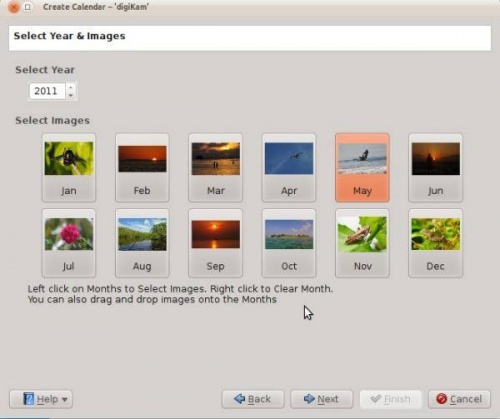
Here you need to select the year and images. Since this is 2011 I have chosen 2011 and if you still want to change any images you still have the option to do it. Left click to change the image and the file manager will pop up show it the new image and press . If you need to clear an image give it a right click and the image will be cleared. And you can add any other image that you may prefer. When you are done press .
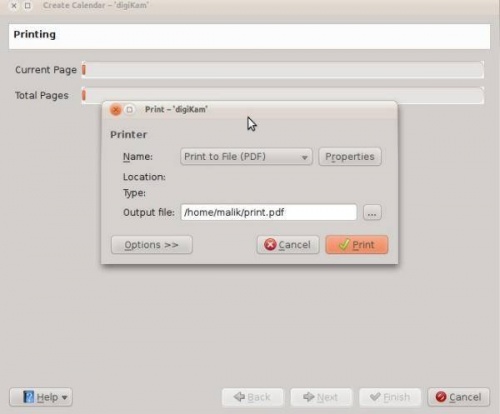
When you are done press and it will generate a 12 page PDF file exactly like a calendar.
You can either send it directly to your printer or print to a PDF file. However according to my personal opinion it will be a wise decision to print to PDF first so that you can see what you have created. If you need to change the printer properties press . You will be able to change the page layout (portrait, landscape) and the units of measurements (cm, inches, px, etc.). By default the output file will be made in your home folder. If you need to change the location press the button on the right and specify manually.
