Showfoto/Perspective/da
KDE fotointroduktion 1-5: Justering af perspektiv
Unai Garro, Summer 2009
Hej igen. Ja, til de der troede, at jeg var forsvundet: beklager, jeg lever stadig ![]() Uden internetforbindelse i månedsvis og med en masse ekstra arbejde har jeg været forhindret i at skrive nogen vejledninger, men nu er jeg her igen.
Uden internetforbindelse i månedsvis og med en masse ekstra arbejde har jeg været forhindret i at skrive nogen vejledninger, men nu er jeg her igen.
Til nye læsere: målet med disse vejledninger er at vise, hvordan man bruger eksisterende opensource-programmer fra KDE til at forbedre i forvejen gode fotos og være stolt af dem. Med den forrige vejledning har vi allerede behandlet de fleste af værktøjerne til at forbedre belysningen af et billede ved hjælp af kurver, niveauer, lysstyrke, kontrast og gamma mm.
I denne vejledning er emnet noget, som de fleste af os fuldstændig glemmer, medmindre vi er særligt opmærksomme på billedet. Noget der kan være lige så irriterende, som det er let at rette: perspektivforvrængning. Ja tro mig: denne vejledning vil være meget lettere at følge end de foregående.
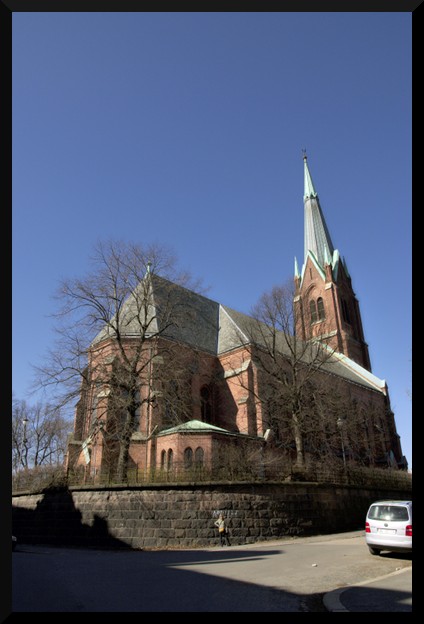
Jeg vil bruge det følgende foto som eksempel, når jeg beskriver problemet:
|
Umiddelbart synes du måske, at det godt nok ud..., men vær lidt mere opmærksom..., ser det ikke ud som om bygningen er bøjet, som om murene ikke går lodret opad? Ja, det er det, jeg refererer til. Det ser måske naturligt ud i et foto, fordi vi er blevet vant til det, men... bygningen ser faktisk ikke sådan ud!
Opfølgning:
Hvor ligger så fejlen? Nogle vil hævde, at kameraets linse er dårlig; men jeg siger, at det er fotografen, der er dårlig (der er også mig) ![]()
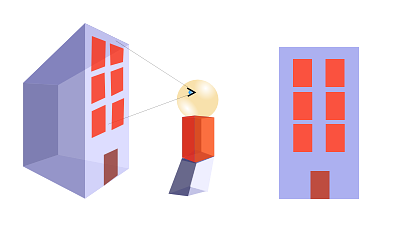
The problem isn't the camera and neither is it the lens. This effect is pretty obvious if you think what happens when you approach a building and look at it with a camera:
|
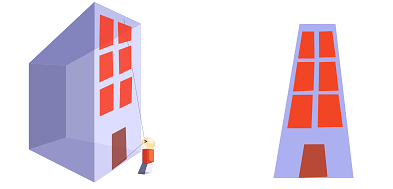
It looks correct right? Now lets approach the building more, look at it from the bottom part rather than front, and lets make the building much larger than us:
|
The further the building parts are, the smaller they look. So the top part looks smaller than the bottom part.
That's exactly what happens in our original photo too. In that photo, I was very close to the building, at the bottom of it. It may not look like that, but that's because I was using a wideangle lens.. Then, the closer you are to the building, and the larger being it, the more pronounced the effect is.
What would you have to do? Well, if at all possible, try avoiding this effect when taking the photograph. Position yourself further away from the building when taking the pic, and try looking perpendicular to the building, not looking up.
If everything fails, ... tadaaaah! yes, Showfoto comes to the rescue here!
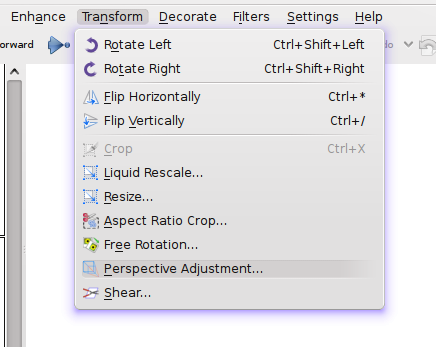
Let's open the picture in Showfoto, and look in the menu for
|
Once selected, you should see a dialog similar to the following:
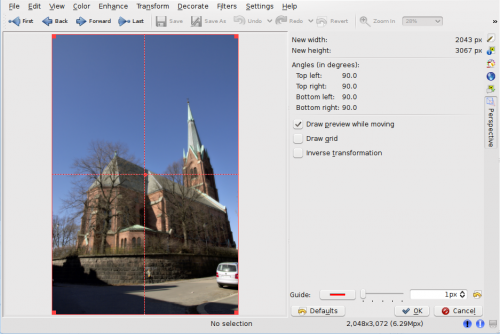
|
In this dialog, you can move around the corners and stretch the picture in any shape you want (it applies a transformation matrix). You can use the dotted guide in the picture to make sure that the parts you want straight are vertical or horizontal. In this photo, I took building walls and trees as reference, and tried straightening them:
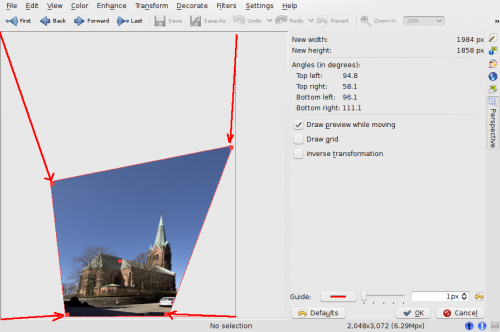
|
And there you go, press , and I got the following result:
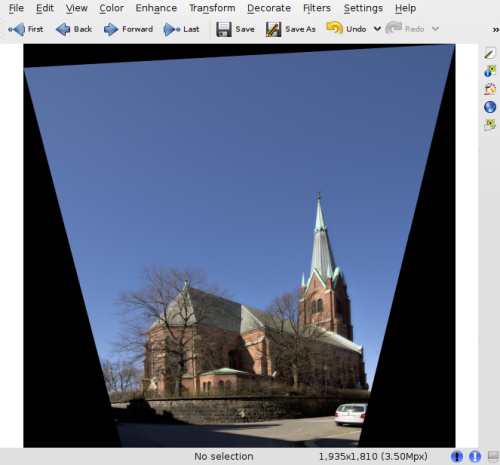
|
Obviously, after reshaping the image, the borders are no more square, and Showfoto has filled the missing parts with black. Now, we'll have to crop this ugly border off (take care when undistorting, because you may leave some image parts off for cropping!)
And yes, we are done. Doesn't it look more natural this way ![]()
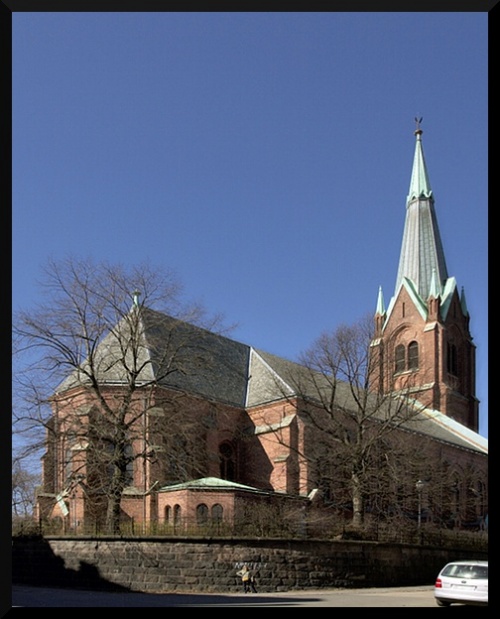
|
Well, I hope you enjoyed this tutorial. I know... you guys that followed the tutorials so far, thought that this tutorial would end up being much harder... that's life. As far as you got a bit of taste for photos, KDE and photography is damn easy. See ya all next time! ![]()
