Digikam/Occhi rossi
Rimuovere gli occhi rossi dalle foto utilizzando digiKam
Trascritto dal blog di Mohamed Malik, 18 febbraio 2011

Dai un'occhiata all'immagine sopra: gli occhi sono rosso sangue, sembrano come quelli dei vampiri visti nel film twilight, c'è bisogno di correggerli. La maggior parte degli occhi rossi si riscontrano nelle foto quando viene utilizzato il flash. La maggior parte delle macchine fotografiche includono un'opzione per correggere gli occhi rossi in modo predefinito, tuttavia anche queste falliscono talvolta. Non ti devi comunque preoccupare, digiKam viene in tuo aiuto.
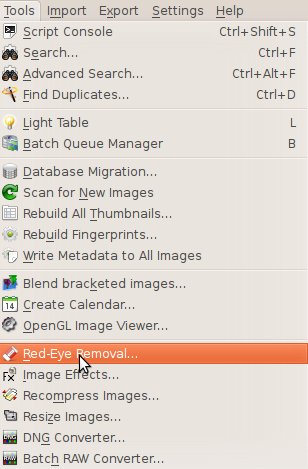
Seleziona le foto in cui vuoi rimuovere gli occhi rossi e poi vai su .

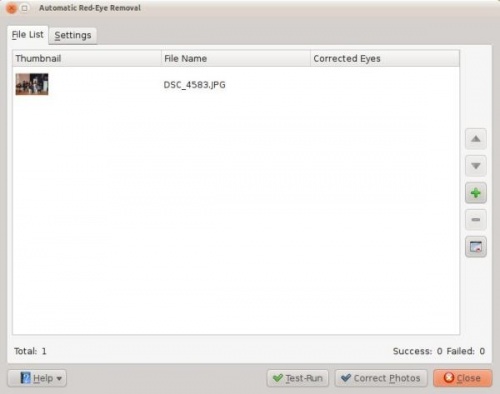
Vedrai questa finestra. Qui hai a disposizione due schede, una è .

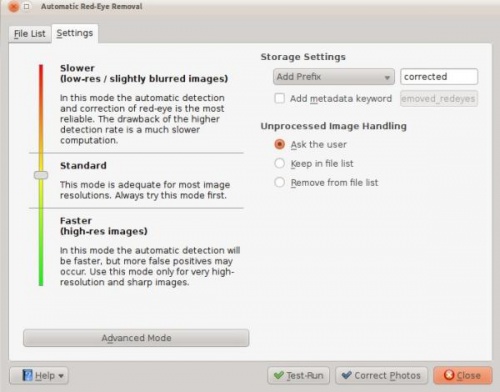
L'altra è , ricorda che è molto importante dare un'occhiata a questa finestra e capirla prima di procedere.

Ti offre molte opzioni sul lato sinistro:
- Più lento
- - rimuove al meglio gli occhi rossi, ma il processo è più lento
- Standard
- - per applicare le impostazioni standard
- Più veloce
- - significa che il processo è più veloce... Personalmente non ho ottenuto buoni risultati con questa opzione.
Sulla destra ti offre la possibilità di definire come rinominare i file. Una volta applicata la riduzione degli occhi rossi, viene creato un nuovo file. Puoi aggiungere un prefisso o un suffisso o scegliere tra le altre opzioni disponibili.
Example : if you choose prefix...
- If the original had a file name “malik.jpg” then the corrected file will have the following name “correctedmalik.jpg”. If you choose suffix, then the vice versa.
If an image cannot be processed, which basically means that, red eyes cannot be removed it gives the user a few options, first one being ask the user then keep the file in the list or remove the file in the list. I have processed many files and no such thing has occurred to me so I leave it at ask the user.
On the right hand side you can see a button named click this if you want to go advanced and you will be presented with the following window. You can use these setting to make more adjustments. When you are done adjusting, click .

This is not the only way to remove red eyes using digiKam but this option is very useful when you want red eyes to be removed from many pictures at once. However if you think you should do them individually select the image and press F4 and this will take you to the editor view. From there select the part where the eyes are red and got to .
Remember the picture in the top of the article? Here is the corrected photo... hmm, the eyes no longer look like the ones we see it twilight!
- Before…
- After…

