K3b
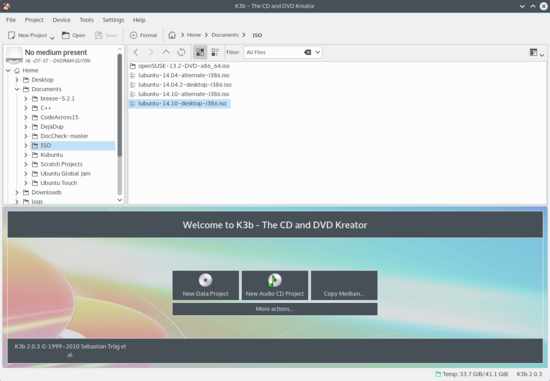 |
Introduction
Si vous avez utiliser un logiciel de gravure comme Nero sous Windows, K3b vous semblera assez familer.
Featuring a simple, yet powerful graphical interface, K3b provides various options for burning a CD, DVD, or BD (Blu-ray disc). Various types of optical projects are supported including (but not limited to) audio and data, video projects for DVD and VCD, as well as multi-session and mixed-mode discs. K3b also has the ability to erase re-writable media and can perform more complicated tasks such as audiovisual encoding and decoding.
Pre-setup
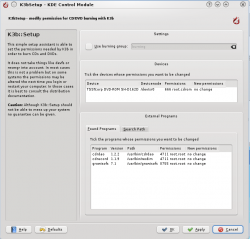
When you run K3b for the first time, you may find K3b informing you that no optical writer drivers have been found, meaning you will not be able to write to any optical discs. There is no need to panic as K3b will open a configuration window which will help you get various tools used by K3b up and running. This includes viewing the user group that owns those applications. You shouldn't need to change this as K3b will apply the correct permissions on external programs itself. These programs are generally cdrecord, growisofs and cdrdao. If preferred, one can tell K3b to use the burning user group and point it to the optical drive. Below is an image of the configuration window where these settings are possible.
Configurer l'interface utilisateur
Au démarrage de K3b vous avez le choix parmi trois des processus les plus populaires:
- Nouveau projet de données
- Nouveau projet audio
- Copier un média
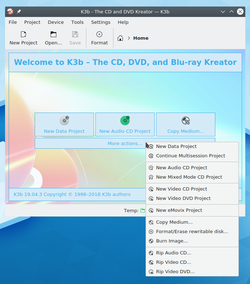
K3b peut faire bien plus que ça cependant, et vous pouvez trouver que d'autres possibilités sont tout aussi utiles pour vous. Regardez cette liste (cliquez sur l'image pour agrandir):
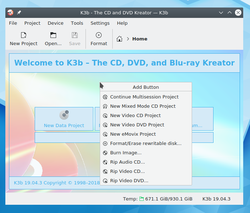
Peut-être qu'un raccourci pour certains d'entre eux vous serait utile. K3b peut vous offrir ça aussi. Clicquez droit sur le bureau, et voila votre menu pour ajouter des boutons:
Configurations des mécanismes internes
La plupart des paramètres par défaut peuvent simplement être laisser en l'état. Cependant, je recommenderais de regarder à la page des Paramètres Avancés.
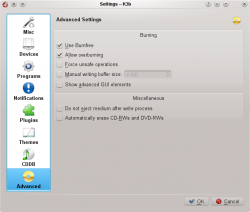
- Utiliser Burnfree devrait être activé - cela controle la gravure, s'assurant que le tampon ne devienne jamais dangereusement bas.
- Vous pouvez vouloir automatiquement effacer les disques ré-inscriptibles
- Ne pas éjecter le média après gravure est inestimable si votre lecteur ne peut pas être fermé suffisament vite pour que la vérification ait lieu.
Préparer la gravure d'un disque
When starting a new project, you should ensure that K3b has detected the correct optical media, such as CD or DVD. On the status line at the bottom of the screen you should see the size of disk which is currently set. If this is not correct, or you require a different size, simply right-click on it and set the preferred size from the provided list:
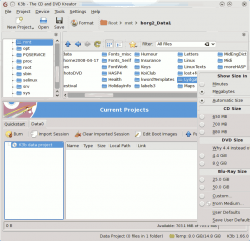
Now choose what is to be burnt.
The top half of the screen is the source pane; it functions like a file manager. You can choose ordinary files from mounted data volumes or audio tracks from inserted audio discs. Names of audio tracks are automatically generated using CDDB; the exact format is controlled by a button in the bottom pane. If the names are incorrect or simply do not match the description of the disc, you can edit them using the toolbar button. Your changes will be cached locally and submitted to the master registry at FreeDB. Internet connection fees apply.
Now that you have your sources at hand, simply drag and drop the files and directories you wish to burn onto the large pane to the right at the bottom; this is the model pane. Behold a tree of your chosen files forming to the left. Should there be some files or directories which you do not want to burn, these can be easily removed from the project by simply removing them from the panel at the bottom. Select the file to be removed (you can control-click to select multiple ones), then choose from the context menu.
The top line will be the title of the disk. In many cases this will be fine, but if you would like to change this to something else, simply rename it using the context menu.
Etapes finales
Vous êtes maintenant prêts à appuyer sur le bouton Graver.
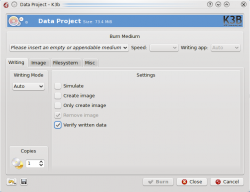
Vous verrez sur ma capture d'écran qu'aucun disque n'était présent. Après avoir inséré le disque approprié vous en verrez une description sur cette ligne.
Il y encore un ou deux choix à faire. Je recommenderais d'activer Verifier les données écrites, puis cliquez sur l'icone Sauvegarder en bas de l'écran, pour s'assurer que cela devienne un choix par défaut. Pour la plupart des graveurs modernes il est sûr de laisser le mode et la vitesse sur Auto. Si vous souhaitez graver une autre copie plus tard, sélectionnez Créer une image, qui évitera d'avoir à reconfigurer la gravure. Choisissez le nombre de copies que vous voulez graver, puis, une fois satisfait, cliquez sur Graver.
Burning an Audio CD
This page tells you how to burn an audio CD from your stored files.
