Digikam/Kalendere
Lav kalendere i digiKam
Fra Mohamed Maliks blog, 18. februar 2011
Vidste du, at du kan lave kalendere i digiKam? Det er ganske enkelt at gøre. Først skal du samle nogle fotos - helst 12 stykker, sådan at du har et for hver måned i kalenderen.
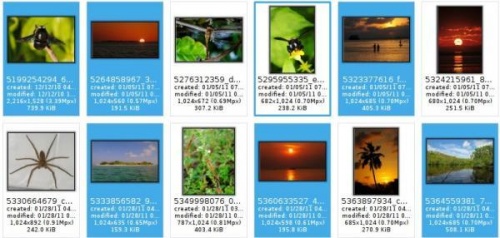
Efter at have markeret billederne vælger du menuen .
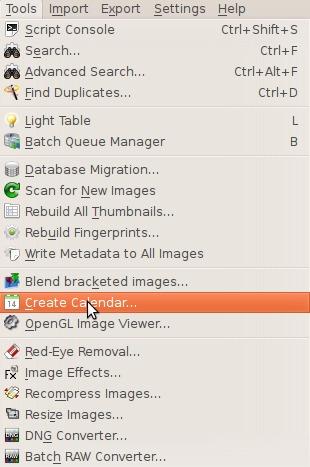
Når du gør det, så dukker dette vindue op.
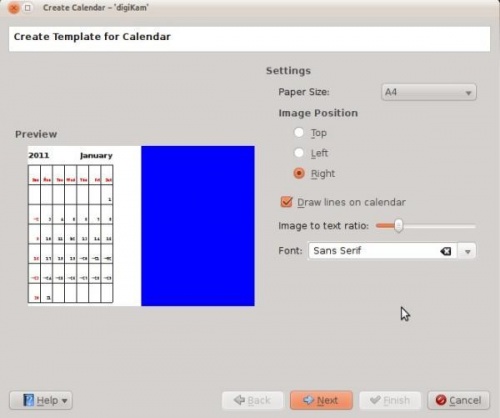
Her kan du ændre indstillinger.
- Papirstørrelse
- Du kan vælæge imellem standard A4 og US Letter.
- Billedposition
- Angiv hvor på kalenderen billedet skal være.
- Tegn linjer i kalender
- Du kan fravælge at få tegnet de linjer, som dukker op.
- Forhold billed-tekst
- Forøg eller formindsk billedet afhængigt af forholdet; når du trækker i skyderen, så kan du se resultatet i forhåndsvisningen.
- Skrifttype
- Vælg hvilken skrifttype, der skal bruges.
Når du er færdig, så klik på i guiden; du mødes så af dette vindue:
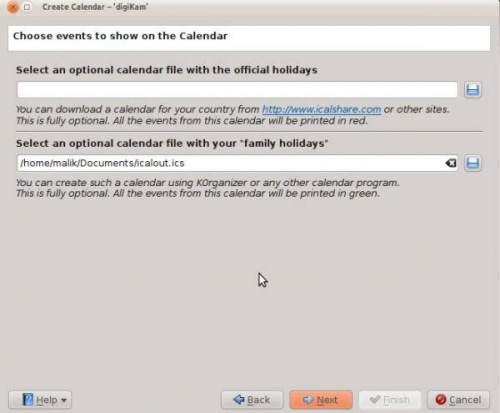
The website iCalshare has many great templates that can be used. They are free to use and download. All you need to do is register an account with them. It includes templates which contain much information on public holidays and events of many countries. I searched this website for Maldives, however I didn’t find anything about my country here so I skipped this.
If you are using KOrganizer to organise your daily work and if you have marked special days like birthdays of friends and relatives you could really use this feature. And it is a very simple process. Open up KOrganizer, go to and save the calendar file on to your computer. Then select the button on the current screen-shot and show it to the file manager and select . This will add that to your calendar. Then press next in the wizard. And you will see this window.
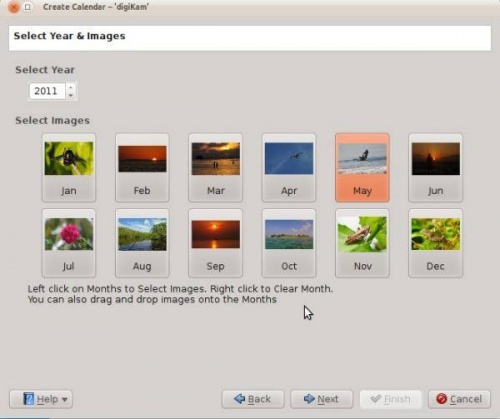
Here you need to select the year and images. Since this is 2011 I have chosen 2011 and if you still want to change any images you still have the option to do it. Left click to change the image and the file manager will pop up show it the new image and press . If you need to clear an image give it a right click and the image will be cleared. And you can add any other image that you may prefer. When you are done press .
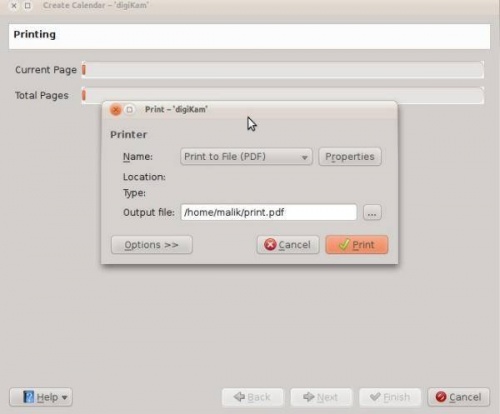
When you are done press print and it will generate a 12 page PDF file exactly like a calendar.
You can either send it directly to your printer or print to a PDF file. However according to my personal opinion it will be a wise decision to print to PDF first so that you can see what you have created. If you need to change the printer properties press “properties” here you will be able to change the page layout ( portrait, landscape) and the units of measurements( cm, inches px etc). By default the output file will be made in your home folder. If you need to change the location press the button on the right and specify manually.
