Digikam/Ulls vermells
Eliminar els ulls vermells de les fotos utilitzant digiKam
Transcrit des de l'article d'en Mohamed Malik, el 18 de febrer de 2011

Feu una ullada a la foto de dalt, els ulls són de color vermell sang i es veuen com els ulls d'un vampir a la pel·lícula Crepuscle i s'ha de corregir. La majoria dels ulls vermells es produeixen en imatges quan s'utilitza el flaix. La majoria de càmeres vénen amb una opció per corregir els ulls vermells per omissió però, de vegades encara que no funciona. En qualsevol cas, no hi ha res de què preocupar-se, digiKam ho té cobert.
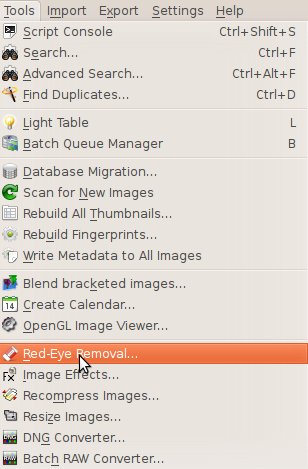
Seleccioneu les imatges de les que voleu eliminar els ulls vermells i després aneu a

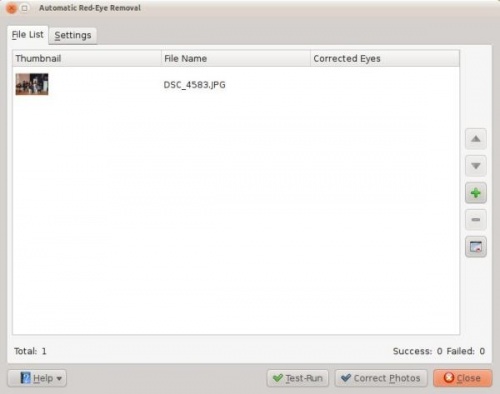
From there you will see this window. Here you have two tabs one is the

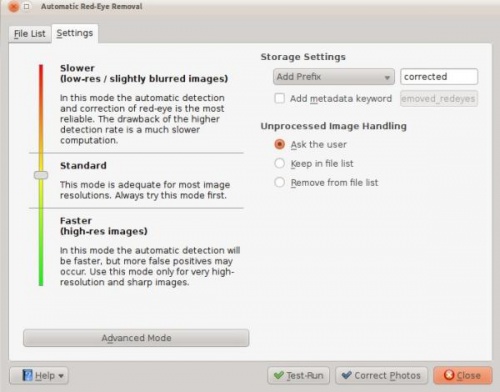
The other is , remember it is very important to take a look at this window and understand it before proceeding.

It gives you many options on the left hand-side:
- Slower
- - removes red eyes better but process is slower
- Standard
- - the standard setting are applied
- Faster
- - means the process is faster... I personally didn’t get good results with this option
On the right hand side it gives you the option about how to rename the files. When red eye reduction is applied to a file it creates a new file. You can add a prefix or a suffice or choose from the other options that are available.
Example : if you choose prefix...
- If the original had a file name “malik.jpg” then the corrected file will have the following name “correctedmalik.jpg”. If you choose suffix, then the vice versa.
If an image cannot be processed, which basically means that, red eyes cannot be removed it gives the user a few options, first one being ask the user then keep the file in the list or remove the file in the list. I have processed many files and no such thing has occurred to me so I leave it at ask the user.
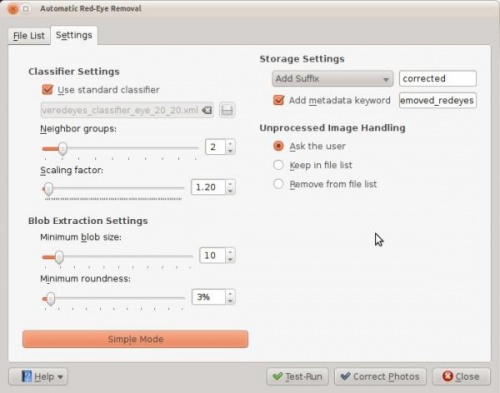
On the right hand side you can see a button named click this if you want to go advanced and you will be presented with the following window. You can use these setting to make more adjustments. When you are done adjusting, click .

This is not the only way to remove red eyes using digiKam but this option is very useful when you want red eyes to be removed from many pictures at once. However if you think you should do them individually select the image and press F4 and this will take you to the editor view. From there select the part where the eyes are red and got to .
Remember the picture in the top of the article? Here is the corrected photo... hmm, the eyes no longer look like the ones we see it twilight!
- Abans…
- Després…

