KSysGuard/zh-tw: Difference between revisions
m Created page with "KSysGuard(系統監視器)" |
Updating to match new version of source page |
||
| (16 intermediate revisions by 2 users not shown) | |||
| Line 2: | Line 2: | ||
{|class="tablecenter vertical-centered" | {|class="tablecenter vertical-centered" | ||
|[[Image:Ksysguard1.png|thumb|265px| | |[[Image:Ksysguard1.png|thumb|265px|系統負載]]|| '''追蹤和控制系統中的行程。''' | ||
|} | |} | ||
== | <span id="General"></span> | ||
==概述== | |||
'''KSysGuard''' | <div class="mw-translate-fuzzy"> | ||
'''KSysGuard''' 設計成無需使用者特別設定即可進行簡單的行程控制 - 預設的通常完全夠用。有兩張工作表 - <menuchoice>系統負載</menuchoice>頁(上面是圖表)和<menuchoice>行程表</menuchoice>。 | |||
</div> | |||
You can also download other tabs (File >> Download New Tabs), including temperatures, network and more. | |||
<span id="System_Load"></span> | |||
==系統負載== | |||
<menuchoice>系統負載</menuchoice>屏有3個顯示圖表,每個分別描繪如下負載要素- 「CPU歷史」,「記憶體和Swap歷史」,「網絡歷史」。如果你懸停鼠標指針到每個部分的,你會看到帶有顏色的詳細分析。 | |||
{|class="tablecenter" | {|class="tablecenter" | ||
| Line 20: | Line 26: | ||
|} | |} | ||
== | <span id="The_Process_Table"></span> | ||
==行程表== | |||
預設的<menuchoice>全部行程</menuchoice>檢視會給你一份按照字母排序的所有運行的行程清列表。點擊任何列的標題會以此列排序。如果你有一個runaway行程(這種行程陷入無限循環,不停派生出子行程),你會發現<menuchoice>全部行程,樹狀</menuchoice>視圖最有用。你也能選擇用「擁有者」或「程式」查看行程的子集。 | |||
{|class="tablecenter" | {|class="tablecenter" | ||
|[[Image:Ksysguard2.png|thumb|300px| | |[[Image:Ksysguard2.png|thumb|300px|行程的記憶體佔用排序列表]]||[[Image:KsysguardTree.png|thumb|300px| 樹狀檢視]] | ||
|} | |} | ||
== | <span id="Hints_and_Tips"></span> | ||
==提示和技巧== | |||
<keycap>Ctrl + Esc</keycap>能啟動系統監視器的''行程''模組,通常在你想找出哪個程式佔用太多資源的時候非常有用。 | |||
<keycap> | <div class="mw-translate-fuzzy"> | ||
在 [[Special:myLanguage/KRunner|KRunner]] (<keycap>Alt + F2</keycap>或是右擊桌面) 上位於輸入框左側有個小圖示-它看起來像微波爐-也能啟動行程表。 | |||
</div> | |||
'''Editing Tabs''': Should you want to adjust a tab, you can find the corresponding .sgrd-file in ~/.local/share/ksysguard/. Once you set "locked" to 0, the sensor browser becomes visible after restarting ksysguard. Now you can drag any sensor from the right into any graph on the left. Setting "locked" back to 1 disables the window again. | |||
[[Category: | [[Category:系統/zh-tw]] | ||
Latest revision as of 08:30, 10 August 2023
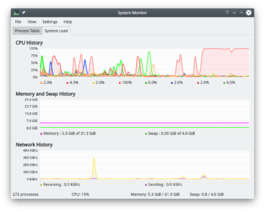 |
追蹤和控制系統中的行程。 |
概述
KSysGuard 設計成無需使用者特別設定即可進行簡單的行程控制 - 預設的通常完全夠用。有兩張工作表 - 頁(上面是圖表)和。
You can also download other tabs (File >> Download New Tabs), including temperatures, network and more.
系統負載
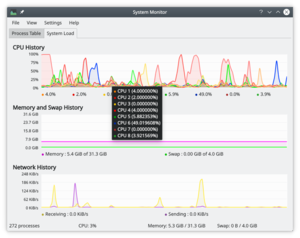
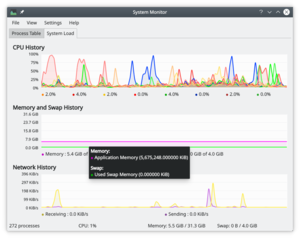
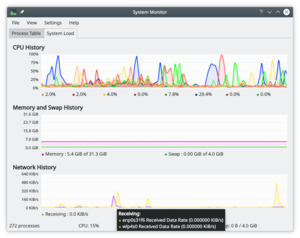
屏有3個顯示圖表,每個分別描繪如下負載要素- 「CPU歷史」,「記憶體和Swap歷史」,「網絡歷史」。如果你懸停鼠標指針到每個部分的,你會看到帶有顏色的詳細分析。
 |
 |
 |
行程表
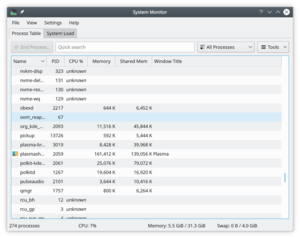
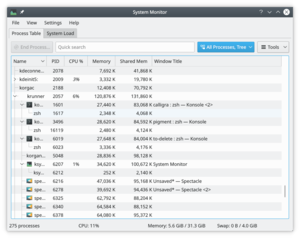
預設的檢視會給你一份按照字母排序的所有運行的行程清列表。點擊任何列的標題會以此列排序。如果你有一個runaway行程(這種行程陷入無限循環,不停派生出子行程),你會發現視圖最有用。你也能選擇用「擁有者」或「程式」查看行程的子集。
 |
 |
提示和技巧
Ctrl + Esc能啟動系統監視器的行程模組,通常在你想找出哪個程式佔用太多資源的時候非常有用。
在 KRunner (Alt + F2或是右擊桌面) 上位於輸入框左側有個小圖示-它看起來像微波爐-也能啟動行程表。
Editing Tabs: Should you want to adjust a tab, you can find the corresponding .sgrd-file in ~/.local/share/ksysguard/. Once you set "locked" to 0, the sensor browser becomes visible after restarting ksysguard. Now you can drag any sensor from the right into any graph on the left. Setting "locked" back to 1 disables the window again.
