Kontact/ca: Difference between revisions
Created page with "Kontact" |
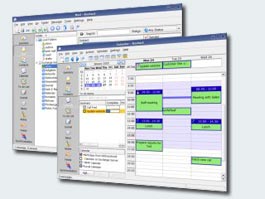
Created page with "Kontact és el gestor d'informació personal integrat del KDE." |
||
| Line 3: | Line 3: | ||
{|style="text-align:center" | {|style="text-align:center" | ||
|[[Image:Kontact_presentation_small.jpg|thumb|265px]]|| '''Kontact | |[[Image:Kontact_presentation_small.jpg|thumb|265px]]|| '''Kontact és el gestor d'informació personal integrat del KDE.''' | ||
|} | |} | ||
Revision as of 21:44, 11 July 2011
 |
Kontact és el gestor d'informació personal integrat del KDE. |
Kontact suite unites mature and proven KDE PIM applications under one roof. Thanks to the powerful KPart technology, existing applications are seamlessly integrated into one.
The components of KDE Kontact are tailored to work well with each other. This results in features like intuitive drag-and-drop between appointment handling, task lists and contacts. KDE Kontact supports various groupware servers. When using these servers your workgroup has access to features like shared email folders, group task lists, calendar sharing, central addressbooks and meeting scheduling.
In short: KDE Kontact delivers innovations to help you manage your communications more easily, organize your work faster and work together more closely, resulting in more productivity and efficiency in digital collaboration.
Components
These programs can be integrated into Kontact:
- Akregator - Read your favorite feeds
- KAddressBook - Manage your contacts
- KJots - Your ideas organised in a Notebook
- KMail - Mail client
- KNode - Your usenet mail reader
- KNotes - Sticky notes for your Desktop
- KOrganizer - Calendar and scheduling, Journal
- KTimeTracker - Track how much time you spend on various tasks
- Summary - Summary screen in Kontact
See also
- How to send SMS using Kontact
- Port to touch screen devices (like mobile handsets or tablets) (currently maemo/Windows Mobile/MeeGo)
Where to get help
There is a mailing list at
- kdepim-users - for users of the KDE PIM applications (Kontact, KAddressBook, KMail, KOrganizer, KNode, ...) subscribe to kdepim-users archive of kdepim-users. A team of developers and users aim to give answers as quickly as possible
and for urgent help, an IRC channel on Freenode
- for users and developers of Kontact - #kontact
Akonadi and KAddressBook
If you have problems concerning Akonadi and the new KAddressBook, there are pages dedicated to these issues
FAQ, Hints and Tips
Migrating your setup to a new distro
In KMail, right click on your Inbox and choose Properties. Go the Maintenance Tab. Have a look at the Location. It has either .kde4 or .kde in the path.
Substitute the appropriate path below.
You need the following config files:
- .kde4/share/config/emaildefaults
- .kde4/share/config/emailidentities
- .kde4/share/config/kmail.eventsrc
- .kde4/share/config/kmailrc
- .kde4/share/config/kaddressbookrc
- .kde4/share/config/kresources/contact
- .kde4/share/config/korgacrc
- .kde4/share/config/korganizerrc
- .kde4/share/config/knotesrc
- .kde4/share/config/mailtransports
And the following directories:
- .kde4/share/apps/kmail
- .kde4/share/apps/kabc
- .kde4/share/apps/korganizer
- .kde4/share/apps/knotes
If you use Akregator within Kontact, you will also need:
- .kde4/share/config/akregator.eventsrc
- .kde4/share/config/akregatorrc
And the whole .kde4/share/apps/akregator directory.
Of course the simplest way is just to keep your whole home directory.
Just a word of warning. If the directory naming is different between Desktops or between the two versions of your distro, this will not work as there are references to the directories within the config files. This means that if the files were in a .kde directory, you cannot just put them in a .kde4 directory without editing the references within the config files.
Hiding the Kontact Sidebar
On small screens, you may wish to reclaim the space used by the Kontact sidebar. You can replace it with an (editable) toolbar:
- Drag the left panel closed using the splitter between it and the main panel, job done.
Enabling SOCKS support in KMail and KNode
Unlike KDE 3, KDE 4 does not have built-in SOCKS support yet. However, it is still possible and relatively simple to make KMail and KNode use a SOCKS proxy, by using proxychains or other similar tools like tsocks or socksify. Assuming that proxychains is correctly installed and configured, all you need to do is to open a terminal (e.g. Konsole) and type:
proxychains kdeinit4
You don't even need to restart KMail/KNode! (You need to type the above command every time you start a new KDE session though).
