Discover/de: Difference between revisions
Created page with "Konzentrieren wir uns erstmal auf den Bereich "Anwendungen"! In dem Bild unten sehen Sie den Kategorien-Baum wie er angezeigt wird, wenn Sie auf "Anwendungen" klicken. Immer w..." |
Created page with "Durch entsprechendes Klicken auf "Zurück" können Sie immer zum Ausgangspunkt zurückkehren. Von dort aus können Sie dann ihre Suche frei fortsetzen. Eine Liste der installi..." |
||
| Line 44: | Line 44: | ||
Durch entsprechendes Klicken auf "Zurück" können Sie immer zum Ausgangspunkt zurückkehren. Von dort aus können Sie dann ihre Suche frei fortsetzen. Eine Liste der installierbaren Anwendungen der Kategorie finden Sie in der Spalte rechts bzw. in der Mitte bei drei Spalten. Wenn Sie auf eine Anwendung klicken öffnet sich eine dritte Spalte ganz rechts mit genauerer Beschreibung der Anwendung oder Erweiterung sofern verfügbar. Sie können weiterhin durch die Liste der Anwendungen blättern und andere Anwendungen anklicken um Beschreibungen zu dieser Anwendung zu erhalten. Um die Spalte ganz rechts zu entfernen klicken Sie auf eine der Kategorien in der Spalte links. | |||
(If you are an app developer and notice that your app has no information or screenshots - see below in "Discover for Devs") | (If you are an app developer and notice that your app has no information or screenshots - see below in "Discover for Devs") | ||
Now try to resize the window. See what happens? '''Discover''', using Kirigami the widget library for convergent apps will react and change to the size of screen you have available. Try resizing it to about the size of a cellphone. It reshapes to better fit that size. | Now try to resize the window. See what happens? '''Discover''', using Kirigami the widget library for convergent apps will react and change to the size of the screen you have available. Try resizing it to about the size of a cellphone. It reshapes to better fit that size. | ||
Now to you sitting on a computer this means that if you have a smaller screen the right column will cover the center to give you the user more visual space for the application you chose to get more information on. To get back from that simply hit the back button in the left column! | Now to you sitting on a computer, this means that if you have a smaller screen the right column will cover the center to give you the user more visual space for the application you chose to get more information on. To get back from that simply hit the back button in the left column! | ||
===How to install applications=== | ===How to install applications=== | ||
Installing an application is easy! When you've found the application that you want, simply click the "Install" button in the middle column and it will begin to install. If you are checking out the detailed information like the image below, you can also click "Install" in the bottom right of the right hand column. | Installing an application is easy! When you've found the application that you want, simply click the "Install" button in the middle column and it will begin to install. If you are checking out the detailed information like the image below, you can also click "Install" in the bottom right of the right-hand column. | ||
[[File:Discoverappfocus.png | 500px]] | [[File:Discoverappfocus.png | 500px]] | ||
Sometimes applications are available from different sources like the repo, [https://en.wikipedia.org/wiki/Snap_(package_manager) snap] or [https://en.wikipedia.org/wiki/Flatpak flatpak]. In this case, right to the '''Install''' button there is a '''Sources''' button. Clicking on this button will give you the option to change the source from which you want to install. In the "Preferences" section you can choose which source to be used as the default source. | |||
[[File:Discover_select_source_de.png | 500px]] | |||
Installation with '''Discover''' is just as simple as that. | Installation with '''Discover''' is just as simple as that. | ||
| Line 67: | Line 71: | ||
[[File:Discoveruninstalling.png | 500px]] | [[File:Discoveruninstalling.png | 500px]] | ||
You can also easily click "Installed" in the left hand column to see all applications and extensions you have installed in your system! That way you can simply scroll through the entire list and look for the app or extensions you wish to uninstall and with ease click "remove". That's all that's needed! | You can also easily click "Installed" in the left-hand column to see all applications and extensions you have installed in your system! That way you can simply scroll through the entire list and look for the app or extensions you wish to uninstall and with ease click "remove". That's all that's needed! | ||
[[File:Discoveruninstall.png | 500px]] | [[File:Discoveruninstall.png | 500px]] | ||
| Line 73: | Line 77: | ||
===How to upgrade applications=== | ===How to upgrade applications=== | ||
Linux distributions come with upgrades, new releases of apps and system details, bugfixes and improvements. To be able to keep your system up to date and safe '''Discover''' has made it easier for you to upgrade. When the update section | Linux distributions come with upgrades, new releases of apps and system details, bugfixes and improvements. To be able to keep your system up to date and safe '''Discover''' has made it easier for you to upgrade. When the update section at the bottom of the left column is bright yellow, which means that you have updates waiting for you. Just click it and you will be moved to this screen (you can as usual simply click in another area in the left column to leave it) | ||
[[File:Discoverupdatelist.png | 500px]] | [[File:Discoverupdatelist.png | 500px]] | ||
In the list you can see all the software that will be updated when you click "Update" at the top right. You can click each individual row to get further information about it. | In the list, you can see all the software that will be updated when you click "Update" at the top right. You can click each individual row to get further information about it. | ||
If something is not to your liking, simply uncheck it on the left of the name of the software and it will be held back from the update. | If something is not to your liking, simply uncheck it on the left of the name of the software and it will be held back from the update. | ||
==How to master Discover== | ==How to master Discover== | ||
In this section we will bring up how to handle upgrades, repositories and how to file bugs. | In this section, we will bring up how to handle upgrades, repositories, and how to file bugs. | ||
===How to handle repositories=== | ===How to handle repositories=== | ||
| Line 92: | Line 96: | ||
===How to check for Upgrades manually=== | ===How to check for Upgrades manually=== | ||
Sometimes you may want to check the system for updates manually. '''Discover''' will check for you automatically, but perhaps you are waiting for something good and want to look to make sure it hasn't arrived yet. In that case go to "Settings" in the left column, click "More" at the top of the middle column and then "Check for updates". | Sometimes you may want to check the system for updates manually. '''Discover''' will check for you automatically, but perhaps you are waiting for something good and want to look to make sure it hasn't arrived yet. In that case, go to "Settings" in the left column, click "More" at the top of the middle column, and then "Check for updates". | ||
[[File:Discoverupdate.png | 500px]] | [[File:Discoverupdate.png | 500px]] | ||
| Line 102: | Line 106: | ||
===Navigating with the keyboard=== | ===Navigating with the keyboard=== | ||
While usually the user will be interacting with '''Discover''' by using the mouse or touch interfaces, it's also possible to navigate it by using the keyboard. | While usually, the user will be interacting with '''Discover''' by using the mouse or touch interfaces, it's also possible to navigate it by using the keyboard. | ||
Here's some useful default key combinations: | Here's some useful default key combinations: | ||
Revision as of 16:12, 15 November 2020
Willkommen zu "Discover"
Die Programmverwaltung für das 22-zigste Jahrhundert
Discover bedeutet sowohl Programme als auch Erweiterungen aus einer Hand. Manchmal wird Discover im Deutschen auch als Entdecken bezeichnet. Es wurde von Grund auf entwickelt um den Nutzern eine einfache Handhabung zu bieten und sich gleichzeitig einfach in die verschiedenen Distributionen zu integrieren. Es soll ein Ort sein an dem fehlendes Expertenwissen niemanden davon abhält, das zu tun was er tun möchte - in diesem Fall die Installation von Programmen und Erweiterungen.
Discover wurde von Grund auf neu gestaltet um die Nutzererfahrung eindeutiger und intuitiver zu machen. Wir bauen mit unser Arbeit auf der neuen Kirigami-Technologie und auf neuen Programmauslieferungstechnologien auf, aber genauso auf dem sicheren Repository-System. Ziel ist es ein Programm für jede Distribution und jedes Erfahrungslevel zu bieten. Ein Programm, dass Freude macht es zu benutzen und es anderen zur Verfügung zu stellen.
Was ist "Discover"?
Discover ist gedacht für Nutzer und Distributionen für die das Terminal nicht die bevorzugte Methode zur Installation von Anwendungen und Erweiterungen ist. Es ist gedacht für Situationen in denen man ein intuitives und einfach zu benutzendes Werkzeug verwenden möchte, dass darüber hinaus auch sicher zu verwenden ist.
Es ist sicherlich vielen schon so gegangen, dass man irgendwelche Befehle von einer Seite im Internet kopiert hat und sich damit plötzlich das gesamte System zerstört hat. Aus Nutzersicht und besonders aus Sicht von unerfahrenen Nutzern ist dieses eine Katastrophe und es wird ihnen schwer fallen zu verstehen wo der Fehler liegt - an dem falschen Befehl aus dem Internet oder an dem eigenen System.
Es ist das Ziel von Discover es dem Nutzer zu ermöglichen nach Programme zu suchen, sie zu testen und sie zu installieren ohne die Sorge einen Fehler machen zu können, der das komplette System beschädigen könnte. Darüber hinaus verwaltet Discover die Updates des gesamten Systems.
Was ist "Discover" nicht?
Discover ist eine ganze Menge, aber es ist keine Anwendung für Experten, die eine genaue Steuerung der Repos wünschen. Es ist nicht gedacht als Ersatz für den Einsatz des Terminals von erfahrenen Nutzern. Unser Ziel war es uns auf eine Gruppe von Nutzern zu konzentrieren für die ein Programm wie Discover nicht nur benötigt wird, sondern unerlässlich für die Nutzung ist. Hierzu haben wir die Bedürfnisse andere Nutzergruppen bei den Entwicklungszielen vernachlässigt oder komplett ausgeschlossen. Das bedeutet nicht, dass diese Discover nicht benutzen können, es wird deren Bedürfnisse aber nicht vollständig abdecken können.
Discover ist nicht absolut "idiotensicher". Es wird niemals etwas sein, dass die Nutzer zu etwas zwingt. Wir glauben an die Handlungsfähigkeit des Nutzers und versuchen ihn durch sichere Auswahlmöglichkeiten zu führen, aber wir werden ihn nicht zu bestimmten Schritten zwingen. Bitten erwarten Sie nicht, dass Discover diese Möglichkeiten von ihren Nutzern fernhält.
Wie verwendet man "Discover"
Discover wurde entwickelt um nutzbar zu sein - es wurde entwickelt um intuitiv zu sein. Also versuchen Sie es und finden Sie es heraus.
Wie man nach Anwendungen sucht
Die einfachste Art nach einer Awendung zu suchen ist deren Namen oder wofür die Anwendung verwendet werden soll einzutippen. Das Suchfeld ist immer vorausgewählt und in den Fällen wo dieses nicht der Fall ist, passiert nichts. Das Suchfeld ist dann ausgegraut und wenn Sie es anklicken befinden Sie sich wieder in der Suche. Also haben Sie keine Angst vor der Tastatur!
Es wird immer in der Kategorie gesucht in der Sie sich aktuell befinden (dieses wird auch durch den Platzhaltertext im Suchfeld angezeigt). Wenn Sie also nur in einer bestimmten Kategorie suchen wollen, dann gehen Sie zuerst zu dieser Kategorie und geben dann den Suchbegriff ein.
Wenn Sie sich nur einfach umsehen wollen oder sich unsicher sind wie der genaue Name der Anwendung lautet oder wie Sie ihren Wunsch in einer Kurzsuche formulieren sollen, dann klicken Sie auf entweder "Anwendungen", "Erweiterungen für Anwendungen" oder "Plasma-Erweiterungen". Sie finden eine komplette Liste der Anwendungen nach Kategorien unter "Anwendungen", Plasma-Miniprogramme und Erweiterungen unter "Plasma-Erweiterungen" und Erweiterungen für ihre Anwendungen wie z. B. Kodeschnippsel für Programmieranwendungen unter "Erweiterungen für Anwendungen".
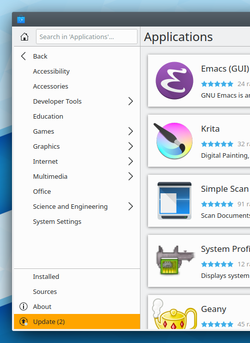
Konzentrieren wir uns erstmal auf den Bereich "Anwendungen"! In dem Bild unten sehen Sie den Kategorien-Baum wie er angezeigt wird, wenn Sie auf "Anwendungen" klicken. Immer wenn Sie zurück möchten klicken Sie auf den "Zurück"-Knopf unterhalb des Suchfeldes und oberhalb der Kategorien. Dieser bringt Sie zurück zum vorherigen Bereich. Bei vielen Kategorien können Sie noch tiefer in Unterkategorien gehen indem Sie auf diese klicken.
Durch entsprechendes Klicken auf "Zurück" können Sie immer zum Ausgangspunkt zurückkehren. Von dort aus können Sie dann ihre Suche frei fortsetzen. Eine Liste der installierbaren Anwendungen der Kategorie finden Sie in der Spalte rechts bzw. in der Mitte bei drei Spalten. Wenn Sie auf eine Anwendung klicken öffnet sich eine dritte Spalte ganz rechts mit genauerer Beschreibung der Anwendung oder Erweiterung sofern verfügbar. Sie können weiterhin durch die Liste der Anwendungen blättern und andere Anwendungen anklicken um Beschreibungen zu dieser Anwendung zu erhalten. Um die Spalte ganz rechts zu entfernen klicken Sie auf eine der Kategorien in der Spalte links.
(If you are an app developer and notice that your app has no information or screenshots - see below in "Discover for Devs")
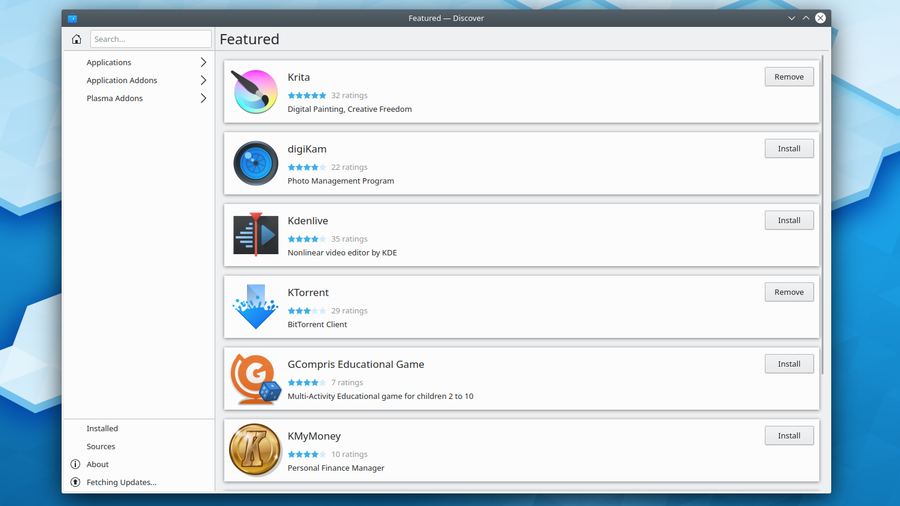
Now try to resize the window. See what happens? Discover, using Kirigami the widget library for convergent apps will react and change to the size of the screen you have available. Try resizing it to about the size of a cellphone. It reshapes to better fit that size.
Now to you sitting on a computer, this means that if you have a smaller screen the right column will cover the center to give you the user more visual space for the application you chose to get more information on. To get back from that simply hit the back button in the left column!
How to install applications
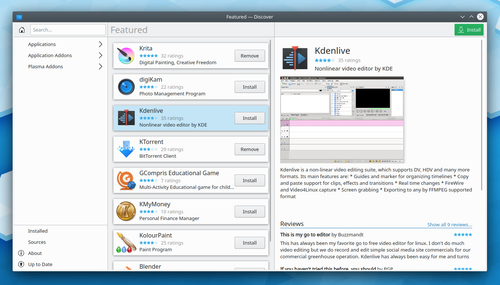
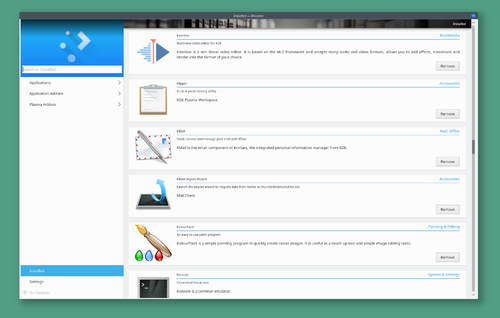
Installing an application is easy! When you've found the application that you want, simply click the "Install" button in the middle column and it will begin to install. If you are checking out the detailed information like the image below, you can also click "Install" in the bottom right of the right-hand column.
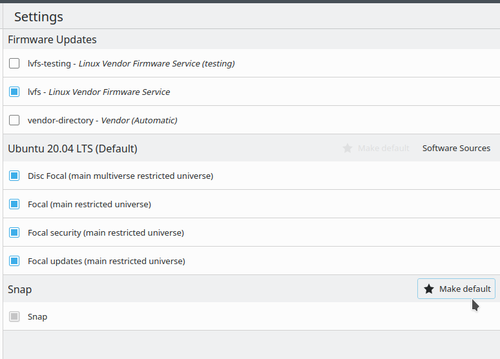
Sometimes applications are available from different sources like the repo, snap or flatpak. In this case, right to the Install button there is a Sources button. Clicking on this button will give you the option to change the source from which you want to install. In the "Preferences" section you can choose which source to be used as the default source.
Installation with Discover is just as simple as that.
How to uninstall applications
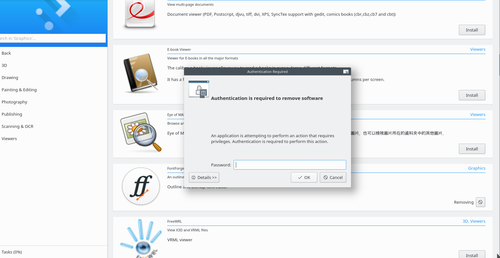
To uninstall apps is just as easy as installing them. Simply find the application that you wish to uninstall in the normal manner - you can note that it has "remove" instead of "install" in the little button next to it. Then click it! All you have to do then is fill in your password and the application is removed directly without fuss.
You can also easily click "Installed" in the left-hand column to see all applications and extensions you have installed in your system! That way you can simply scroll through the entire list and look for the app or extensions you wish to uninstall and with ease click "remove". That's all that's needed!
How to upgrade applications
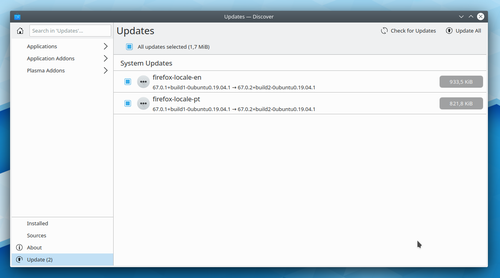
Linux distributions come with upgrades, new releases of apps and system details, bugfixes and improvements. To be able to keep your system up to date and safe Discover has made it easier for you to upgrade. When the update section at the bottom of the left column is bright yellow, which means that you have updates waiting for you. Just click it and you will be moved to this screen (you can as usual simply click in another area in the left column to leave it)
In the list, you can see all the software that will be updated when you click "Update" at the top right. You can click each individual row to get further information about it. If something is not to your liking, simply uncheck it on the left of the name of the software and it will be held back from the update.
How to master Discover
In this section, we will bring up how to handle upgrades, repositories, and how to file bugs.
How to handle repositories
Currently Discover focuses on stability and safety and interactions with repositories is beyond the scope of Discover in the current iteration (changing repositories is also potentially dangerous for inexperienced users). Future versions will include a more extensive repository feature and parts of the interface can be tested here.
How to check for Upgrades manually
Sometimes you may want to check the system for updates manually. Discover will check for you automatically, but perhaps you are waiting for something good and want to look to make sure it hasn't arrived yet. In that case, go to "Settings" in the left column, click "More" at the top of the middle column, and then "Check for updates".
How to file a bug
While usually, the user will be interacting with Discover by using the mouse or touch interfaces, it's also possible to navigate it by using the keyboard.
Here's some useful default key combinations:
- Ctrl+F: focus the search text field where we can type
- Back/Forward or Alt+Left/Right: Navigates the panes horizontally
- Enter: opens selected resource on a list
- Up and down arrows: navigate vertical list pages
- Escape: closes the right-most application pane (since Plasma 5.10)

