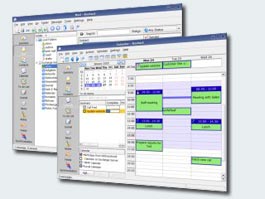
Kontact
 |
Kontact es el Gestor de Información Personal integrado de KDE |
La suite Kontact une la madurez y las aplicaciones KDE PIM bajo un mismo techo. Gracias a la potente tecnología de KPart, las aplicaciones existentes se pueden integrar en una sola.
Los componentes de Kontact están diseñados para trabajar bien entre ellos. Esto da como resultado características como la gestión de citas con un sistema intuitivo de arrastrar y soltar, listas de tareas y contactos. KDE Kontact es compatible varios servidores de trabajo colaborativo. Al usar estos servidores tu grupo de trabajo tiene acceso a cosas como directorios de correo compartidos, listas de tareas, calendarios, libretas de direcciones centralizadas, y programación de eventos.
En resumen: KDE Kontact proporciona innovaciones para ayudarte a gestionar tus comunicaciones más fácilmente, organizar tu trabajo de forma más rápida, y trabajar juntos más estrechamente, lo que tiene como resultado mayor productividad y eficiencia en la colaboración digital.
Componentes
Estos programas pueden ser integrados en Kontact:
- Akregator - Lee tus fuentes favoritas
- KAddressBook - Administra tus contactos
- KJots - Organiza tus ideas en un cuaderno
- KMail - Cliente de correo* KNode - Tu lector de noticias usenet
- KNotes - Notas pegajosas para tu escritorio
- KOrganizer - Calendario y horarios, diario
- Ktimetracker - Descubre cuanto tiempo dedicas a varias tareas
- Summary - Pantalla con un resumen en Kontact
Visita también
- * Cómo enviar SMS usando Kontact
Dónde conseguir ayuda
Hay una lista de correo en
- kdepim-users - para usuarios de las aplicaciones de KDE PIM (Kontact, KAddressBook, KMail, KOrganizer, KNode, ...) [suscribirse a kdepim-users] [Archivo de kdepim-users]. Un equipo de desarrolladores y usuarios que proporcionarán respuestas lo más rápido posible
y para ayuda urgente, un canal IRC en Freenode
- para usuarios y desarrolladores de Kontact - #kontact
Akonadi y KAddressBook
- Si tienes problemas relacionados con Akonadi y el nuevo KAddressBook, hay páginas dedicadas a estos temas
Preguntas más frecuentes, consejos y trucos
Migración de tu configuración a una nueva distribución
En KMail, haz clic con el botón derecho en tu bandeja de entrada y selecciona Propiedades. Ve a la pestaña Mantenimiento y echa un vistazo a la Ubicación. La ruta puede contener .kde4 o .kde.
Substitute the appropriate path below.
You need the following config files:
- .kde4/share/config/emaildefaults
- .kde4/share/config/emailidentities
- .kde4/share/config/kmail.eventsrc
- .kde4/share/config/kmailrc
- .kde4/share/config/kaddressbookrc
- .kde4/share/config/kresources/contact
- .kde4/share/config/korgacrc
- .kde4/share/config/korganizerrc
- .kde4/share/config/knotesrc
- .kde4/share/config/mailtransports
And the following directories:
- .kde4/share/apps/kmail
- .kde4/share/apps/kabc
- .kde4/share/apps/korganizer
- .kde4/share/apps/knotes
If you use Akregator within Kontact, you will also need:
- .kde4/share/config/akregator.eventsrc
- .kde4/share/config/akregatorrc
And the whole .kde4/share/apps/akregator directory.
Of course the simplest way is just to keep your whole home directory.
Just a word of warning. If the directory naming is different between Desktops or between the two versions of your distro, this will not work as there are references to the directories within the config files. This means that if the files were in a .kde directory, you cannot just put them in a .kde4 directory without editing the references within the config files.
Hiding the Kontact Sidebar
On small screens, you may wish to reclaim the space used by the Kontact sidebar. You can replace it with an (editable) toolbar:
- Settings->Toolbars->Navigator [x]
- Drag the left panel closed using the splitter between it and the main panel, job done.
Enabling SOCKS support in KMail and KNode
Unlike KDE 3, KDE 4 does not have built-in SOCKS support yet. However, it is still possible and relatively simple to make KMail and KNode use a SOCKS proxy, by using proxychains or other similar tools like tsocks or socksify. Assuming that proxychains is correctly installed and configured, all you need to do is to open a terminal (e.g. Konsole) and type:
proxychains kdeinit4
You don't even need to restart KMail/KNode! (You need to type the above command every time you start a new KDE session though).
