Template:SearchPages
Find pages among a given subset of English pages containing a string:
{{SearchPages|pages|string}}
finds all pages containing the string in pages
matching pages. Searches are case sensitive. In order to find both
xyz and Xyz use a regular expression:
{{SearchPages|...|[Xx]yz}}.
Regular expressions use a perl like syntax. Special characters like '[', '[','(' and ')' need to be escaped.

No wiki expansion takes place before passing arguments to the template.

Example: {{SearchPages|1=System_Settings|2=[Ss]creen}} gives
A total of 510 pages were searched
- System Settings/Icons/da
- System Settings/Icons/en
- System Settings/Global Policy Configurations
- System Settings/Icons/it
- System Settings/Permissions
- System Settings/Fonts (Category)/en
- System Settings/Icons/fr
- System Settings/Workspace/en
- System Settings/Actions Policy
- System Settings/Fonts (Category)/it
- System Settings/Launch Feedback/en
- System Settings/Workspace/da
- System Settings/Fonts (Category)/fr
- System Settings/Removable Storage/en
- System Settings/Color/en
- System Settings/Windows Decorations/da
- System Settings/Fonts (Category)/da
- System Settings/Spell Check/en
- System Settings/Windows Decorations/fr
- System Settings/Removable Storage/da
- System Settings/Color/da
- System Settings/Touch Screen/en
Add actions that are triggered by swiping from the screen edge towards the center of the screen.

More information
- Martin Flöser blog article about this module.
- System Settings/Launch Feedback/da
- System Settings/Information Sources
- System Settings/Digital Camera
- System Settings/Plasma Search/en
- System Settings/Touch Screen/da
Tilføj handlinger, som bliver udløst ved at swipe fra en skærmkant mod midten af skærmen.
Mere information
- Martin Flöser blog article about this module.
- System Settings/Workspace
- System Settings/Spell Check/da
- System Settings/Windows Decorations/it
- System Settings/Icons/uk
- System Settings/Account Details/es
- System Settings/Account Details/de
- System Settings/Account Details/ro
- System Settings/Account Details/en
- System Settings/Notifications/en
- System Settings/Removable Storage/it
- System Settings/Spell Check/it
- System Settings/Removable Storage/fr
- System Settings/Workspace/it
- System Settings/Workspace/fr
- System Settings/Account Details/zh-cn
- System Settings/Plasma Search/da
- System Settings/Account Details/gl
- System Settings/Launch Feedback
- System Settings/Color/fr
- System Settings/Notifications/da
- System Settings/Windows Decorations
- System Settings/Color
- System Settings/Account Details/da
- System Settings/Launch Feedback/fr
- System Settings/Launch Feedback/it
- System Settings/Account Details/it
- System Settings/Spell Check
- System Settings/Spell Check/fr
- System Settings/Color/it
- System Settings/Touch Screen/it
Aggiungi delle azioni, che vengono innescate scorrendo dal bordo verso il centro dello schermo.
Maggiori informazioni
- Articolo sul blog di Martin Flöser su questo modulo.
- System Settings/Icons
- System Settings/Account Details/el
- System Settings/Workspace Theme/en
Plasma let you fully customize your workspace theme.
Plasma Theme

Configure the plasma theme. Cursors

Change the look of the mouse cursor. Splash Screen

Change the splash screen.
<translate>
Add actions that are triggered by swiping from the screen edge towards the center of the screen.
More information
- Martin Flöser blog article about this module.
</translate>
- System Settings/Plasma Search/it
- System Settings/Removable Devices
- System Settings/Notifications/it
- System Settings/Account Details/fr
- System Settings/Workspace Theme/da
Plasma lader dig personliggøre alle aspekter af dit arbejdsområde.
Plasma-tema
Indstil temaet til skrivebordet Markører
Indstil musemarkørens udseende Splashskærm
Skift splashskærm
Ajoutez des actions déclenchées en faisant glisser votre doigt depuis le bord de l'écran vers le centre de l'écran.
Plus d'information
- Article du blog de Martin Flöser à propos de ce module.
- System Settings/Plasma Search
- System Settings/Fonts (Category)
- System Settings/KDE Wallet/en
- System Settings/Notifications
- System Settings/Plasma Search/fr
- System Settings/Software Management
- System Settings/Notifications/fr
- System Settings/KDE Wallet/da
- System Settings/Search/it
- System Settings/Search/da
- System Settings/KDE Wallet/fr
- System Settings/Workspace Theme/it
Plasma ti permette di configurare completamente il tuo tema dello spazio di lavoro.
Tema di Plasma
Configura il tema di Plasma. Puntatori
Cambia l'aspetto del puntatore del mouse. Schermata iniziale
Modifica la schermata iniziale.
Plasma vous laisse customiser le thème de votre environnement de travail.
Plasma Theme
Configure the plasma theme. Thème du pointeur de la souris
Changer l'apparence du curseur de la souris. Splash Screen
Changer l'écran de démarrage
- System Settings/Fonts (Category)/uk
- System Settings/Removable Storage
- System Settings/Launch Feedback/uk
- System Settings/Personal Information
- System Settings/Regional Settings/da
- System Settings/Regional Settings/en
- System Settings/Search/fr
- System Settings/Windows Decorations/uk
- System Settings/Plasma Theme/en
- System Settings/Online Accounts/en
- System Settings/KDE Wallet/it
- System Settings/KDE Wallet
- System Settings/Online Accounts/da
- System Settings/Removable Storage/uk
- System Settings/Color/uk
- System Settings/Spell Check/uk
- System Settings/Account Details
- System Settings/Touchpad/en
- System Settings/Regional Settings/it
- System Settings/Activities/en
- System Settings/Formats/da
- System Settings/Mouse/en
- System Settings/Plasma Theme/da
- System Settings/Emoticon Theme/it
- System Settings/Emoticon Theme/en
- System Settings/Touch Screen/uk
Модуль для додавання дій, які виконуються у відповідь на проведення пальцем від краю екрана до його центру.
Докладніші відомості
- Допис у блозі Мартіна Фльосера щодо цього модуля.
- System Settings/Touchpad/da
- System Settings/Plasma Theme/de
- System Settings/Regional Settings/fr
- System Settings/Formats/en
- System Settings/Web Shortcuts/en
- System Settings/Shortcuts/da
- System Settings/Mouse/da
- System Settings/Windows Decorations/ka
- System Settings/File Search/en
- System Settings/Shortcuts/en
- System Settings/Plasma Theme
- System Settings/Splash Screen/en
The splash screen is the small loading screen occurring just after a successful login. The splash screen is displayed during the time, plasma is loading.

You can choose to remove it by selecting none, it can decrease the startup time.

More information
- KDE official documentation
- Browse splash screen theme on the KDE Store
- System Settings/Online Accounts
- System Settings/Language/en
- System Settings/Search
- System Settings/Emoticon Theme/da
- System Settings/Activities
- System Settings/Plasma Theme/fr
- System Settings/File Search/da
- System Settings/Web Shortcuts/da
- System Settings/Application Style/en
- System Settings/Splash Screen/da
Splashskærmen er en lille skærm, som vises lige efter en succesfuldt login. Splashskærmen vises under den tid det tager at indslæse systemet. \
Du har mulighed for at fjerne denne skærm ved at vælge Ingen; dette kan mindste opstartstiden.
Mere information
- KDE official documentation
- Find splashskærmstemaer i KDE Store
- System Settings/Activities/da
- System Settings/Online Accounts/fr
- System Settings/Language/da
- System Settings/Notifications/uk
- System Settings/Device Actions
- System Settings/Touchpad/it
- System Settings/Font/en
- System Settings/Application Style/da
- System Settings/Mouse
- System Settings/GNOME Application Style (GTK)/en
- System Settings/Screen Locking/en
This module configures when to lock your screen and define the appearance of the screen locker.

The lock screen is a security feature. After some time of inactivity, plasma doesn't let anybody access your computer without your password. But this feature isn't bulletproof, for example, if your computer is stolen, the screen locker can't protect your precious file. If you want more security, you should consider an encrypted hard drive.
More information
- KDE official documentation
- System Settings/Formats/it
- System Settings/Virtual Desktops/en
- System Settings/Activities/fr
- System Settings/Shortcuts/it
- System Settings/Mouse Cursor Theme/da
- System Settings/Touchpad
- System Settings/Plasma Search/uk
- System Settings/Account Details/uk
- System Settings/Web Shortcuts
- System Settings/Touchpad/fr
- System Settings/Emoticon Theme
- System Settings/GNOME Application Style (GTK)/da
- System Settings/Window Rules/en
- System Settings/Workspace Theme/uk
Плазма надає вам змогу повністю налаштувати тему вашого робочого простору.
Тема Плазми
Налаштовування теми Плазми. Вказівники
Внесення змін до вигляду вказівника миші. Вікно вітання
Внесення змін до параметрів вікна вітання.
- System Settings/GNOME Application Style (GTK)/it
- System Settings/File Search
- System Settings/Shortcuts/fr
- System Settings/Mouse Cursor Theme/en
- System Settings/Formats
- System Settings/Language/it
- System Settings/Web Shortcuts/fr
- System Settings/Display and Monitor
 |
Configuration of your monitor |

Size & Orientation
Here you can configure the physical characteristics of your screen.

Screen Saver
Here you can configure your screen saver.

Gamma
Here you can tweak the way your monitor displays colors. See the Handbook for more details.
Multiple Monitors
<translate> Plasma let you fully customize your workspace theme. </translate>
Plasma Theme</translate>
[[File:<translate> Preferences-desktop-plasma-theme.png|48px|link=Special:myLanguage/System Settings/Plasma Theme]]||<translate> Configure the plasma theme. </translate>
Cursors</translate>
[[File:<translate> Preferences-cursor.png|48px|link=Special:myLanguage/System Settings/Mouse Cursor Theme]]||<translate> Change the look of the mouse cursor. </translate>
<translate> Splash Screen</translate>
<translate> Change the splash screen. </translate>
<translate> </translate>
La schermata iniziale è quella piccola schermata di caricamento che viene visualizzata solo dopo un accesso avvenuto con successo. Si presenta mentre Plasma si sta caricando.
Puoi scegliere di rimuoverla non selezionandone nessuna, dato che ciò può ridurre il tempo di avvio.
More information
- Documentazione ufficiale di KDE
- Naviga tra le schermati iniziali nel KDE Store
- System Settings/Virtual Desktops/da
- System Settings/Mouse/it
- System Settings/Splash Screen/fr
L'écran de démarrage est le petit écran de chargement qui apparaît juste après une connexion réussie. L'écran de démarrage s'affiche pendant le chargement du plasma.
Vous pouvez choisir de le supprimer en n’en sélectionnant aucun, cela peut réduire le temps de démarrage.
Plus d'information
- KDE official documentation
- Browse splash screen theme on the KDE Store
- System Settings/Applications/da
- System Settings/Screen Locking/da
Dette modul indstiller hvornår din skærm skal låses og bestemmer udseendet af skærmlåsen.
Skærmlåsen er en sikkerhedsfunktion. Efter en vis tids inaktivitet vil Plasma ikke lade nogen tilgå din computer uden en adgangskode. Men denne funktion er ikke skudsikker: Hvis for eksempel din computer bliver stjålet kan skærmlåsen ikke beskytte dine dyrebare filer. Hvis du ønsker højere sikkerhed skulle du overveje en krypteret harddisk.
Mere information
- KDE official documentation
- System Settings/Window Rules/da
- System Settings/Formats/fr
- System Settings/Splash Screen
<translate> The splash screen is the small loading screen occurring just after a successful login. The splash screen is displayed during the time, plasma is loading.
You can choose to remove it by selecting none, it can decrease the startup time.
More information
- KDE official documentation
- Browse splash screen theme on the KDE Store
</translate>
- System Settings/Font/da
- System Settings/Applications/en
- System Settings/Language
- System Settings/Font
- System Settings/GNOME Application Style (GTK)
- System Settings/KDE Wallet/uk
- System Settings/Window Rules/ca
- System Settings/Application Style/fr
- System Settings/Mouse Cursor Theme/it
- System Settings/Screen Locking
<translate> This module configures when to lock your screen and define the appearance of the screen locker.
The lock screen is a security feature. After some time of inactivity, plasma doesn't let anybody access your computer without your password. But this feature isn't bulletproof, for example, if your computer is stolen, the screen locker can't protect your precious file. If you want more security, you should consider an encrypted hard drive.
More information
</translate>
- System Settings/Font/fr
- System Settings/Language/fr
- System Settings/Emoticon Theme/fr
- System Settings/Application Style/it
- System Settings/Mouse/fr
- System Settings/Locations/da
- System Settings/Font/it
- System Settings/Virtual Desktops
- System Settings/Window Rules
- System Settings/File Search/it
- System Settings/File Search/fr
- System Settings/GNOME Application Style (GTK)/fr
- System Settings/Icon Theme/en
- System Settings/Windows Management/en
- System Settings/Locations
- System Settings/Icon Theme/da
- System Settings/Windows Management/fr
- System Settings/Screen Edges/en
In the Screen Edges module you can choose between certain actions to be triggered when the mouse moves to one of the edges or corners of the screen. Each edge, and each corner can have its own action attached. You can also decide whether you want windows to be maximized when you drag them to the top edge of the screen, or to be tiled when you drag them to the sides of the screen. Finally you can set what happens to windows when you drag them across the screen edge.

More information
- KDE official documentation
- Screen Edges in the community wiki (for KDE programmers)
- System Settings/Font Management/en
- System Settings/Desktop Session/en
- System Settings/Screen Locking/it
Questo modulo configura quando bloccare lo schermo, e definisce l'aspetto della schermata di blocco.
Il blocco dello schermo è una funzionalità per la sicurezza: dopo un certo tempo d'inattività, Plasma non permette a nessuno di accedere al computer senza la password. Tuttavia questa funzionalità non risolve tutti i problemi: se ad esempio il tuo computer viene rubato, il blocco dello schermo non può proteggere i tuoi preziosi file. Se vuoi maggior sicurezza, dovresti considerare l'uso di un unità criptata.
Maggiori informazioni
- Documentazione ufficiale di KDE
- System Settings/Virtual Desktops/fr
- System Settings/Applications/it
- System Settings/Mouse Cursor Theme
- System Settings/Screen Locking/fr
Ce module configure quand verrouiller votre écran et définit l'apparence de l'écran de verrouillage.
L'écran de verrouillage est une fonction de sécurité. Après un certain temps d'inactivité, Plasma ne permet à personne d'accéder à votre ordinateur sans votre mot de passe. Mais cette fonctionnalité n'est pas à l'épreuve des balles. Par exemple, si votre ordinateur est volé, l'écran de verrouillage ne peut pas protéger vos précieux fichiers. Si vous souhaitez plus de sécurité, vous devriez envisager un disque dur crypté.
Plus d'information
- KDE official documentation
- System Settings/Windows Management/da
- System Settings/Locations/it
- System Settings/Look And Feel/en
- System Settings/Desktop Session/da
- System Settings/Locations/fr
- System Settings/Plasma Theme/uk
- System Settings/Mouse Cursor Theme/fr
- System Settings/Regional Settings
- System Settings/Search/uk
- System Settings/User Manager/da
- System Settings/Desktop Session/ca
- System Settings/Icon Theme
- System Settings/Connections/en
- System Settings/User Manager/en
Here you can change your password and the image associated with your user account. You can also edit the personal information that is associated with your account, and you can change the way the password entry field on the login screen behaves.
In order to change your image, you just need to click on the box on the left side of your username, which should contain your current image. A face selection window will pop up. There you can choose between the different images available in the gallery, or click on to search for an image file in your computer. Once you have chosen your desired image, press .

More information
<translate> In the Screen Edges module you can choose between certain actions to be triggered when the mouse moves to one of the edges or corners of the screen. Each edge, and each corner can have its own action attached. You can also decide whether you want windows to be maximized when you drag them to the top edge of the screen, or to be tiled when you drag them to the sides of the screen. Finally you can set what happens to windows when you drag them across the screen edge.
More information
</translate>
I modulet Skærmkanter kan du vælge nogle handlinger, som kan udløses når musen flyttes til en af skærmens kanter eller hjærner. Hver kant og hvert hjørne kan tilknyttes sin egen handling. Du kan bestemme om du ønsker, at vinduer skal maksimeres når du trækker dem til skærmens øverste kant eller om de skal fliselægges, når du trækker dem til skærmens sider. Endelig kan du se hvad der sker, når du trækker dem ud over skærmkanten.
Mere information
- System Settings/Window Rules/fr
- System Settings/Application Style
- System Settings/Applications/fr
- System Settings/Desktop Behavior/da
Arbejdsområde

Indstil arbejdsområdets opførsel Skrivebordseffekter

Indstil all KWin's skrivebordseffekter Skærmkanter
Indstil de handlinger der udløses, når du fører musemarkøren ud til skærmens kant. Touchskærm
Indstil hvilke handlinger, der skal udløses, når du swiper. Skærmlås

Indstil skærmlåsen Virtuelle skriveborde
Indstil de virtuelle skrivebordes egenskaber. Aktiviteter

Indstil aktiviteter
- System Settings/Windows Management/it
- System Settings/Date & Time/zh-cn
- System Settings/Desktop Effects/en
- System Settings/Icon Theme/fr
- System Settings/Font Management
- System Settings/File Search/uk
- System Settings/Look And Feel/fr
- System Settings/Connections/da
- System Settings/Look And Feel/da
- System Settings/Look And Feel/it
- System Settings/Screen Edges/ka
In the Screen Edges module you can choose between certain actions to be triggered when the mouse moves to one of the edges or corners of the screen. Each edge, and each corner can have its own action attached. You can also decide whether you want windows to be maximized when you drag them to the top edge of the screen, or to be tiled when you drag them to the sides of the screen. Finally you can set what happens to windows when you drag them across the screen edge.
დამატებითი ინფორმაცია
- KDE ოფიციალური დოკუმენტაცია
- Screen Edges in the community wiki (for KDE programmers)
- System Settings/Regional Settings/uk
- System Settings/Application and System Notifications
- System Settings/Desktop Session
- System Settings/Desktop Effects/ca
- System Settings/Screen Edges/it
Nel modulo Bordi dello schermo puoi scegliere tra alcune azioni che verranno innescate quando il mouse si sposta verso uno degli angoli, oppure dei bordi dello schermo: ciascuno di questi posti può avere associata una propria azione. Puoi anche decidere se vuoi che le finestre vengano massimizzate quando le trascini sul bordo superiore dello schermo, oppure che vengano affiancate se le trascini verso i lati. Infine, puoi impostare cosa succede alle finestre quando le trascini tra i bordi dello schermo.
Maggiori informazioni
- Documentazione ufficiale di KDE
- Bordi dello schermo nel wiki della Comunità (per i programmatori di KDE)
- System Settings/Desktop Session/it
- System Settings/Shortcuts
- System Settings/Font Management/da
- System Settings/Icon Theme/it
- System Settings/Workspace Appearance/zh-tw
- System Settings/Desktop Behavior/en
Workspace
Configure the workspace behavior Desktop Effects

Configure all desktop effects done by KWin Screen Edges

Configure actions to trigger when pushing the mouse cursor on the screen edge. Touch Screen

Configure action to trigger when using swipe gestures. Screen Locking

Configure the lock screen Virtual Desktops

Configure the properties of virtual desktops. Activities

Configure activities
<translate>
Here you can change your password and the image associated with your user account. You can also edit the personal information that is associated with your account, and you can change the way the password entry field on the login screen behaves.
In order to change your image, you just need to click on the box on the left side of your username, which should contain your current image. A face selection window will pop up. There you can choose between the different images available in the gallery, or click on to search for an image file in your computer. Once you have chosen your desired image, press .
More information
</translate>
- System Settings/Desktop Effects/da
- System Settings/Look And Feel
- System Settings/Web Shortcuts/uk
- System Settings/Connections
- System Settings/User Manager/it
- System Settings/Connections/fr
- System Settings/Screen Edges/fr
Dans le module Bords de l'écran vous pouvez choisir entre certaines actions à déclencher lorsque la souris se déplace vers l'un des bords ou coins de l'écran. Chaque bord et chaque coin peuvent avoir leur propre action attachée. Vous pouvez également décider si vous souhaitez que les fenêtres soient agrandies lorsque vous les faites glisser vers le bord supérieur de l'écran, ou qu'elles soient en mosaïque lorsque vous les faites glisser sur les côtés de l'écran. Enfin, vous pouvez définir ce qui arrive aux fenêtres lorsque vous les faites glisser sur le bord de l'écran.
Plus d'information
- KDE official documentation
- Screen Edges in the community wiki (for KDE programmers)
- System Settings/Desktop Effects/pt-br
- System Settings/Emoticon Theme/uk
- System Settings/Touchpad/uk
- System Settings/Online Accounts/uk
- System Settings/Desktop Effects
- System Settings/Application Style/uk
- System Settings/Formats/uk
- System Settings/Desktop Session/fr
- System Settings/User Manager/fr
- System Settings/Font Management/it
- System Settings/Widget Style/en
- System Settings/Splash Screen/uk
Вікно вітання — невеличке вікно під час завантаження, яке система показує після успішного входу. Вікно вітання буде показано протягом самого завантаження Плазми.
Ви можете вимкнути вікно вітання, вибравши варіант «Немає». Такий вибір може дещо зменшити час запуску робочого середовища.
Докладніші відомості
- Офіційна документація KDE
- Розділ тем вікон вітання у Крамниці KDE
- System Settings/Applications
- System Settings/Font Management/fr
- System Settings/Multimedia
- System Settings/Shortcuts/uk
- System Settings/Windows Management
- System Settings/Desktop Effects/fr
- System Settings/Widget Style/da
- System Settings/GNOME Application Style (GTK)/uk
- System Settings/Language/uk
- System Settings/Activities/uk
- System Settings/Desktop Effects/it
- System Settings/Widget Style
- System Settings/Mouse/uk
- System Settings/Font/uk
- System Settings/Locale
- System Settings/Widget Style/it
- System Settings/Window Rules/uk
- System Settings/Power Management/en
 |
Power Devil allows you to define your all power settings |
Global Settings
Power Devil is configured by accessing . The first screen, shown above, allows you to configure the appropriate actions according to power state. You can set the action that system should take after having spent a specific time in each state (e.g. dim display after 10 minutes on battery) or upon an event (e.g. sleep when laptop lid closes).

The tab is where you set your parameters for battery levels, and also decide what action you want to take place when the battery reaches a critical level. It is also the place where you can configure notifications. Like the case of the majority of KDE applications, you can set a sound or a flag as the way you want to be notified, or nothing at all.

In latest KDE versions, tab has been added. It allows you to configure different power settings per activity.
|
Power Devil vous permets de configurer toutes vos préférences énergies. |
Global Settings
Power Devil is configured by accessing . The first screen, shown above, allows you to configure the appropriate actions according to power state. You can set the action that system should take after having spent a specific time in each state (e.g. dim display after 10 minutes on battery) or upon an event (e.g. sleep when laptop lid closes).
The tab is where you set your parameters for battery levels, and also decide what action you want to take place when the battery reaches a critical level. It is also the place where you can configure notifications. Like the case of the majority of KDE applications, you can set a sound or a flag as the way you want to be notified, or nothing at all.
In latest KDE versions, tab has been added. It allows you to configure different power settings per activity.
За допомогою цього модуля можна визначити умови блокування екрана комп'ютера та вигляд екрана блокування.

Блокування екрана є можливістю, яка захищає систему. Після певного періоду бездіяльності Плазма забороняє усім доступ до системи без введення пароля. Звичайно ж, захист не є повним. Наприклад, якщо ваш комп'ютер викрадено, блокування екрана не зможе захистити важливі для вас файли. Якщо ви хочете справжнього захисту, спробуйте скористатися шифруванням даних на диску.
Докладніші відомості
- [hhttps://docs.kde.org/stable5/en/plasma-workspace/kcontrol/screenlocker/index.html Офіційна документація KDE]
- System Settings/Mouse Cursor Theme/uk
- System Settings/Login Screen/zh-cn

This settings module allows you to configure the login procedure. This setting is only useful if you use SDDM as your login manager. Luckily most of the Linux distribution shipping a KDE edition are using SDDM as a login manager. In case you use an other login manager and want to change to SDDM, refer to your distribution wiki.
便利
If you don't want to type your username and password during login, you can check in the tab the box here, then select the user and default desktop environment you want to auto-login with, and hit . Remember, though, that anyone who can physically access your computer or laptop will also have instant access to all your data. You need to make a risk assessment before using this facility.
More Information
- SDDM (Wikipedia)
- SDDM (Arch Linux wiki)
- Login Manager (Wikipedia)
- Login Manager (Arch Linux wiki)
- System Settings/Login Screen/pl
This settings module allows you to configure the login procedure. This setting is only useful if you use SDDM as your login manager. Luckily most of the Linux distribution shipping a KDE edition are using SDDM as a login manager. In case you use an other login manager and want to change to SDDM, refer to your distribution wiki.
Wygoda
If you don't want to type your username and password during login, you can check in the tab the box here, then select the user and default desktop environment you want to auto-login with, and hit . Remember, though, that anyone who can physically access your computer or laptop will also have instant access to all your data. You need to make a risk assessment before using this facility.
More Information
- SDDM (Wikipedia)
- SDDM (Arch Linux wiki)
- Login Manager (Wikipedia)
- Login Manager (Arch Linux wiki)
- System Settings/Login Screen/es
This settings module allows you to configure the login procedure. This setting is only useful if you use SDDM as your login manager. Luckily most of the Linux distribution shipping a KDE edition are using SDDM as a login manager. In case you use an other login manager and want to change to SDDM, refer to your distribution wiki.
Convenience
If you don't want to type your username and password during login, you can check in the tab the box here, then select the user and default desktop environment you want to auto-login with, and hit . Remember, though, that anyone who can physically access your computer or laptop will also have instant access to all your data. You need to make a risk assessment before using this facility.
More Information
- SDDM (Wikipedia)
- SDDM (Arch Linux wiki)
- Login Manager (Wikipedia)
- Login Manager (Arch Linux wiki)
- System Settings/Login Screen/nl
This settings module allows you to configure the login procedure. This setting is only useful if you use SDDM as your login manager. Luckily most of the Linux distribution shipping a KDE edition are using SDDM as a login manager. In case you use an other login manager and want to change to SDDM, refer to your distribution wiki.
Convenience
If you don't want to type your username and password during login, you can check in the tab the box here, then select the user and default desktop environment you want to auto-login with, and hit . Remember, though, that anyone who can physically access your computer or laptop will also have instant access to all your data. You need to make a risk assessment before using this facility.
More Information
- SDDM (Wikipedia)
- SDDM (Arch Linux wiki)
- Login Manager (Wikipedia)
- Login Manager (Arch Linux wiki)
- System Settings/Login Screen/fa
This settings module allows you to configure the login procedure. This setting is only useful if you use SDDM as your login manager. Luckily most of the Linux distribution shipping a KDE edition are using SDDM as a login manager. In case you use an other login manager and want to change to SDDM, refer to your distribution wiki.
Convenience
If you don't want to type your username and password during login, you can check in the tab the box here, then select the user and default desktop environment you want to auto-login with, and hit . Remember, though, that anyone who can physically access your computer or laptop will also have instant access to all your data. You need to make a risk assessment before using this facility.
More Information
- SDDM (Wikipedia)
- SDDM (Arch Linux wiki)
- Login Manager (Wikipedia)
- Login Manager (Arch Linux wiki)
- System Settings/Login Screen/en
This settings module allows you to configure the login procedure. This setting is only useful if you use SDDM as your login manager. Luckily most of the Linux distribution shipping a KDE edition are using SDDM as a login manager. In case you use an other login manager and want to change to SDDM, refer to your distribution wiki.
Convenience
If you don't want to type your username and password during login, you can check in the tab the box here, then select the user and default desktop environment you want to auto-login with, and hit . Remember, though, that anyone who can physically access your computer or laptop will also have instant access to all your data. You need to make a risk assessment before using this facility.
More Information
- SDDM (Wikipedia)
- SDDM (Arch Linux wiki)
- Login Manager (Wikipedia)
- Login Manager (Arch Linux wiki)
- System Settings/Login Screen/ca
This settings module allows you to configure the login procedure. This setting is only useful if you use SDDM as your login manager. Luckily most of the Linux distribution shipping a KDE edition are using SDDM as a login manager. In case you use an other login manager and want to change to SDDM, refer to your distribution wiki.
Conveniència
If you don't want to type your username and password during login, you can check in the tab the box here, then select the user and default desktop environment you want to auto-login with, and hit . Remember, though, that anyone who can physically access your computer or laptop will also have instant access to all your data. You need to make a risk assessment before using this facility.
More Information
- SDDM (Wikipedia)
- SDDM (Arch Linux wiki)
- Login Manager (Wikipedia)
- Login Manager (Arch Linux wiki)
- System Settings/Login Screen/pt-br
This settings module allows you to configure the login procedure. This setting is only useful if you use SDDM as your login manager. Luckily most of the Linux distribution shipping a KDE edition are using SDDM as a login manager. In case you use an other login manager and want to change to SDDM, refer to your distribution wiki.
Conveniência
If you don't want to type your username and password during login, you can check in the tab the box here, then select the user and default desktop environment you want to auto-login with, and hit . Remember, though, that anyone who can physically access your computer or laptop will also have instant access to all your data. You need to make a risk assessment before using this facility.
More Information
- SDDM (Wikipedia)
- SDDM (Arch Linux wiki)
- Login Manager (Wikipedia)
- Login Manager (Arch Linux wiki)
- System Settings/Virtual Desktops/uk
- System Settings/Power Management/ru
|
Power Devil позволяет определить все ваши параметры питания |
Глобальные параметры
Power Devil is configured by accessing . The first screen, shown above, allows you to configure the appropriate actions according to power state. You can set the action that system should take after having spent a specific time in each state (e.g. dim display after 10 minutes on battery) or upon an event (e.g. sleep when laptop lid closes).
The tab is where you set your parameters for battery levels, and also decide what action you want to take place when the battery reaches a critical level. It is also the place where you can configure notifications. Like the case of the majority of KDE applications, you can set a sound or a flag as the way you want to be notified, or nothing at all.
In latest KDE versions, tab has been added. It allows you to configure different power settings per activity.
Dette konfigurationsmodul lader dig indstille login-proceduren. Det kan kun bruges, hvis du bruger SDDM til at håndtere dine login. Heldigvis bliver SDDM brugt af de fleste distributioner, som har en KDE-udgave. Hvis du bruger en anden login-manager og ønsker at skifte til SDDM, så se på din distributions wiki.
Belejlighed
Hvis du ikke ønsker at skulle skrive dit brugernavn og din adgangskode under login, så kan du aktivere tilvalget i fanebladet , vælge den bruger og det skrivebordsmiljø, som du automatisk vil logge ind til og klikke på . Husk dog, at enhver, som har fysisk adgang til din computer eller bærbare nu også kan få adgang til alle dine data. Du bør overveje risici før du bruger denne funktion.
Mere information
- SDDM (Wikipedia)
- SDDM (Arch Linux wiki)
- Login Manager (Wikipedia)
- Login Manager (Arch Linux wiki)
- System Settings/Windows Management/uk
- System Settings/Locations/uk
- System Settings/Icon Theme/uk
- System Settings/Power Management
<translate>
|
Power Devil allows you to define your all power settings |
Global Settings
Power Devil is configured by accessing . The first screen, shown above, allows you to configure the appropriate actions according to power state. You can set the action that system should take after having spent a specific time in each state (e.g. dim display after 10 minutes on battery) or upon an event (e.g. sleep when laptop lid closes).
The tab is where you set your parameters for battery levels, and also decide what action you want to take place when the battery reaches a critical level. It is also the place where you can configure notifications. Like the case of the majority of KDE applications, you can set a sound or a flag as the way you want to be notified, or nothing at all.
In latest KDE versions, tab has been added. It allows you to configure different power settings per activity. </translate>
- System Settings/Power Management/da
- System Settings/Power Management/ca
- System Settings/Login Screen
<translate>
This settings module allows you to configure the login procedure. This setting is only useful if you use SDDM as your login manager. Luckily most of the Linux distribution shipping a KDE edition are using SDDM as a login manager. In case you use an other login manager and want to change to SDDM, refer to your distribution wiki.
Convenience
If you don't want to type your username and password during login, you can check in the tab the box here, then select the user and default desktop environment you want to auto-login with, and hit . Remember, though, that anyone who can physically access your computer or laptop will also have instant access to all your data. You need to make a risk assessment before using this facility.
More Information
- SDDM (Wikipedia)
- SDDM (Arch Linux wiki)
- Login Manager (Wikipedia)
- Login Manager (Arch Linux wiki)
</translate>
- System Settings/Application Appearance
- System Settings/Power Management/it
- System Settings/Workspace Appearance/en
 |
Settings for the appearance of your workspace |

Window Decorations
Here you can select which window theme you want to use. The window theme affects how window title bars and window edges look like as well as the buttons in the titleline. You can fine tune the chosen theme using the and buttons and the button lets you download more themes.

Cursor Theme
Similarly, you can pick the collection of cursors to be used in your workspace, and there is an button to get more cursor themes.

Desktop Theme
In the tab you select which desktop theme you want to use, and there is a button to download new themes.
In the tab you can tweak the appearance of individual elements of your desktop theme.

Splash Screen
Here you choose which splash screen to use. The splash screen is the screen you see while your machine starts up.
|
Settings for the appearance of your workspace |
Window Decorations
Here you can select which window theme you want to use. The window theme affects how window title bars and window edges look like as well as the buttons in the titleline. You can fine tune the chosen theme using the and buttons and the button lets you download more themes.
Cursor Theme
Similarly, you can pick the collection of cursors to be used in your workspace, and there is an button to get more cursor themes.
Desktop Theme
In the tab you select which desktop theme you want to use, and there is a button to download new themes.
In the tab you can tweak the appearance of individual elements of your desktop theme.
Splash Screen
Here you choose which splash screen to use. The splash screen is the screen you see while your machine starts up.
Questo modulo di impostazioni ti permette di configurare la procedura d'accesso. Questa impostazione è utile solo se utilizzi SDDM come gestore d'accesso: fortunatamente però, la maggior parte delle distribuzioni che hanno un'edizione di KDE ce l'hanno. Se tuttavia usi un altro gestore d'accesso e vuoi modificarlo in SDDM, fai riferimento al wiki della tua distribuzione.
Comodità
Se non vuoi digitare il tuo nome utente e la password all'accesso, qui puoi selezionare , poi seleziona l'utente con cui vuoi accedere automaticamente e premi . Ricorda, però, che chiunque in grado di avere accesso fisico al tuo computer o portatile avrà accesso all'istante a tutti i tuoi dati. Devi fare una valutazione dei rischi prima di utilizzare questo strumento.
Maggiori informazioni
- SDDM (Wikipedia)
- SDDM (wiki di Arch Linux)
- Login Manager (Wikipedia)
- Gestore d'accesso (wiki di Arch Linux)
- System Settings/Workspace Appearance/fr
|
Settings for the appearance of your workspace |
Window Decorations
Here you can select which window theme you want to use. The window theme affects how window title bars and window edges look like as well as the buttons in the titleline. You can fine tune the chosen theme using the and buttons and the button lets you download more themes.
Cursor Theme
Similarly, you can pick the collection of cursors to be used in your workspace, and there is an button to get more cursor themes.
Desktop Theme
In the tab you select which desktop theme you want to use, and there is a button to download new themes.
In the tab you can tweak the appearance of individual elements of your desktop theme.
Splash Screen
Here you choose which splash screen to use. The splash screen is the screen you see while your machine starts up.
- System Settings/Autostart/da
- System Settings/Connections/uk
- System Settings/Workspace Appearance/da
- System Settings/Desktop Behavior
Workspace</translate>
[[File:<translate> Plasma.png|48px|link=Special:myLanguage/System Settings/Workspace]]||<translate> Configure the workspace behavior </translate>
Desktop Effects</translate>
[[File:<translate> Preferences-desktop-effects.png|48px|link=Special:myLanguage/System Settings/Desktop Effects]]||<translate> Configure all desktop effects done by KWin </translate>
Screen Edges</translate>
[[File:<translate> Preferences-desktop-gestures-screenedges.png|48px|link=Special:myLanguage/System Settings/Screen Edges]]||<translate> Configure actions to trigger when pushing the mouse cursor on the screen edge. </translate>
Touch Screen</translate>
[[File:<translate> Preferences-desktop-gestures-touch.png|48px|link=Special:myLanguage/System Settings/Touch Screen]]||<translate> Configure action to trigger when using swipe gestures. </translate>
Screen Locking</translate>
[[File:<translate> Preferences-desktop-user-password.png|48px|link=Special:myLanguage/System Settings/Screen Locking]]||<translate> Configure the lock screen </translate>
Virtual Desktops</translate>
[[File:<translate> Preferences-desktop-virtual.png|48px|link=Special:myLanguage/System Settings/Virtual Desktops]]||<translate> Configure the properties of virtual desktops. </translate>
Activities</translate>
[[File:<translate> Preferences-desktop-activities.png|48px|link=Special:myLanguage/System Settings/Activities]]||<translate> Configure activities </translate>
<translate> </translate>
За допомогою модуля «Краї екрана» ви зможете вибрати дії, які виконуватимуться системою, коли ви наводитимете вказівник миші на краї або кути екрана. Із кожним краєм або кутом можна пов'язати власну дію. Крім того, ви можете визначити, чи буде максимізовано вікна, які ви підтягуватимете до верхнього краю екрана, або наказати системі створювати мозаїку з вікон, якщо ви підтягуватимете вікна до країв екрана. Нарешті, ви можете визначити, які дії буде виконано, якщо вікно буде перетягнуто за межу екрана.

Докладніші відомості
- System Settings/Look And Feel/uk
- System Settings/Desktop Session/uk
- System Settings/Font Management/uk
- System Settings/Workspace Appearance/ca
- System Settings/Autostart/en
- System Settings/Workspace Appearance
<translate>
|
Settings for the appearance of your workspace |
Window Decorations
Here you can select which window theme you want to use. The window theme affects how window title bars and window edges look like as well as the buttons in the titleline. You can fine tune the chosen theme using the and buttons and the button lets you download more themes.
Cursor Theme
Similarly, you can pick the collection of cursors to be used in your workspace, and there is an button to get more cursor themes.
Desktop Theme
In the tab you select which desktop theme you want to use, and there is a button to download new themes.
In the tab you can tweak the appearance of individual elements of your desktop theme.
Splash Screen
Here you choose which splash screen to use. The splash screen is the screen you see while your machine starts up. </translate>
The appearance section contains all the settings for customizing the theme of Plasma and the applications.
Application Style

Widgets are the interface elements such as buttons, scroll bars, tabs and so on. Here you can choose and configure the widget style used for all KDE applications. You can also fine tune widget behaviour. Global Theme

Customize Plasma in one click. Color

Here you can choose which color scheme to use on the desktop and in applications. You can also tweak the settings for individual elements. Windows Decorations

This module allows you to select a style for the buttons and borders around windows. Fonts

Configure the font used by your system. Icons

Here you can choose which icon theme to use for your workspace, and how large you want them to be. Cursors
Change the look of the mouse cursor. Font Management

Manage the fonts installed on your computer. Splash Screen
Change the splash screen.
Ce module de configuration vous permet de configurer la procédure de connexion. Cela est nécessaire seulement, si vous utilisez SDDM comme gestionnaire de votre session. Heureusement la plupart des distributions Linux qui embarquent une version de KDE utilisent SDDM comme gestionnaire de connexion. Si vous utilisez un autre gestionnaire de connexion, et que vous voulez passer à SDDM, voyez le wiki de votre distribution.
Commodités
Si vous ne souhaitez pas indiquer votre identifiants et mot de passe lors de votre connexion, vous pouvez cocher dans l'onglet la case . Puis sélectionner l'utilisateur et l'environnemnt de bureau avec lequel vous souhaitez vous connecter automatiquement et cliquez sur . Cependant, n'oubliez pas que n'importe pouvant accéder physiquement à votre ordinateur de bureau ou à votre portable, aura également accès à l'ensemble de vos données. Vous devez donc faire une évaluation des risques avant d'utiliser cette option.
Informations supplémentaires
- SDDM (sur Wikipédia)
- SDDM (sur le wiki d'Arch Linux)
- Gestionnaire de connexion (sur Wikipédia)
- Gestionnaire de connexion (sur le wiki d’Arch Linux)
- System Settings/Date & Time/da
- System Settings/Date & Time/pl
- System Settings/Desktop Behavior/uk
Робочий простір
Модуль для налаштовування поведінки робочого простору Ефекти стільниці
Модуль для налаштовування усіх ефектів стільниці, роботу яких забезпечує KWin Краї екрана
Модуль для налаштовування дій, які виконуватимуться при наведенні вказівника миші на край екрана. Сенсорна панель
Модуль налаштовування дій, які виконуватимуться у відповідь на торкання сенсорної панелію Блокування екрана
Модуль для налаштовування блокування екрана Віртуальні стільниці
Налаштовування властивостей віртуальних стільниць. Простори дій
Модуль для налаштовування просторів дій
- System Settings/Default Applications/da
- System Settings/User Manager/uk
- System Settings/Desktop Effects/uk
- System Settings/Autostart
- System Settings/Default Applications/en
- System Settings/Date & Time
- System Settings/Task Switcher/da
- System Settings/Date & Time/ca
- System Settings/Task Switcher/en
- System Settings/Widget Style/uk
- System Settings/Autostart/it
- System Settings/Date & Time/it
- System Settings/Workspace Behaviour/en
 |
Configuring your workspace |
Virtual Desktops
Having many windows open in your workspace can be confusing. Virtual desktops gives you a way to separate tasks and keep the clutter of windows to a minimum. In the Virtual Desktops module you can configure your virtual desktops. In the tab you can set the number of virtual desktops you want, and you can give them individual names. The tab holds settings for switching between virtual desktops: In the dropdown list you decide how the transition from one virtual desktop to another looks. You can also configure shortcuts to shuffle through virtual desktops, or to go to a particular desktop.
Screen Edges
In the Screen Edges module you can choose between certain actions to be triggered when the mouse moves to one of the edges or corners of the screen. Each edge, and each corner can have its own action attached. You can also decide whether you want windows to be maximized when you drag them to the top edge of the screen, or to be tiled when you drag them to the sides of the screen. Finally you can set what happens to windows when you drag them across the screen edge.

Workspace
In the Workspace module you can choose what type of workspace you want: a conventional desktop or a netbook-friendly one. You can also decide whether you want the Dashboard to display the same widgets as the desktop, or if it should have it own independent set of widgets.
|
Configuring your workspace |
Virtual Desktops
Having many windows open in your workspace can be confusing. Virtual desktops gives you a way to separate tasks and keep the clutter of windows to a minimum. In the Virtual Desktops module you can configure your virtual desktops. In the tab you can set the number of virtual desktops you want, and you can give them individual names. The tab holds settings for switching between virtual desktops: In the dropdown list you decide how the transition from one virtual desktop to another looks. You can also configure shortcuts to shuffle through virtual desktops, or to go to a particular desktop.
Screen Edges
In the Screen Edges module you can choose between certain actions to be triggered when the mouse moves to one of the edges or corners of the screen. Each edge, and each corner can have its own action attached. You can also decide whether you want windows to be maximized when you drag them to the top edge of the screen, or to be tiled when you drag them to the sides of the screen. Finally you can set what happens to windows when you drag them across the screen edge.
Workspace
In the Workspace module you can choose what type of workspace you want: a conventional desktop or a netbook-friendly one. You can also decide whether you want the Dashboard to display the same widgets as the desktop, or if it should have it own independent set of widgets.
- System Settings/Keyboard/en
- System Settings/Search Desktop/en
- System Settings/Default Applications/it
- System Settings/Workspace Behaviour/fr
|
Configuring your workspace |
Virtual Desktops
Having many windows open in your workspace can be confusing. Virtual desktops gives you a way to separate tasks and keep the clutter of windows to a minimum. In the Virtual Desktops module you can configure your virtual desktops. In the tab you can set the number of virtual desktops you want, and you can give them individual names. The tab holds settings for switching between virtual desktops: In the dropdown list you decide how the transition from one virtual desktop to another looks. You can also configure shortcuts to shuffle through virtual desktops, or to go to a particular desktop.
Screen Edges
In the Screen Edges module you can choose between certain actions to be triggered when the mouse moves to one of the edges or corners of the screen. Each edge, and each corner can have its own action attached. You can also decide whether you want windows to be maximized when you drag them to the top edge of the screen, or to be tiled when you drag them to the sides of the screen. Finally you can set what happens to windows when you drag them across the screen edge.
Workspace
In the Workspace module you can choose what type of workspace you want: a conventional desktop or a netbook-friendly one. You can also decide whether you want the Dashboard to display the same widgets as the desktop, or if it should have it own independent set of widgets.
- System Settings/Keyboard/zh-cn
- System Settings/Task Switcher
- System Settings/Task Switcher/ca
- System Settings/Keyboard/es
- System Settings/Keyboard/ca
- System Settings/Keyboard/da
- System Settings/Default Applications/ca
- System Settings/Search Desktop/fr
- System Settings/Default Applications
- System Settings/Search Desktop/da
- System Settings/Task Switcher/it
- System Settings/Appearance/fr
The appearance section contains all the settings for customizing the theme of Plasma and the applications.
Apparence des applications
Les widgets sont les éléments de l'interface tels que les boutons, les barres de défilement, les onglets, etc. Ici, vous pouvez choisir et configurer le style de widget utilisé par toutes les applications. Vous pouvez également régler le comportement des widgets. Thème global
Customiser Plasma en un seul clic. Couleur
Ici, vous pouvez choisir le schéma de couleurs à utiliser sur le bureau et dans les applications. Vous pouvez également modifier les paramètres de chaque élément. Décorations des fenêtres
Ce module vous permet de sélectionner un style pour les boutons et les décoration autour des fenêtres. Polices
Configurer la polices utiliser par votre système. Icônes du thème
Ici vous pouvez choisir quel thème des icônes, vous voulez utiliser pour votre environnement de travail et quel taille utiliser pour les icônes. Thème du pointeur de la souris
Changer l'apparence du curseur de la souris. Gestion des polices
Gérez les polices de caractères installées sur votre ordinateur. Splash screen
Changer l'écran de démarrage
- System Settings/Workspace Behaviour/ca
- System Settings/Search Desktop
- System Settings/Date & Time/fr
- System Settings/Workspace Behaviour
<translate>
|
Configuring your workspace |
Virtual Desktops
Having many windows open in your workspace can be confusing. Virtual desktops gives you a way to separate tasks and keep the clutter of windows to a minimum. In the Virtual Desktops module you can configure your virtual desktops. In the tab you can set the number of virtual desktops you want, and you can give them individual names. The tab holds settings for switching between virtual desktops: In the dropdown list you decide how the transition from one virtual desktop to another looks. You can also configure shortcuts to shuffle through virtual desktops, or to go to a particular desktop.
Screen Edges
In the Screen Edges module you can choose between certain actions to be triggered when the mouse moves to one of the edges or corners of the screen. Each edge, and each corner can have its own action attached. You can also decide whether you want windows to be maximized when you drag them to the top edge of the screen, or to be tiled when you drag them to the sides of the screen. Finally you can set what happens to windows when you drag them across the screen edge.
Workspace
In the Workspace module you can choose what type of workspace you want: a conventional desktop or a netbook-friendly one. You can also decide whether you want the Dashboard to display the same widgets as the desktop, or if it should have it own independent set of widgets. </translate>
- System Settings/Default Applications/fr
- System Settings/Workspace Behaviour/da
- System Settings/Autostart/fr
- System Settings/Keyboard
- System Settings/Search Desktop/it
- System Settings/Window Behavior/en
- System Settings/Workspace Behaviour/pt-br
- System Settings/Task Switcher/fr
- System Settings/Search Desktop/ca
- System Settings/Login Screen/uk
За допомогою цього модуля ви можете налаштувати процедуру входу до системи. Модуль діятиме лише, якщо входом до системи керує SDDM. На щастя, у більшості дистрибутивів Linux, до складу яких входить KDE, як засіб керування входом до системи використовується SDDM. Якщо у вашій системі використовується інший засіб керування входом, і ви захочете змінити його на SDDM, зверніться до вікі вашого дистрибутива.
Зручність
Якщо ви не хочете вказувати ім’я користувача і пароль під час входу до системи, ви можете позначити на вкладці пункт , потім вибрати користувача і натиснути кнопку . Слід пам’ятати, що у такому разі будь-хто, хто може отримати фізичний доступ до комп’ютера або ноутбука негайно отримає доступ до ваших даних. Вам слід зважити на це, коли вимикатимете реєстрацію.
Докладніші відомості
- SDDM (Вікіпедія)
- SDDM (вікі Arch Linux)
- Засіб керування входом (Вікіпедія)
- Засіб керування входом (вікі Arch Linux)
- System Settings/Keyboard/it
- System Settings/Window Behavior
- System Settings/Window Behavior/fr
- System Settings/Window Behavior/da
- System Settings/Appearance
The appearance section contains all the settings for customizing the theme of Plasma and the applications.
Application Style</translate>
[[File:<translate> Preferences-desktop-theme.png|48px|link=Special:myLanguage/System Settings/Application Style]]||<translate> Widgets are the interface elements such as buttons, scroll bars, tabs and so on. Here you can choose and configure the widget style used for all applications. You can also fine tune widget behaviour. </translate>
Global Theme</translate>
[[File:<translate> Preferences-desktop-theme-global.png|48px|link=Special:myLanguage/System Settings/Look And Feel]]||<translate> Customize Plasma in one click.</translate>
Color </translate>
[[File:<translate> Preferences-desktop-color.png|48px|link=Special:myLanguage/System Settings/Color]]||<translate> Here you can choose which color scheme to use on the desktop and in applications. You can also tweak the settings for individual elements. </translate>
Windows Decorations</translate>
[[File:<translate> Preferences-system-windows.png|48px|link=Special:myLanguage/System Settings/Windows Decorations]]||<translate> This module allows you to select a style for the buttons and borders around windows. </translate>
Fonts</translate>
[[File:<translate> Preferences-desktop-fonts.png|48px|link=Special:myLanguage/System Settings/Font]]||<translate> Configure the font used by your system. </translate>
Icons</translate>
[[File:<translate> Preferences-desktop-icons.png|48px|link=Special:myLanguage/System Settings/Icons]]||<translate> Here you can choose which icon theme to use for your workspace, and how large you want them to be. </translate>
Cursors</translate>
[[File:<translate> Preferences-cursor.png|48px|link=Special:myLanguage/System Settings/Mouse Cursor Theme]]||<translate> Change the look of the mouse cursor. </translate>
Font Management</translate>
[[File:<translate> Preferences-desktop-fonts-management.png|48px|link=Special:myLanguage/System Settings/Font Management]]||<translate> Manage the fonts installed on your computer. </translate>
<translate> Splash Screen</translate>
<translate> Change the splash screen. </translate>
<translate> </translate>
- System Settings/Window Behavior/ca
- System Settings/Keyboard/fr
- System Settings/Workspace Appearance/uk
- System Settings/Appearance/uk
The appearance section contains all the settings for customizing the theme of Plasma and the applications.
Стиль програм
Віджети — це елементи інтерфейсу, зокрема кнопки, смужки гортання, вкладки тощо. За допомогою цієї сторінки ви може налаштувати стиль віджетів для всіх програм. Також можна виконати точне налаштування поведінки віджетів. Загальна тема
Налаштування Плазми у одне клацання. Колір
Тут ви можете вибрати схему кольорів для стільниці і вікон ваших програм. Ви можете внести зміни до параметрів окремих елементів вигляду. Обрамлення вікон
За допомогою цього модуля ви можете вибрати стиль кнопок і рамок навколо вікон. Шрифти
Налаштуйте шрифт, який буде використано в інтерфейсі вашої системи. Піктограми
Тут ви можете визначитися з набором піктограм для вашого робочого простору та їхніми розмірами. Вказівники
Змініть вигляд вказівника миші. Керування шрифтами
Керуйте шрифтами, які встановлено у вашій системі. Вікно вітання
Змініть вікно вітання.
- System Settings/Power Management/uk
- System Settings/Autostart/uk
- System Settings/Printers/zh-cn
- System Settings/Printers/zh-tw
- System Settings/Task Switcher/uk
- System Settings/Date & Time/uk
- System Settings/Input Devices/ro
- System Settings/Input Devices/en
- System Settings/Input Devices/zh-cn
- System Settings/Input Devices/es
- System Settings/Task Scheduler/en
General Information
Task Scheduler is a graphical front end to the standard "cron" utility. With it, commands (or "tasks") can be run at specific times, on a certain day or date, or at specific intervals (time between execution).

Usage
Task Scheduler can be started by starting the System Settings application. Select follwed by .
Adding and Modifying tasks
- Click to add a new task, or "Modify" to modify an existing task. The Add or modify existing task page will be displayed.

- Enter the command to be run. Click the folder icon to choose it from a dialog.
- Enter a comment (optional). This should be descriptive, explaining what the task will do as the command may not always be obvious.
- Click Enable this task to enable the task to run.
- Click Run at system bootup to enable the script to run each time the system is booted.
- Click Run every day to enable the script to run every day. This will automatically select the appropriate options.
- Using the buttons, choose when the command should be run. Not all parameters are required, those not needed may be left blank.
- Hours and Minutes are the time of day to run the task, not an interval.
- When done, click . The task will be added and scheduled if enabled.

Removing a task
To completely remove a task, select the task from the list and click the Delete button. This will permanently remove the task.
Environment Variables
Sometimes a task or multiple tasks need a specific variable set, it must be added in the Environment Variables section. The cron utility uses its own environment, system-wide and user-specific variables are not used. Click New Variable to add a new variable definition, or Modify to change an existing variable.
- Enter the name of the variable to use. This name:
- Must consist of letters, digits, and underscore ('_') only
- Must start with a letter
- Should not be a reserved or commonly used system variable. See https://pubs.opengroup.org/onlinepubs/000095399/basedefs/xbd_chap08.html for more information
- The value the variable will contain. This can be a number or string.
- Enter a brief description of the variable.
Hints
- All the files that are modified are located in the /etc/cron directory where there are numerous files to look at.
- The command-line tool that allows you to have a look at the currently installed cron-jobs is (that's the letter L).
crontab -l
More Information
- KDE official documentation
- Cron (Wikipedia)
- Cron (Arch Linux wiki)
- System Settings/Input Devices/da
- System Settings/Keyboard/uk
- System Settings/Input Devices/ca
- System Settings/Workspace Behaviour/uk
- System Settings/Input Devices
- System Settings/Printers/da
- System Settings/Search Desktop/uk
- System Settings/Default Applications/uk
- System Settings/Printers/en
Printer Configuration
 |
Use this tool to connect your computer to a printer and set up appropriate options |
Feature List
- Add a printer to your computer
- Give each printer a name that helps identify it
- Perform printer tests and maintenance
- Remove a printer

When a printer is not attached directly to your computer with a USB cable, you will need to use the Printer Configuration utility to add the printer, such as when another computer has shared a printer, or you want to connect directly to a printer that is networked with a print server.
Example
Follow these example steps to add a network connected printer to your computer. First, gather your printer information before you begin (make, model, IP number, etc).
Getting to the program is a sequence of straightforward steps.
- KDE
- Once you get to the tool, click the button to add a printer (Find and click the button between steps.)
- Your computer will search your local area network for printers that have been shared on other computers or are directly attached to the network.
In this example, I have an HP Laserjet 2100M which is connected directly to my network using a small print server on the printer.
The next illustration also shows that I have another computer sharing two printers on a Toshiba laptop. If I wanted to use either of them, that other computer would need to be on for the printer to work. Remote printers work best if directly connected to the network or are connected to a dedicated print server computer.

- I choose which is the choice for my printserver.

- I enter the IP address number in the Host blank (Currently, the Printer Configuration tool does not identify what that number is, so you will need to ask your network administrator what the IP address is).
- Choose the manufacturer (Mine is HP)
- Choose the model (HP has many)
- Choose the recommended Driver unless you have a reason to do otherwise.
- Give the printer a useful name since "printer" may not be good enough.
- Give a description including the physical location if not in your own room.
- The "Location" defaults to your computer's name in case you decide to share it later. Sharing is one of the options of the printer configuration tool.
On the configuration screen, you will now see a new "Local Printer" because the printer is "attached" to your computer. If you have more than one printer, you should be sure to thoughtfully select one as the default. You might not want to set the big high-speed departmental printer/copier in the department manager's office as your default if you have a small printer hooked directly to your computer.
常规信息
KCron是个标准的KDE工作区应用程序。 |
Task Scheduler is a graphical front end to the standard "cron" utility. With it, commands (or "tasks") can be run at specific times, on a certain day or date, or at specific intervals (time between execution).
用法
到了KDE 4.4 中KCron 是的模组。如果没找到,请检查是否已安装kdeadmin 包。 KDE 4.5 中是在 。一些发行版将 KCron单独弄成一个包,所以你得自己找找。
Adding and Modifying tasks
- Click to add a new task, or "Modify" to modify an existing task. The Add or modify existing task page will be displayed.
- Enter the command to be run. Click the folder icon to choose it from a dialog.
- Enter a comment (optional). This should be descriptive, explaining what the task will do as the command may not always be obvious.
- Click Enable this task to enable the task to run.
- Click Run at system bootup to enable the script to run each time the system is booted.
- Click Run every day to enable the script to run every day. This will automatically select the appropriate options.
- Using the buttons, choose when the command should be run. Not all parameters are required, those not needed may be left blank.
- Hours and Minutes are the time of day to run the task, not an interval.
- When done, click . The task will be added and scheduled if enabled.
Removing a task
To completely remove a task, select the task from the list and click the Delete button. This will permanently remove the task.
Environment Variables
Sometimes a task or multiple tasks need a specific variable set, it must be added in the Environment Variables section. The cron utility uses its own environment, system-wide and user-specific variables are not used. Click New Variable to add a new variable definition, or Modify to change an existing variable.
- Enter the name of the variable to use. This name:
- Must consist of letters, digits, and underscore ('_') only
- Must start with a letter
- Should not be a reserved or commonly used system variable. See https://pubs.opengroup.org/onlinepubs/000095399/basedefs/xbd_chap08.html for more information
- The value the variable will contain. This can be a number or string.
- Enter a brief description of the variable.
提示
- 全部修改的文件都位于拥有许多文件的/etc/cron目录。
- 查看现在安装好的cron任务的命令行工具是(小写的字母L)
crontab -l
More Information
- KDE official documentation
- Cron (Wikipedia)
- Cron (Arch Linux wiki)
- System Settings/Startup and Shutdown/zh-cn
- System Settings/Locale/How To Install and Apply Interface Translation/en
- System Settings/Task Scheduler/zh-tw
一般資訊
Task Scheduler is a graphical front end to the standard "cron" utility. With it, commands (or "tasks") can be run at specific times, on a certain day or date, or at specific intervals (time between execution).
用法
到了
![]() 4.4 中 KCron 是的模組。如果沒找到,請檢查是否已安裝kdeadmin 包。 KDE 4.5 中是在。一些發行版將 KCron單獨弄成一個包,所以你得自己找找。
4.4 中 KCron 是的模組。如果沒找到,請檢查是否已安裝kdeadmin 包。 KDE 4.5 中是在。一些發行版將 KCron單獨弄成一個包,所以你得自己找找。
Adding and Modifying tasks
- Click to add a new task, or "Modify" to modify an existing task. The Add or modify existing task page will be displayed.
- Enter the command to be run. Click the folder icon to choose it from a dialog.
- Enter a comment (optional). This should be descriptive, explaining what the task will do as the command may not always be obvious.
- Click Enable this task to enable the task to run.
- Click Run at system bootup to enable the script to run each time the system is booted.
- Click Run every day to enable the script to run every day. This will automatically select the appropriate options.
- Using the buttons, choose when the command should be run. Not all parameters are required, those not needed may be left blank.
- Hours and Minutes are the time of day to run the task, not an interval.
- When done, click . The task will be added and scheduled if enabled.
Removing a task
To completely remove a task, select the task from the list and click the Delete button. This will permanently remove the task.
Environment Variables
Sometimes a task or multiple tasks need a specific variable set, it must be added in the Environment Variables section. The cron utility uses its own environment, system-wide and user-specific variables are not used. Click New Variable to add a new variable definition, or Modify to change an existing variable.
- Enter the name of the variable to use. This name:
- Must consist of letters, digits, and underscore ('_') only
- Must start with a letter
- Should not be a reserved or commonly used system variable. See https://pubs.opengroup.org/onlinepubs/000095399/basedefs/xbd_chap08.html for more information
- The value the variable will contain. This can be a number or string.
- Enter a brief description of the variable.
提示
- 全部修改的檔案都位於擁有許多檔案的/etc/cron目錄。
- 查看現在安裝好的cron任務的命令列工具是(小寫的字母L)
crontab -l
More Information
- KDE official documentation
- Cron (Wikipedia)
- Cron (Arch Linux wiki)
- System Settings/Task Scheduler/da
Generel information
Opgaveskemalæggeren en brugerflade til det almindelige "cron"-program. Med dette kan kommandoer (eller "opgaver") blive kørt på faste tidspunkter, på en given ugedag eller dato eller med et givet interval.
Brug
Opgaveskemalæggeren kan startes fra programmet Systemindstillinger. Vælg og så .
Tilføjning og ændring af opgaver
- Klik for at tilføje en ny opgave eller for at ændre en eksisterende opgave. Nu vises vinduet Tilføj eller ændr en skemalagt opgave.
- Skriv den kommando, der skal køres eller klik på mappeikonet for at vælge det fra en dialog.
- Skriv en kommentar (valgfrit). Den bør være forklare, hvad opgaven vil gøre, da kommandoen ikke altid er indlysende.
- Klik Aktivér denne opgave for at køre opgaven klar til at blive kørt.
- Klik Kør ved systemboot hvis du vil have scriptet til at køre hver gang systemet bootes.
- Klik Kør hver dag for at få scriptet til at blive kørt hver dag. Dette vil automatisk sørge for, at de rette tilvalg indstilles.
- Ved hjælp af knapperne kan du vælge hvornår kommandoen skal køres. Du behøver ikke at vælge noget i hver gruppe; de der ikke er nødvendige kan forblive urørte.
- Timer og Minutter angiver tider på dagen, hvor opgaven køres, ikke et interval.
- Nåe du er færdig klikker du på . Opgaven bliver nu tilføjer og skemalagt, hvis den er aktiveret.
Fjern en opgave
For at fjerne en opgave helt vælger du den i listen og klikker på knappen Slet. Dette vil fjerne opgaven permanent.
Miljøvariabler
Nogle gange har en eller flere opgaver bruge for nogel særlige variabler; disse skal tilføjes i afsnittet Miljøvariabler. Programmet cron bruger sine egne miljøvariabler, variabler for hele systemet og brugerspecifikke variabler anvendes ikke. Klik på Ny variabel... for at tilføje en ny variabledefinition eller på Ændr... for at ændre en eksisterende variabel.
- Angiv navnet på den variabel, der skal bruges. Dette navn
- må udelukkende indeholde bogstaver, cifre og underscore-tegnet ('_').
- skal begynde med et bogstav
- må ikke være en reserveret eller almindeligt anvendt systemvariabel. Se https://pubs.opengroup.org/onlinepubs/000095399/basedefs/xbd_chap08.html for mere information
- Værdien som variablen indeholder. Dette kan være et tal eller en tekststreng.
- Skriv en kort beskrivelse af variablen.
Tips
- Alle de filer, som modificeres findes i mappen /etc/cron, hvor der er mange filer, som kan bruges som eksempler.
- Kommandolinje-værktøjet til at se det aktuelt installerede cron-job er (det er bogstavet L).
crontab -l
Mere information
- KDE official documentation
- Cron (Wikipedia)
- Cron (Arch Linux wiki)
- System Settings/File Associations/en
- System Settings/Search Desktop/el
- System Settings/Startup and Shutdown/zh-tw
- System Settings/Input Devices/it
- System Settings/Startup and Shutdown/en
- System Settings/File Associations/da
- System Settings/Startup and Shutdown/fa
- System Settings/Startup and Shutdown/ro
- System Settings/Startup and Shutdown/de
- System Settings/Startup and Shutdown/es
- System Settings/Window Behavior/uk
- System Settings/Locale/How To Install and Apply Interface Translation/da
- System Settings/Window Behaviour/en
- System Settings/Startup and Shutdown/da
- System Settings/Printers
<translate>
Printer Configuration
</translate>
|
<translate>
Use this tool to connect your computer to a printer and set up appropriate options</translate> |
<translate>
Feature List
- Add a printer to your computer
- Give each printer a name that helps identify it
- Perform printer tests and maintenance
- Remove a printer
When a printer is not attached directly to your computer with a USB cable, you will need to use the Printer Configuration utility to add the printer, such as when another computer has shared a printer, or you want to connect directly to a printer that is networked with a print server.
Example
Follow these example steps to add a network connected printer to your computer. First, gather your printer information before you begin (make, model, IP number, etc).
Getting to the program is a sequence of straightforward steps.
- KDE
- Once you get to the tool, click the button to add a printer (Find and click the button between steps.)
- Your computer will search your local area network for printers that have been shared on other computers or are directly attached to the network.
In this example, I have an HP Laserjet 2100M which is connected directly to my network using a small print server on the printer.
The next illustration also shows that I have another computer sharing two printers on a Toshiba laptop. If I wanted to use either of them, that other computer would need to be on for the printer to work. Remote printers work best if directly connected to the network or are connected to a dedicated print server computer.
- I choose which is the choice for my printserver.
- I enter the IP address number in the Host blank (Currently, the Printer Configuration tool does not identify what that number is, so you will need to ask your network administrator what the IP address is).
- Choose the manufacturer (Mine is HP)
- Choose the model (HP has many)
- Choose the recommended Driver unless you have a reason to do otherwise.
- Give the printer a useful name since "printer" may not be good enough.
- Give a description including the physical location if not in your own room.
- The "Location" defaults to your computer's name in case you decide to share it later. Sharing is one of the options of the printer configuration tool.
On the configuration screen, you will now see a new "Local Printer" because the printer is "attached" to your computer. If you have more than one printer, you should be sure to thoughtfully select one as the default. You might not want to set the big high-speed departmental printer/copier in the department manager's office as your default if you have a small printer hooked directly to your computer.
</translate>
<translate>
General Information
Task Scheduler is a graphical front end to the standard "cron" utility. With it, commands (or "tasks") can be run at specific times, on a certain day or date, or at specific intervals (time between execution).
Usage
Task Scheduler can be started by starting the System Settings application. Select follwed by .
Adding and Modifying tasks
- Click to add a new task, or "Modify" to modify an existing task. The Add or modify existing task page will be displayed.
- Enter the command to be run. Click the folder icon to choose it from a dialog.
- Enter a comment (optional). This should be descriptive, explaining what the task will do as the command may not always be obvious.
- Click Enable this task to enable the task to run.
- Click Run at system bootup to enable the script to run each time the system is booted.
- Click Run every day to enable the script to run every day. This will automatically select the appropriate options.
- Using the buttons, choose when the command should be run. Not all parameters are required, those not needed may be left blank.</translate>
<translate>
- Hours and Minutes are the time of day to run the task, not an interval.
- When done, click . The task will be added and scheduled if enabled.
Removing a task
To completely remove a task, select the task from the list and click the Delete button. This will permanently remove the task.
Environment Variables
Sometimes a task or multiple tasks need a specific variable set, it must be added in the Environment Variables section. The cron utility uses its own environment, system-wide and user-specific variables are not used. Click New Variable to add a new variable definition, or Modify to change an existing variable.
- Enter the name of the variable to use. This name:</translate>
<translate>
- Must consist of letters, digits, and underscore ('_') only</translate>
<translate>
- Must start with a letter</translate>
<translate>
- Should not be a reserved or commonly used system variable. See https://pubs.opengroup.org/onlinepubs/000095399/basedefs/xbd_chap08.html for more information
- The value the variable will contain. This can be a number or string.
- Enter a brief description of the variable.
Hints
- All the files that are modified are located in the /etc/cron directory where there are numerous files to look at.
- The command-line tool that allows you to have a look at the currently installed cron-jobs is (that's the letter L).
crontab -l
More Information
- KDE official documentation
- Cron (Wikipedia)
- Cron (Arch Linux wiki)
</translate>
プリンターの設定
|
このツールはコンピューターにプリンターを接続し、適切なオプションを設定するためのものです。 |
特徴一覧
- コンピューターにプリンターを追加
- それぞれのプリンターに名前をつける
- プリンターのテストとメンテナンスを行う
- プリンターを削除
USB ケーブルでコンピューターに直接プリンターが接続されていない場合 (例えば別のコンピューターが共有プリンターを持っている場合や、プリントサーバーに接続されているプリンターに直接接続したい場合など) は、 プリンターの設定 ユーティリティ用いる必要があります。
例
以下の例に沿って、ネットワークに接続されたプリンターをコンピューターに接続しましょう。まず、始める前に、プリンター情報を集めましょう。(型番、モデル、IP アドレスなど)
Getting to the program is a sequence of straightforward steps.
- KDE
- Once you get to the tool, click the button to add a printer (Find and click the button between steps.)
- Your computer will search your local area network for printers that have been shared on other computers or are directly attached to the network.
In this example, I have an HP Laserjet 2100M which is connected directly to my network using a small print server on the printer.
The next illustration also shows that I have another computer sharing two printers on a Toshiba laptop. If I wanted to use either of them, that other computer would need to be on for the printer to work. Remote printers work best if directly connected to the network or are connected to a dedicated print server computer.
- I choose which is the choice for my printserver.
- I enter the IP address number in the Host blank (Currently, the Printer Configuration tool does not identify what that number is, so you will need to ask your network administrator what the IP address is).
- Choose the manufacturer (Mine is HP)
- Choose the model (HP has many)
- Choose the recommended Driver unless you have a reason to do otherwise.
- Give the printer a useful name since "printer" may not be good enough.
- Give a description including the physical location if not in your own room.
- The "Location" defaults to your computer's name in case you decide to share it later. Sharing is one of the options of the printer configuration tool.
On the configuration screen, you will now see a new "Local Printer" because the printer is "attached" to your computer. If you have more than one printer, you should be sure to thoughtfully select one as the default. You might not want to set the big high-speed departmental printer/copier in the department manager's office as your default if you have a small printer hooked directly to your computer.
- System Settings/File Associations
- System Settings/Startup and Shutdown
- System Settings/Window Behaviour/da
- System Settings/Input Devices/fr
- System Settings/Locale/How To Install and Apply Interface Translation/fr
- System Settings/Printers/it
- System Settings/Window Behaviour
- System Settings/Startup and Shutdown/ca
- System Settings/Task Scheduler/es
Información general
KCron es una aplicación estándar que es preempaquetada con entornos de trabajo de KDE. |
Task Scheduler is a graphical front end to the standard "cron" utility. With it, commands (or "tasks") can be run at specific times, on a certain day or date, or at specific intervals (time between execution).
Uso
En
![]() En 4.4 KCron es un módulo que puede ser encontrado en . Si no aparece, por favor comprueba si tienes instalado el paquete kdeadmin. En KDE 4.5 lo encontrarás en . Algunas distribuciones tienen a KCron en un paquete separado, por lo que si no es visible deberías buscarlo en tus repositorios.
En 4.4 KCron es un módulo que puede ser encontrado en . Si no aparece, por favor comprueba si tienes instalado el paquete kdeadmin. En KDE 4.5 lo encontrarás en . Algunas distribuciones tienen a KCron en un paquete separado, por lo que si no es visible deberías buscarlo en tus repositorios.
Adding and Modifying tasks
- Click to add a new task, or "Modify" to modify an existing task. The Add or modify existing task page will be displayed.
- Enter the command to be run. Click the folder icon to choose it from a dialog.
- Enter a comment (optional). This should be descriptive, explaining what the task will do as the command may not always be obvious.
- Click Enable this task to enable the task to run.
- Click Run at system bootup to enable the script to run each time the system is booted.
- Click Run every day to enable the script to run every day. This will automatically select the appropriate options.
- Using the buttons, choose when the command should be run. Not all parameters are required, those not needed may be left blank.
- Hours and Minutes are the time of day to run the task, not an interval.
- When done, click . The task will be added and scheduled if enabled.
Removing a task
To completely remove a task, select the task from the list and click the Delete button. This will permanently remove the task.
Environment Variables
Sometimes a task or multiple tasks need a specific variable set, it must be added in the Environment Variables section. The cron utility uses its own environment, system-wide and user-specific variables are not used. Click New Variable to add a new variable definition, or Modify to change an existing variable.
- Enter the name of the variable to use. This name:
- Must consist of letters, digits, and underscore ('_') only
- Must start with a letter
- Should not be a reserved or commonly used system variable. See https://pubs.opengroup.org/onlinepubs/000095399/basedefs/xbd_chap08.html for more information
- The value the variable will contain. This can be a number or string.
- Enter a brief description of the variable.
Sugerencias
- Todos los archivos que se modifican se encuentran en el directorio /etc/cron donde hay muchos archivos que mirar.
- La herramienta en línea de comandos que te permite echar un vistazo a los trabajos instalados en cron es (es una letra L).
crontab -l
More Information
- KDE official documentation
- Cron (Wikipedia)
- Cron (Arch Linux wiki)
- System Settings/Printers/ca
- System Settings/Locale/How To Install and Apply Interface Translation
- System Settings/Startup and Shutdown/pt-br
- System Settings/Locale/How To Install and Apply Interface Translation/it
- System Settings/Startup and Shutdown/it
- System Settings/File Associations/it
- System Settings/Locale/How To Install and Apply Interface Translation/ca
- System Settings/File Associations/de
- System Settings/Window Behaviour/it
- System Settings/File Associations/ca
- System Settings/Window Behaviour/ca
- System Settings/Startup and Shutdown/fr
- System Settings/Task Scheduler/fr
Information générale
Planificateur de tâches est une interface graphique pour l'outil standard "cron". Avec lui, des commandes (où tâches) peuvent être exécuté à une date spécifique, ou selon un intervalle défini (temps entre les exécutions).
Usage
Le planificateur de tâches peut être démarré, en démarrant l'application Configuration du système. Sélectionner suivie par .
Ajouter et modifier une tâches
- Cliquer sur "Nouvelle tâches..." pour ajouter une nouvelle taches, ou "Modifier..." pour modifier une tâche existante. La page Ajouter ou modifier une tâche planifiée va être affichée.
- Entrer une commande qui va être exécutée. Cliquer sur un dossier pour le choisir depuis une fenêtre de dialogue.
- Entrer un commentaire (optionnel). Il est préférable que le commentaire soit descriptif, expliquant ce que la tâche va faire. En effet, il peut être difficile de comprendre la tâche avec seulement la commande.
- Click Enable this task to enable the task to run.
- Cliquez sur Exécuter au démarrage du système pour permettre au script de s'exécuter à chaque démarrage du système.
- Cliquez sur Exécuter tous les jours pour permettre au script de s'exécuter tous les jours. Cela sélectionnera automatiquement les options appropriées.
- A l'aide des boutons, choisissez quand la commande doit être exécutée. Tous les paramètres ne sont pas obligatoires, ceux qui ne sont pas nécessaires peuvent rester vides.
- Les heures et les minutes correspondent à l'heure de la journée à laquelle exécuter la tâche, et non à un intervalle.
- Une fois terminé, cliquez sur . La tâche sera ajoutée et planifiée si elle est activée.
Supprimer une tâche
Pour supprimer complètement une tâche, sélectionnez la tâche dans la liste et cliquez sur le bouton Supprimer. Cela supprimera définitivement la tâche.
Variables d'environment
Parfois, une ou plusieurs tâches nécessitent un jeu de variables spécifique, celui-ci doit être ajouté dans la section Variables d'environnement. L'utilitaire cron utilise son propre environnement, les variables à l'échelle du système et spécifiques à l'utilisateur ne sont pas utilisées. Cliquez sur Nouvelle variable pour ajouter une nouvelle définition de variable, ou sur Modifier pour modifier une variable existante.
- Entrez le nom de la variable à utiliser. Ce nom :
- Doit être composé uniquement de lettres, de chiffres et de traits de soulignement (« _ »)
- Doit commencer par une lettre
- Ne doit pas être une variable système réservée ou couramment utilisée. Voir https://pubs.opengroup.org/onlinepubs/000095399/basedefs/xbd_chap08.html pour plus d'informations
- La valeur que contiendra la variable. Cela peut être un nombre ou une chaîne.
- Tapez une brève description de la variable.
Astuces
- Tous les fichiers modifiés se trouvent dans le répertoire /etc/cron où se trouvent de nombreux fichiers à consulter.
- L'outil de ligne de commande qui vous permet de consulter les tâches cron actuellement installées est (c'est la lettre L).
crontab -l
Plus d'information
- Documentation officiel de KDE
- Cron (Wikipedia)
- Cron (Arch Linux wiki)
- System Settings/Printers/fr
- System Settings/Task Scheduler/it
Informazioni generali
Il Pianificatore di operazioni è un'interfaccia grafica al classico programma "cron". Con esso i comandi (o "operazioni") possono essere eseguiti ad orari specifici, in certi giorni o in certe date, oppure a intervalli specifici (tempo tra le esecuzioni).
Utilizzo
In KDE 4.4 KCron è un modulo accessibile in . Se non è presente controlla di aver installato il pacchetto kdeadmin. In KDE 4.5 lo troverai in . Alcune distro creano un pacchetto separato per KCron, dunque se non lo vedi dovresti cercare questo termine nel tuo repository.
Aggiunta e modifica delle operazioni
Fai clic su per aggiungerne una nuova, oppure "Modifica" per modificarne una esistente: verrà visualizzata la pagina Aggiungi o modifica operazione esistente.
- Inserisci il comando da eseguire. Fai clic sull'icona a cartella per sceglierla dalla finestra.
- Inserisci un comando (facoltativo). Dovrebbe essere descrittivo, in modo da spiegare cosa fa l'operazione: non sempre è ovvio.
- Fai clic su Abilita questa operazione per abilitarne l'esecuzione.
- Fai clic su Esegui all'avvio del sistema per abilitare l'esecuzione dello script ad ogni avvio del sistema.
- Fai clic su Esegui ogni giorno per abilitare l'esecuzione dello script ogni giorno. Questo selezionerà automaticamente le opzioni appropriate.
- Usando i pulsanti scegli quale comando dovrebbe essere eseguito. Non sono richiesti tutti i parametri: quelli non necessari possono essere lasciati vuoti.
- Le ore e i minuti sono l'ora del giorno quando eseguire l'operazione, non un intervallo.
- Quando hai finito fai clic su . L'operazione verrà aggiunta e programmata, se abilitata.
Rimozione di un operazione
Per rimuovere completamente un operazione, selezionala dall'elenco e fai clic sul pulsante Elimina. Questo rimuoverà in modo permanente l'operazione.
Variabili d'ambiente
Se a volte un operazione, o più operazioni, hanno bisogno di un'impostazione di una variabile, questa deve essere aggiunta nella sezione Environment Variables. Il programma cron utilizza il proprio ambiente, non delle variabili di sistema o specifiche per l'utente. Fai clic su Nuova variabile per aggiungere una nuova definizione di variabile, oppure su Modifica per modificarne una esistente.
- Inserisci il nome della variabile da usare. Questo nome:
- Deve essere composto solo da lettere, numeri e underscore ('_')
- Deve iniziare con una lettera
- Non dovrebbe essere una variabile di sistema riservata o usata comunemente. Per maggiori dettagli vedi https://pubs.opengroup.org/onlinepubs/000095399/basedefs/xbd_chap08.html
Il valore che la variabile conterrà. Può essere un numero o una stringa.
- Inserisci una breve descrizione della variabile.
Suggerimenti
- Tutti i file che vengono modificati si trovano nella cartella /etc/cron dove ci sono numerosi file da guardare.
- Lo strumento a riga di comando che ti permette di vedere i cron-jobs attualmente definiti è (l'ultima è la lettera L).
crontab -l
Maggiori informazioni
- Documentazione ufficiale di KDE
- Cron (Wikipedia)
- Cron (wiki di Arch Linux)
- System Settings/Window Behaviour/fr
- System Settings/Accessibility/en
 |
Settings to improve the desktop experience for disabled persons |
Plasma contains accessibility settings for you in order to make your experience easier when using the computer.
Bell

In the tab you can customize the system bell. The visible bell settings allows you to change their preferences to having a visual notification on the screen. For example, if a document is being edited, and a sticky key is pressed, you can choose between having the document's interface window being color-inverted, or having the entire window screen of the document change to a custom user-selected color.
The slider allows you to select how long the active window will change color in milliseconds. A smaller amount of time will mean there will be a shorter pause in between visible bells, while a larger amount of time means that the visible pause will be longer.
If you find these settings useful, you may also want to have a look at the Application and System Notifications module of System Settings.
If you find it difficult to use the keyboard, the and tabs have options that you may find helpful; and the has options to use mouse gestures to activate sticky keys or slow keys, if you do not want to use these features all the time.
Modifier Keys

There are two panels here, the Sticky Keys and the Locking Keys panel. Sticky keys is a setting to make it easier to enter multiple key shortcuts. For instance, when one wants to capitalize a letter, the Shift key is pressed at the same time as the letter. Sticky Keys allow you to first press Shift, Control, or Alt, and then release it and press another key. This system will interpret it as those keys being simultaneously pressed.
There are 3 Locking Keys on most keyboards. These keys are the Caps Lock, Num Lock, and Scroll Lock keys. In the tab, you can choose to have a system bell played if these are activated or deactivated.
Keyboard filters

Slow Keys
Slow Keys allow confirmation that a key has been pressed and entered. The system bell is activated when the time allotted with the slider has passed. For a key to be accepted, it has to be held until the set amount of time. The system bell can be used to indicate when a key press has been made, accepted, rejected, or any combination of the three.
Bounce Keys
The bounce key setting is used to prevent multiple characters appearing in a document as a result of an immediate key press occurring after the first one. If you press a key again in less time that has been set with the slider, the second repeat character won't be made and a system bell might activate.
Even simple settings like slowing the rate of keyboard repeat can be a great help

Activation Gestures

Screen Reader

More information
- KDE official documentation
- Accessibility project (Community wiki)
- Accessibility project (Phabricator workboard)
- KDE accessibility applications
- System Settings/Task Scheduler/ru
Основная информация
KCron стандартный инструмент, поставляемый внутри в рабочей среды KDE. |
Task Scheduler is a graphical front end to the standard "cron" utility. With it, commands (or "tasks") can be run at specific times, on a certain day or date, or at specific intervals (time between execution).
Использование
В
![]()
В версии 4.4 KCron является модулем, который может быть найден в . В случае отсутствия приложения, убедитесь, что установлен пакет kdeadmin. В KDE 4.5, а также в более поздних версиях, находится в . В некоторых дистрибутивах выделяют KCron в отдельный пакет, поэтому, в случае его отсутствия, осуществите поиск по репозиторию.
Adding and Modifying tasks
- Click to add a new task, or "Modify" to modify an existing task. The Add or modify existing task page will be displayed.
- Enter the command to be run. Click the folder icon to choose it from a dialog.
- Enter a comment (optional). This should be descriptive, explaining what the task will do as the command may not always be obvious.
- Click Enable this task to enable the task to run.
- Click Run at system bootup to enable the script to run each time the system is booted.
- Click Run every day to enable the script to run every day. This will automatically select the appropriate options.
- Using the buttons, choose when the command should be run. Not all parameters are required, those not needed may be left blank.
- Hours and Minutes are the time of day to run the task, not an interval.
- When done, click . The task will be added and scheduled if enabled.
Removing a task
To completely remove a task, select the task from the list and click the Delete button. This will permanently remove the task.
Environment Variables
Sometimes a task or multiple tasks need a specific variable set, it must be added in the Environment Variables section. The cron utility uses its own environment, system-wide and user-specific variables are not used. Click New Variable to add a new variable definition, or Modify to change an existing variable.
- Enter the name of the variable to use. This name:
- Must consist of letters, digits, and underscore ('_') only
- Must start with a letter
- Should not be a reserved or commonly used system variable. See https://pubs.opengroup.org/onlinepubs/000095399/basedefs/xbd_chap08.html for more information
- The value the variable will contain. This can be a number or string.
- Enter a brief description of the variable.
Подсказки
- Все модифицированные файлы расположены в папке /etc/cron, где находятся многочисленные файлы в которых придётся посмотреть.
- Инструмент командной строки, позволяющий посмотреть на текущее установленное задание Cron, является (это буква L).
crontab -l
More Information
- KDE official documentation
- Cron (Wikipedia)
- Cron (Arch Linux wiki)
- System Settings/File Associations/fr
- System Settings/Accessibility/da
|
Indstillinger til at gøre det lettere for handicappede at bruge computeren |
Plasmas indstillinger af tilgængelighed gør det muligt for dig at gøre det nemmere for dig at betjene computeren.
Klokke
I fanebladet kan du tilpasse systemklokken. Med indstillingerne for synlig klokke kan du indstille systemet til at give visuelle bekendtgærelser på skærmen. Hvis du for eksempel redigerer et dokument og en klæbende tast trykkes ned, så kan du vælge mellem at få dokumentets brugerflade vist med inverterede farver og at få hele dokumentets vindue til at skifte til en brugervalgt farve.
Skyderen lader dig vælge, i hvor lang tid (i milisekunder) det aktive vindue skal ændre farve. Et mindre tidsrum betyder, at der vil være en kortere pause imellem de visuelle signaler, mens et længere tidsrum betyder, at pausen vil være længere
Hvis du finder disse indstillinger nyttige, så kan du måske også få glæde af indstillingerne i Systemindstillingers modul Program- og systembekendtgørelser.
Hvis du har svært ved at bruge tastaturet, så har fanebladene og indstillingsmuligheder, som måske kan være til hjælp; og fanebladet giver dig mulighed for at aktivere klæbrige og langsomme taster med en musegestus, hvis du ikke ønsker at bruge disse funktioner hele tiden.
Ændringstaster
Her er der to felter, Klæbende taster og Låsetaster. Indstillingerne af klæbende taster gør det lettere at bruge tastekombinationer. Når du for eksempel vil skrive et stort bogstav, så holder du tasten Shift nede samtidig med at du taster bogstavet. Klæbende taster lader dig taste Shift, Ctrl eller Alt først, slippe tasten igen og så trykke en anden tast ned. Systemet vil opfatte det som om tasterne blev trykket ned samtidigt.
Der er tre låsetaster på de fleste tastaturer, Caps Lock, Num Lock og Scroll Lock. I feltet Låsetaster kan du vælge at få en systemklokke afspillet, hvis en af disse aktiveres eller deaktiveres.
Tastaturfiltre
Langsomme taster
Langsomme taster betyder, at du kan få bekræftelse på, at en tast er blevet trykket og indgivet. Systemklokken aktiveres efter at den tid, der er indstillet på skyderen er gået. En tast skal holdes nede i så lang tid for at blive accepteret. Systemklokken kan bruges til at indikere, når tasten trykkes ned, accepteres eller afvises eller en hvilken som helst kombination af disse tre.
Elastiske taster
Indstillingerne af elastiske taster bruges til at forhindre flere tegn i at dukke op i et dokument som resultat af et tastetryk, som kommer umiddelbart efter det første. Hvis du taster igen inden for det tidsrum, som er indstillet på skyderen, så indgives det næste tegn ikke og systemklokken aktiveres eventuelt.
Selv simple indstillinger som at gøre tastaturetgentagelsen langsommere kan være en stor hjælp
Aktiveringsgestusser
Skærmlæser
Mere information
- KDE officielle dokumentation
- Accessibility project (Community wiki)
- Accessibility project (Phabricator workboard)
- KDE's tilgængelighedsprogrammer
- System Settings/Accessibility
<translate>
|
Settings to improve the desktop experience for disabled persons |
Plasma contains accessibility settings for you in order to make your experience easier when using the computer.
Bell
In the tab you can customize the system bell. The visible bell settings allows you to change their preferences to having a visual notification on the screen. For example, if a document is being edited, and a sticky key is pressed, you can choose between having the document's interface window being color-inverted, or having the entire window screen of the document change to a custom user-selected color.
The slider allows you to select how long the active window will change color in milliseconds. A smaller amount of time will mean there will be a shorter pause in between visible bells, while a larger amount of time means that the visible pause will be longer.
If you find these settings useful, you may also want to have a look at the Application and System Notifications module of System Settings.
If you find it difficult to use the keyboard, the and tabs have options that you may find helpful; and the has options to use mouse gestures to activate sticky keys or slow keys, if you do not want to use these features all the time.
Modifier Keys
There are two panels here, the Sticky Keys and the Locking Keys panel. Sticky keys is a setting to make it easier to enter multiple key shortcuts. For instance, when one wants to capitalize a letter, the Shift key is pressed at the same time as the letter. Sticky Keys allow you to first press Shift, Control, or Alt, and then release it and press another key. This system will interpret it as those keys being simultaneously pressed.
There are 3 Locking Keys on most keyboards. These keys are the Caps Lock, Num Lock, and Scroll Lock keys. In the tab, you can choose to have a system bell played if these are activated or deactivated.
Keyboard filters
Slow Keys
Slow Keys allow confirmation that a key has been pressed and entered. The system bell is activated when the time allotted with the slider has passed. For a key to be accepted, it has to be held until the set amount of time. The system bell can be used to indicate when a key press has been made, accepted, rejected, or any combination of the three.
Bounce Keys
The bounce key setting is used to prevent multiple characters appearing in a document as a result of an immediate key press occurring after the first one. If you press a key again in less time that has been set with the slider, the second repeat character won't be made and a system bell might activate.
Even simple settings like slowing the rate of keyboard repeat can be a great help
Activation Gestures
Screen Reader
More information
- KDE official documentation
- Accessibility project (Community wiki)
- Accessibility project (Phabricator workboard)
- KDE accessibility applications
</translate>
Γενικές πληροφορίες
Το KCron είναι μια πρότυπη εφαρμογή για την οποία δημιουργείται το αντίστοιχο πακέτο προκαταβολικά για τους χώρους εργασίας του KDE. |
Task Scheduler is a graphical front end to the standard "cron" utility. With it, commands (or "tasks") can be run at specific times, on a certain day or date, or at specific intervals (time between execution).
Χρήση
Στο KDE 4.4 το KCron είναι ένα άρθρωμα που μπορείτε να το βρείτε στις . Αν δεν το βρείτε εκεί, ελέγξτε παρακαλώ αν έχετε εγκαταστήσει το πακέτο kdeadmin. Στο KDE 4.5 καθώς και στις επόμενες εκδόσεις θα το βρείτε στις . Σε μερικές διανομές το KCron αποτελεί ξεχωριστό πακέτο, έτσι, αν δεν το βλέπετε, αναζητήστε το στο αποθετήριο σας.
Adding and Modifying tasks
- Click to add a new task, or "Modify" to modify an existing task. The Add or modify existing task page will be displayed.
- Enter the command to be run. Click the folder icon to choose it from a dialog.
- Enter a comment (optional). This should be descriptive, explaining what the task will do as the command may not always be obvious.
- Click Enable this task to enable the task to run.
- Click Run at system bootup to enable the script to run each time the system is booted.
- Click Run every day to enable the script to run every day. This will automatically select the appropriate options.
- Using the buttons, choose when the command should be run. Not all parameters are required, those not needed may be left blank.
- Hours and Minutes are the time of day to run the task, not an interval.
- When done, click . The task will be added and scheduled if enabled.
Removing a task
To completely remove a task, select the task from the list and click the Delete button. This will permanently remove the task.
Environment Variables
Sometimes a task or multiple tasks need a specific variable set, it must be added in the Environment Variables section. The cron utility uses its own environment, system-wide and user-specific variables are not used. Click New Variable to add a new variable definition, or Modify to change an existing variable.
- Enter the name of the variable to use. This name:
- Must consist of letters, digits, and underscore ('_') only
- Must start with a letter
- Should not be a reserved or commonly used system variable. See https://pubs.opengroup.org/onlinepubs/000095399/basedefs/xbd_chap08.html for more information
- The value the variable will contain. This can be a number or string.
- Enter a brief description of the variable.
Υποδείξεις
- Όλα τα τροποποιημένα αρχεία βρίσκονται στον κατάλογο /etc/cron όπου μπορείτε να βρείτε έναν μεγάλο αριθμό αρχείων.
- Το εργαλείο της γραμμής εντολών που σας επιτρέπει να παρακολουθήσετε τις τρέχουσες προγραμματισμένες εργασίες του cron είναι το (το γράμμα είναι το λατινικό L).
crontab -l
More Information
- KDE official documentation
- Cron (Wikipedia)
- Cron (Arch Linux wiki)
- System Settings/Shortcuts and Gestures/zh-cn
- System Settings/Accessibility/ca
|
Arranjament per a millorar l'experiència d'escriptori per a les persones amb discapacitat. |
El Plasma conté opcions de configuració d'accessibilitat per a fer la vostra experiència més fàcil quan utilitzeu l'ordinador.
Timbre
A la pestanya podeu personalitzar el timbre del sistema. La configuració de timbre visible us permet canviar les preferències per tenir una notificació visual a la pantalla. Per exemple, si s'està editant un document, i es prem una tecla apegalosa, podeu triar entre tenir la interfície de la finestra del document amb els colors invertits, o tenir-la canviada a un color personalitzat seleccionat per l'usuari.
El control lliscant us permet seleccionar la durada de la finestra activa en que canviarà de color, en mil·lèsimes de segon. Una menor quantitat de temps significa que hi haurà una pausa més curta entre els timbres visibles, mentre que una major quantitat de temps significa que la pausa visible serà més llarga.
Si trobeu útils aquests ajustaments, és possible que vulgueu fer una ullada al mòdul Notificacions de les aplicacions i del sistema d'Arranjament del sistema.
Si us resulta difícil utilitzar el teclat, les pestanyes i disposen d'opcions que poden ser-vos útils, i disposa d'opcions per utilitzar els gestos del ratolí per activar les tecles apegaloses o les tecles lentes, si no voleu utilitzar aquestes funcions tot el temps.
Tecles modificadores
Aquí hi ha dos plafons, Tecles lentes i Tecles de repetició. Les tecles lentes són un ajustament per a que sigui més fàcil introduir diverses dreceres de teclat. Per exemple, quan es vol utilitzar una lletra majúscula, la tecla Majús. es prem alhora que la lletra. Les tecles lentes us permeten prémer primer Majús., Control, o Alt, i després de deixar-les anar, prémer una altra tecla. Això serà interpretat pel sistema com tecles premudes simultàniament.
A la majoria dels teclats hi ha tres tecles de bloqueig. Aquestes són Bloq Majús, Bloq Núm, i Bloq Despl. A la pestanya , podeu triar si tenir un timbre del sistema si s'activen o desactiven aquestes.
Filtres de teclat
Tecles lentes
Les tecles lentes permeten confirmar que la tecla ha estat premuda i que ha entrat. El timbre del sistema s'activarà quan hagi passat el temps assignat amb el control lliscant. Per a que una tecla sigui acceptada, l'haureu de mantenir durant el temps establert. El timbre del sistema es pot utilitzar per indicar que una tecla es prem, s'ha acceptat, s'ha rebutjat, o qualsevol combinació de les tres.
Tecles de repetició
L'ajustament de la tecla de repetició s'utilitza per prevenir que apareguin múltiples caràcters en un document com a resultat de prémer una tecla immediatament després de la primera. Si premeu una tecla després del temps establert amb el control lliscant, el segon caràcter repetit no es farà i es podrà activar un timbre del sistema.
Fins i tot ajustaments simples com la desacceleració de la taxa de repetició del teclat poden ser-vos de gran ajuda.
Gestos d'activació
Lector de pantalla
Més informació
- Documentació oficial del KDE
- Projecte d'accessibilitat (wiki de la comunitat)
- Projecte d'accessibilitat (tauler del Phabricator)
- Aplicacions d'accessibilitat del KDE
- System Settings/lb
System Settings
KDE system manager for hardware, software, and workspaces.

Features
- Search function helps narrow down relevant settings
- Highlight Changed Settings function displays changed settings
- Pointing at an icon displays a tooltip with more information about it
Search
When the keyboard focus is in the icon window, you can type the first few letters of any module name to select it.
System Settings has a search function to help in hunting down a setting. Simply type in a keyword in the Search field in the toolbar and System Settings will display modules that contain the keyword and hide those that don't.
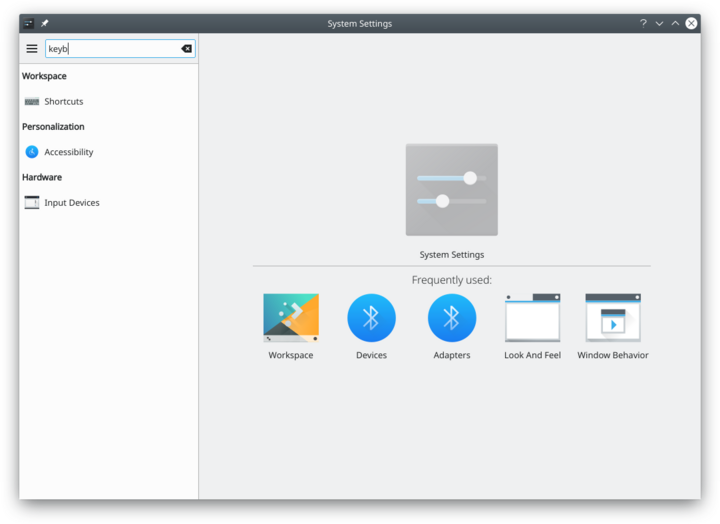
Searching for "key".

You can also search for and open System Settings modules in KRunner.
Kategorien
Appearance
Look and Feel
Customize Plasma in one click. Workspace Theme

Customize your plasma theme, cursor theme, and splash theme all from here. Color
Here you can choose which color scheme to use on the desktop and in applications. You can also tweak the settings for individual elements. Font

Configure which fonts you want to use in window bars, menus, and elsewhere. Icons
Here you can choose which icon theme to use for your workspace, and how large you want them to be. Application Style
Customize your systems widget style (button themes), window decorations (how your titlebars look), and how GNOME (GTK) applications look..
Workspace
Desktop Behavior
Configure desktop effects such as window animations, transparency, or the desktop cube. Windows Management
Configure Kwin the KDE windows manager. Shortcuts

Configure keyboard shortcuts. Startup and Shutdown

Configure your system behavior when starting up or shutting down. Search

Settings for the desktop search engine and the file indexer.
Personalization
Acccount Details

Manage users and configure password manager. Regional Settings

Configure language, time formats, date and more Notifications

Configure notifications. Applications

Configure default applications, file associations, and more. Accessibility

Settings to help users who have difficulty hearing audible cues, or who have difficulty using a keyboard. Online Accounts

Add your google, ownCloud or Twitter account, for a better integration.
Network
Connections

Preferences for your network connections. Settings

Additional settings about your connection, Konqueror and SMB shares Bluetooth

Preference about Bluetooth.
Hardware
Input Devices

Configure your keyboard, mouse and joystick. Display and Monitor

Configuration of your monitor(s) and screensaver settings. Multimedia

Configure the handling of audio CDs Power Management

Global settings for the power manager. Printers

Configure your printers to work with plasma. Removable Storage

Configure automatic handling of removable storage media and which actions are available when a new device is connected to your machine.
System Settings
KDE system manager for hardware, software, and workspaces.
Features
- Search function helps narrow down relevant settings
- Highlight Changed Settings function displays changed settings
- Pointing at an icon displays a tooltip with more information about it
Search
When the keyboard focus is in the icon window, you can type the first few letters of any module name to select it.
System Settings has a search function to help in hunting down a setting. Simply type in a keyword in the Search field in the toolbar and System Settings will display modules that contain the keyword and hide those that don't.
Searching for "key".
You can also search for and open System Settings modules in KRunner.
Categories
Appearance
Look and Feel
Customize Plasma in one click. Workspace Theme
Customize your plasma theme, cursor theme, and splash theme all from here. Color
Here you can choose which color scheme to use on the desktop and in applications. You can also tweak the settings for individual elements. Font
Configure which fonts you want to use in window bars, menus, and elsewhere. Icons
Here you can choose which icon theme to use for your workspace, and how large you want them to be. Application Style
Customize your systems widget style (button themes), window decorations (how your titlebars look), and how GNOME (GTK) applications look..
Workspace
Desktop Behavior
Configure desktop effects such as window animations, transparency, or the desktop cube. Windows Management
Configure Kwin the KDE windows manager. Shortcuts
Configure keyboard shortcuts. Startup and Shutdown
Configure your system behavior when starting up or shutting down. Search
Settings for the desktop search engine and the file indexer.
Personalization
Acccount Details
Manage users and configure password manager. Regional Settings
Configure language, time formats, date and more Notifications
Configure notifications. Applications
Configure default applications, file associations, and more. Accessibility
Settings to help users who have difficulty hearing audible cues, or who have difficulty using a keyboard. Online Accounts
Add your google, ownCloud or Twitter account, for a better integration.
Network
Connections
Preferences for your network connections. Settings
Additional settings about your connection, Konqueror and SMB shares Bluetooth
Preference about Bluetooth.
Hardware
Input Devices
Configure your keyboard, mouse and joystick. Display and Monitor
Configuration of your monitor(s) and screensaver settings. Multimedia
Configure the handling of audio CDs Power Management
Global settings for the power manager. Printers
Configure your printers to work with plasma. Removable Storage
Configure automatic handling of removable storage media and which actions are available when a new device is connected to your machine.
System Settings
Ovládacie centrum pre KDE softvér and pracovné prostredie.
Features
- Search function helps narrow down relevant settings
- Highlight Changed Settings function displays changed settings
- Pointing at an icon displays a tooltip with more information about it
Search
When the keyboard focus is in the icon window, you can type the first few letters of any module name to select it.
System Settings has a search function to help in hunting down a setting. Simply type in a keyword in the Search field in the toolbar and System Settings will display modules that contain the keyword and hide those that don't.
Searching for "key".
You can also search for and open System Settings modules in KRunner.
Categories
Appearance
Look and Feel
Customize Plasma in one click. Workspace Theme
Customize your plasma theme, cursor theme, and splash theme all from here. Color
Here you can choose which color scheme to use on the desktop and in applications. You can also tweak the settings for individual elements. Font
Configure which fonts you want to use in window bars, menus, and elsewhere. Icons
Here you can choose which icon theme to use for your workspace, and how large you want them to be. Application Style
Customize your systems widget style (button themes), window decorations (how your titlebars look), and how GNOME (GTK) applications look..
Workspace
Desktop Behavior
Configure desktop effects such as window animations, transparency, or the desktop cube. Windows Management
Configure Kwin the KDE windows manager. Shortcuts
Configure keyboard shortcuts. Startup and Shutdown
Configure your system behavior when starting up or shutting down. Search
Settings for the desktop search engine and the file indexer.
Personalization
Acccount Details
Manage users and configure password manager. Regional Settings
Configure language, time formats, date and more Notifications
Configure notifications. Applications
Configure default applications, file associations, and more. Accessibility
Settings to help users who have difficulty hearing audible cues, or who have difficulty using a keyboard. Online Accounts
Add your google, ownCloud or Twitter account, for a better integration.
Network
Connections
Preferences for your network connections. Settings
Additional settings about your connection, Konqueror and SMB shares Bluetooth
Preference about Bluetooth.
Hardware
Input Devices
Configure your keyboard, mouse and joystick. Display and Monitor
Configuration of your monitor(s) and screensaver settings. Multimedia
Configure the handling of audio CDs Power Management
Global settings for the power manager. Printers
Configure your printers to work with plasma. Removable Storage
Configure automatic handling of removable storage media and which actions are available when a new device is connected to your machine.
|
Paramètres pour améliorer l'utilisation du bureau pour les personnes déficientes |
Plasma contient des paramètres d'accessibilité pour facilter l'utilisation de votre ordinateur.
Cloche
Dans l'onglet vous pouvez personnaliser la cloche du système. Les paramètres visibles de la cloche vous permettent de changer leur préférence pour avoir une notification visuelle sur l'écran. Par exemple, si une document est en cour de modification, et une touche collante a été enfoncée, vous pouvez choisir entre avoir la fenêtre d'interface du document passer en couleurs inversées, ou avoir toute la fenêtre d'écran du document qui se change en couleur définie par l'utilisateur.
Le curseur linéaire vous permet de sélectionner la durée pendant laquelle la fenêtre active changera de couleur en millisecondes. Une valeur plus petite du temps signifie que l'attente sera plus courte entre les cloches visibles, tandis qu'une valeur plus grande de ce temps indique que l'attente sera plus longue.
Si vous trouvez ces paramètres intéressants, vous pourrez également regarder le module Notification des applications et du système de Paramètres système.
Si vous trouvez difficile d'utiliser le clavier, les onglets et possèdent des options qui vous seront utiles; et les des options pour utiliser les gestes à la souris pour activer les touches collantes (sticky keys) ou les touches lentes, si vous ne voulez pas utiliser ces fonctions tout le temps.
Touches de modification
Il y a deux panneaux ici, le panneau des touches collantes (Sticky Keys) et celui des Touches de verrouillage. Les touches collantes sont une configuration pour faciliter l'entrée de multiples raccourcis clavier. Par exemple, si on veut mettre une lettre en majuscule, la touche Shift est pressée au même moment que la lettre. Les clés collantes vous autorisent à presser d'abord Shift, Control, ou Alt, et ensuite de les relâcher et de presser une autre touche. Ce système va les interpréter comme si les touches avaient été simultanément pressées.
Il existe trois touches de verouillage sur la plupart des claviers. Ces clés sont les touches Caps Lock, Num Lock, et Scroll Lock . Dans l'onglet , vous pouvez choisir d'avoir une cloche système qui retentit si celles-ci sont activées ou désactivées.
Filtres clavier
Touches lentes
Les touches lentes permettent de confirmer qu'une touche a été pressée et entrée. La cloche système est activée quand le temps alloué avec le curseur linéaire est dépassé. Pour qu'une touche soit acceptée, elle doit être tenue pendant la période de temps définie. La cloche système peut être utilisée pour indiquer qu'une touche a été enfoncée, acceptée, rejetée, ou tout autre combinaison de ces trois cas.
Touches de renvoi
Le paramètre de touche de renvoi est utilisé pour éviter que plusieurs caractères n'apparaissent dans un document à la suite d'une pression immédiate sur une touche après la première. Si vous appuyez à nouveau sur la touche en moins de temps que défini avec le curseur, le deuxième caractère répété ne sera pas créé et une cloche système peut s'activer.
Même une simple initialisation, comme abaisser la vitesse de répétition du clavier, peut être d'une grande aide.
Gestes d'activation
Lecteur d'écran
Informations supplémentaires
- documentation officielle de KDE
- Projet Accessibility (sur wiki Community)
- Projet Accessibility (tableau de bord de Phabricator)
- Applications KDE Accessibility
- System Settings/Accessibility/it
|
Impostazioni per migliorare l'esperienza d'uso del desktop per persone diversamente abili |
Plasma contiene delle impostazioni di accessibilità per rendere l'esperienza d'uso del computer più semplice.
Campanella
Nella scheda puoi configurare la campanella di sistema. Le impostazioni della campanella visiva possono essere configurate per avere un feedback visivo degli eventi. Ad esempio se si sta modificando un documento e viene premuto un tasto modificatore (es Alt) puoi impostare di ricevere una segnalazione mediante l'inversione dei colori della finestra, oppure modificando il colore della finestra ad una valore impostato.
Il cursore ti permette di scegliere quanto a lungo (in millisecondi) deve durare il cambio di colore della finestra. Un intervallo di tempo minore significherà pause più corte tra diverse campanelle, mentre tempi più lunghi prolungheranno la durata della campanella.
Se hai trovato utili queste impostazioni potresti voler consultare anche il modulo Notifiche delle applicazioni e di sistema, sempre in Impostazioni di sistema.
Se hai dei problemi ad utilizzare la tastiera, le schede e hanno opzioni che puoi trovare utili, inoltre la scheda ha opzioni per usare gesti del mouse per attivare tasti permanenti o rallentati, se non vuoi che queste opzioni siano sempre attive.
Tasti modificatori
In questa scheda sono presenti due pannelli, Permanenza dei tasti e Tasti di blocco. Le opzioni di permanenza dei tasti favoriscono l'inserimento di scorciatoie multitasto. Ad esempio, per avere una lettera maiuscola è necessario premere Shift più, contemporaneamente, il tasto corrispondente alla lettera. Permanenza dei tasti consente di premere prima Shift, Ctrl o Alt e poi rilasciarli e premere il tasto seguente. Il sistema interpreterà questi ultimi come premuti contemporaneamente ai primi.
Sulla maggior parte delle tastiere sono presenti tre tasti di blocco. Questi sono Caps Lock, Num Lock, e Scroll Lock. Nell'opzione tasti di blocco puoi scegliere di suonare la campanella di sistema quando i tasti di blocco sono attivati o disattivati.
Filtri tastiera
Rallentamento tasti
Il rallentamento tasti permette di riceve conferme che ogni tasto è stato premuto. La campanella di sistema si attiva ogni volta che passa il tempo indicato dal cursore. Per essere accettato ogni tasto deve essere premuto almeno fino al tempo definito. La campanella può essere quanti usata per indicare quando un tasto viene premuto, accettato, rifiutato o una combinazione di queste tre.
Pressione ravvicinata dei tasti
L'impostazione pressione ravvicinata dei tasti è impiegata per impedire che diversi caratteri compaiano in un documento come prodotto della pressione immediata di diversi tasti successivamente al primo. Se premi un tasto dopo che sia passato un tempo minore a quello indicato dal cursore rispetto al precedente, il secondo carattere non sarà accettato, e, se impostata, verrà suonata la campanella di sistema.
Anche impostazioni semplici come il rallentamento della ripetizione dei tasti per la tastiera possono essere di grande aiuto.
Gesti di attivazione
Lettore dello schermo
Maggiori informazioni
- Documentazione ufficiale di KDE
- Accessibility project (Wiki della comunità)
- Accessibility project (Tavola di lavoro di Phabricator)
- Applicazioni per l'accessibilità di KDE
- System Settings/Shortcuts and Gestures/zh-tw
- System Settings/pl
System Settings
Okno ustawień KDE
Funkcje
- Menadżer dla wszystkich ustawień KDE
- Personalizuj i zarządzaj swoim systemem z jednego miejsca
- Funkcja wyszukiwania pozwala szybko odszukać dane ustawienie
- Wskazanie myszą ikony pokazuje opis danego ustawienia
Search
When the keyboard focus is in the icon window, you can type the first few letters of any module name to select it.
System Settings has a search function to help in hunting down a setting. Simply type in a keyword in the Search field in the toolbar and System Settings will display modules that contain the keyword and hide those that don't.
Searching for "key".
You can also search for and open System Settings modules in KRunner.
Kategorie
Appearance
Look and Feel
Customize Plasma in one click. Workspace Theme
Customize your plasma theme, cursor theme, and splash theme all from here. Color
Here you can choose which color scheme to use on the desktop and in applications. You can also tweak the settings for individual elements. Font
Configure which fonts you want to use in window bars, menus, and elsewhere. Icons
Here you can choose which icon theme to use for your workspace, and how large you want them to be. Application Style
Customize your systems widget style (button themes), window decorations (how your titlebars look), and how GNOME (GTK) applications look..
Workspace
Desktop Behavior
Configure desktop effects such as window animations, transparency, or the desktop cube. Windows Management
Configure Kwin the KDE windows manager. Shortcuts
Configure keyboard shortcuts. Startup and Shutdown
Configure your system behavior when starting up or shutting down. Search
Settings for the desktop search engine and the file indexer.
Personalization
Acccount Details
Manage users and configure password manager. Regional Settings
Configure language, time formats, date and more Notifications
Configure notifications. Applications
Configure default applications, file associations, and more. Accessibility
Settings to help users who have difficulty hearing audible cues, or who have difficulty using a keyboard. Online Accounts
Add your google, ownCloud or Twitter account, for a better integration.
Network
Connections
Preferences for your network connections. Settings
Additional settings about your connection, Konqueror and SMB shares Bluetooth
Preference about Bluetooth.
Hardware
Input Devices
Configure your keyboard, mouse and joystick. Display and Monitor
Configuration of your monitor(s) and screensaver settings. Multimedia
Configure the handling of audio CDs Power Management
Global settings for the power manager. Printers
Configure your printers to work with plasma. Removable Storage
Configure automatic handling of removable storage media and which actions are available when a new device is connected to your machine.
System Settings
KDE 軟體和工作空間的控制中心。
特性
- 全局性的 KDE 平臺配置中心
- 方便的自定義,管理你的桌面
- 幫助定位設置模塊的搜索功能
搜索
系統設置 有個搜索功能幫助定位要找的設置模塊位置。在工具欄的搜索框輸入,系統設置會高亮包含關鍵詞的設置模塊,同時黯淡其他無關模塊。還可以透過 KRunner 訪問到系統設定模組。
搜索關鍵詞
You can also search for and open System Settings modules in KRunner.
分類
通用外觀與行為
Look and Feel
Customize Plasma in one click. {{{3}}}
[[File:{{{2}}}|48px|link=Special:myLanguage/System Settings/Workspace Theme]] 設定你的用戶信息,密碼和路徑。你還可以配置社會化桌面提供方。
{{{3}}}
[[File:{{{2}}}|48px|link=Special:myLanguage/System Settings/Color]] 設定應用程式風格,顏色,圖示,字型和表情圖示。
Font
Configure which fonts you want to use in window bars, menus, and elsewhere. Icons
Here you can choose which icon theme to use for your workspace, and how large you want them to be. Application Style
Customize your systems widget style (button themes), window decorations (how your titlebars look), and how GNOME (GTK) applications look..
Workspace
Desktop Behavior
Configure desktop effects such as window animations, transparency, or the desktop cube. Windows Management
Configure Kwin the KDE windows manager. Shortcuts
Configure keyboard shortcuts. {{{3}}}
[[File:{{{2}}}|48px|link=Special:myLanguage/System Settings/Startup and Shutdown]] 設定啟動或關閉時的系統行為 Search
Settings for the desktop search engine and the file indexer.
Personalization
Acccount Details
Manage users and configure password manager. Regional Settings
Configure language, time formats, date and more Notifications
Configure notifications. Applications
Configure default applications, file associations, and more. Accessibility
Settings to help users who have difficulty hearing audible cues, or who have difficulty using a keyboard. Online Accounts
Add your google, ownCloud or Twitter account, for a better integration.
Network
Connections
Preferences for your network connections. Settings
Additional settings about your connection, Konqueror and SMB shares Bluetooth
Preference about Bluetooth.
硬體
{{{3}}}
[[File:{{{2}}}|48px|link=Special:myLanguage/System Settings/Input Devices]] 設定你的鍵盤,滑鼠和搖杆。 Display and Monitor
Configuration of your monitor(s) and screensaver settings. Multimedia
Configure the handling of audio CDs Power Management
Global settings for the power manager. Printers
Configure your printers to work with plasma. Removable Storage
Configure automatic handling of removable storage media and which actions are available when a new device is connected to your machine.
システム設定
ハードウェア、ソフトウェア、ワークスペース用の KDE システムマネージャーです。
機能
- Search function helps narrow down relevant settings
- Highlight Changed Settings function displays changed settings
- Pointing at an icon displays a tooltip with more information about it
Search
When the keyboard focus is in the icon window, you can type the first few letters of any module name to select it.
System Settings has a search function to help in hunting down a setting. Simply type in a keyword in the Search field in the toolbar and System Settings will display modules that contain the keyword and hide those that don't.
Searching for "key".
You can also search for and open System Settings modules in KRunner.
カテゴリ
外観
Look and Feel
ワンクリックでPlasmaをカスタマイズします。 ワークスペースのテーマ
Plasmaのテーマ、カーソルのテーマ、スプラッシュのテーマをすべてここからカスタマイズできます。 色
ここでは、デスクトップやアプリケーションで使用する配色を選択できます。また、個々の要素の設定を微調整することも可能です。 フォント
ウィンドウバーやメニューなどで使用するフォントを設定します。 アイコン
ここでは、ワークスペースに使用するアイコン テーマとそのサイズを選択できます。 Application Style
Customize your systems widget style (button themes), window decorations (how your titlebars look), and how GNOME (GTK) applications look..
Workspace
デスクトップの動作
Configure desktop effects such as window animations, transparency, or the desktop cube. Windows Management
Configure Kwin the KDE windows manager. Shortcuts
Configure keyboard shortcuts. Startup and Shutdown
Configure your system behavior when starting up or shutting down. Search
Settings for the desktop search engine and the file indexer.
Personalization
Acccount Details
Manage users and configure password manager. Regional Settings
Configure language, time formats, date and more Notifications
Configure notifications. Applications
Configure default applications, file associations, and more. Accessibility
Settings to help users who have difficulty hearing audible cues, or who have difficulty using a keyboard. Online Accounts
Add your google, ownCloud or Twitter account, for a better integration.
Network
Connections
Preferences for your network connections. Settings
Additional settings about your connection, Konqueror and SMB shares Bluetooth
Preference about Bluetooth.
Hardware
Input Devices
キーボード、マウス、ジョイスティックを設定します。 Display and Monitor
Configuration of your monitor(s) and screensaver settings. Multimedia
Configure the handling of audio CDs Power Management
Global settings for the power manager. Printers
Configure your printers to work with plasma. Removable Storage
リムーバブル ストレージ メディアの自動処理と、新しいデバイスがマシンに接続されたときに実行できるアクションを構成します。
 |
Edit system wide keyboard shortcuts and mouse gestures |

Custom Shortcuts
Here you edit settings for input actions, including mouse gestures.
Standard Keyboard Shortcuts
Here you can configure the keyboard shortcuts for a number of actions common to many applications. This includes actions such as Open, Save, Close, Cut, Copy, Paste, Find, and many more.
Global Keyboard Shortcuts
Global keyboard shortcuts are used to interface with applications that do not display an interface. Settings for such shortcuts are edited here.
Mouse Gestures
The place where you start is (in KDE SC 4.5 it is )
Enabling mouse gestures
In the bottom left corner of the window there is a button. Make sure that the checkbox is checked. Set the timout as you see fit. The mouse button might be different for you, I chose 3 for using the right mouse button. If you want input actions to be enabled automatically, check the "Start the input Actions daemon on login" above.
Also to have any gestures working you need to have the individual gestures themself enabled.
Creating the Mouse gestures actions group
Right click on the left pane (in an empty area under the list of action groups) and choose , rename that group to "Mouse Gestures" and check the checkbox attached to its name.
Creating a new mouse gesture
From now on I will assume that the new group is called "Mouse Gestures". Right click on and choose (here there are three options but I didn't manage to work with "Send Keyboard Input") using "Command/URL" or "D-Bus Command" you will need to create a gesture and bind an action to it.
To create the gesture
Click on your and select the tab. in the bottom of the screen there is an button (click it). In the box that just opened draw your gesture using the left mouse button.
To bind an action
if you chose simply enter that command/url under the tab at the field.
Examples using Command/URL
Close window
This command will let you close the next window you mouse click on.
Command/URL: wmctrl -c :SELECT:
to close the active window
Command/URL: wmctrl -c :ACTIVE:
Translate clipboard content
This command will display a translation of the current clipboard content.
- Required for this are:
- xclip
- libtranslate
'"`UNIQ--syntaxhighlight-0000016E-QINU`"'
Replace 'en' and 'he' with the desired source and destination language, if you are not sure, a full list of language codes is available from the ISO 639-2 list.
Examples using D-Bus
If you chose D-Bus, here are few examples.
Finding out what to fill where, is done with the help of the "Launch D-Bus Browser", using that browser you can find what method you wish to call in what application object. Using D-Bus we need to fill some fields, the field name will be regular and the content italic.
Runner
This will display the Runner dialog.
Remote Application: org.kde.krunner
Remote Object: /App
Function: org.kde.krunner.App.display
Audacious next/previous/pause/play/stop/repeat track
Remote Application: org.mpris.audacious
Remote Object: /Player
Function: org.freedesktop.MediaPlayer.Next (replace Next with Prev/Pause/Stop/Play/Repeat)
Audacious PlayPause track
If not playing will play, if playing will pause.
Remote Application: org.mpris.audacious
Remote Object: /org/atheme/audacious
Function: org.atheme.audacious.PlayPause
display the actions pop-up. (I am using that to search and translate words)
Remote Application: org.kde.klipper
Remote Object: /klipper
Function: org.kde.klipper.klipper.showKlipperManuallyInvokeActionMenu
See also
- Browser Configuration/Mousegestures for all Browsers - Premade gestures for file and web browsers
- System Settings/Shortcuts and Gestures/de
|
Edit system wide keyboard shortcuts and mouse gestures |
Custom Shortcuts
Here you edit settings for input actions, including mouse gestures.
Standard Keyboard Shortcuts
Here you can configure the keyboard shortcuts for a number of actions common to many applications. This includes actions such as Open, Save, Close, Cut, Copy, Paste, Find, and many more.
Global Keyboard Shortcuts
Global keyboard shortcuts are used to interface with applications that do not display an interface. Settings for such shortcuts are edited here.
Mouse Gestures
The place where you start is (in KDE SC 4.5 it is )
Mausgesten einschalten
In the bottom left corner of the window there is a button. Make sure that the checkbox is checked. Set the timout as you see fit. The mouse button might be different for you, I chose 3 for using the right mouse button. If you want input actions to be enabled automatically, check the "Start the input Actions daemon on login" above.
Also to have any gestures working you need to have the individual gestures themself enabled.
Erstellen der Mausgesten Aktionen-Gruppe
Right click on the left pane (in an empty area under the list of action groups) and choose , rename that group to "Mouse Gestures" and check the checkbox attached to its name.
Erstellen einer neuen Mausgeste
From now on I will assume that the new group is called "Mouse Gestures". Right click on and choose (here there are three options but I didn't manage to work with "Send Keyboard Input") using "Command/URL" or "D-Bus Command" you will need to create a gesture and bind an action to it.
Um die Geste zu erstellen
Click on your and select the tab. in the bottom of the screen there is an button (click it). In the box that just opened draw your gesture using the left mouse button.
Eine Aktion einbinden
if you chose simply enter that command/url under the tab at the field.
Beispiel der Verwendung eines Befehls / Adresse
Fenster schließen
This command will let you close the next window you mouse click on.
Command/URL: wmctrl -c :SELECT:
to close the active window
Command/URL: wmctrl -c :ACTIVE:
Inhalt der Zwischenablage übersetzen
This command will display a translation of the current clipboard content.
- Required for this are:
- xclip
- libtranslate
'"`UNIQ--syntaxhighlight-00000184-QINU`"'
Replace 'en' and 'he' with the desired source and destination language, if you are not sure, a full list of language codes is available from the ISO 639-2 list.
Examples using D-Bus
If you chose D-Bus, here are few examples.
Finding out what to fill where, is done with the help of the "Launch D-Bus Browser", using that browser you can find what method you wish to call in what application object. Using D-Bus we need to fill some fields, the field name will be regular and the content italic.
Runner
This will display the Runner dialog.
Remote Application: org.kde.krunner
Remote Object: /App
Function: org.kde.krunner.App.display
Audacious next/previous/pause/play/stop/repeat track
Remote Application: org.mpris.audacious
Remote Object: /Player
Function: org.freedesktop.MediaPlayer.Next (replace Next with Prev/Pause/Stop/Play/Repeat)
Audacious PlayPause track
If not playing will play, if playing will pause.
Remote Application: org.mpris.audacious
Remote Object: /org/atheme/audacious
Function: org.atheme.audacious.PlayPause
display the actions pop-up. (I am using that to search and translate words)
Remote Application: org.kde.klipper
Remote Object: /klipper
Function: org.kde.klipper.klipper.showKlipperManuallyInvokeActionMenu
See also
- Browser Configuration/Mousegestures for all Browsers - Premade gestures for file and web browsers
- System Settings/da
- System Settings/ro
System Settings
Centrul de control pentru software-ul KDE şi spaţiile de lucru.
Caracteristici
- Centrul de Control pentru setările platformei globale KDE
- Personalizează-ţi şi gestionează-ţi desktop-ul într-o locaţie convenabilă
- Funcţia de căutare ajută la restrângerea setărilor probabile.
Căutare
System Settings are o funcţie de căutare pentru a ajuta la căutarea şi eliminarea unei setări.Pur şi simplu tastaţi un cuvânt cheie în câmpul de căutare din bara de unelte şi Setările de Sistem vor afişa module ce conţin cuvântul cheie şi le ascund pe cele care nu conţin.Modulele Setărilor de Sistem pot fi de asemenea găsite în KRunner.
În căutarea "cheii".
You can also search for and open System Settings modules in KRunner.
Categorii
Aspect şi Comportament Comun
Look and Feel
Customize Plasma in one click. {{{3}}}
[[File:{{{2}}}|48px|link=Special:myLanguage/System Settings/Workspace Theme]] Configurează-ţi informaţia de utilizator,parola şi traiectoriile.De asemenea puteţi să vă configuraţi furnizorii Social Desktop ai dumneavoastră.
{{{3}}}
[[File:{{{2}}}|48px|link=Special:myLanguage/System Settings/Color]] Configurează-ţi aspectul aplicaţiilor tale,culorile,pictogramele,fonturile şi emoticon-urile.
Font
Configure which fonts you want to use in window bars, menus, and elsewhere. Icons
Here you can choose which icon theme to use for your workspace, and how large you want them to be. Application Style
Customize your systems widget style (button themes), window decorations (how your titlebars look), and how GNOME (GTK) applications look..
Workspace
Desktop Behavior
Configure desktop effects such as window animations, transparency, or the desktop cube. Windows Management
Configure Kwin the KDE windows manager. Shortcuts
Configure keyboard shortcuts. {{{3}}}
[[File:{{{2}}}|48px|link=Special:myLanguage/System Settings/Startup and Shutdown]] Configurează-ţi comportamentul sistemului atunci când îl porneşti sau opreşti. Search
Settings for the desktop search engine and the file indexer.
Personalization
Acccount Details
Manage users and configure password manager. Regional Settings
Configure language, time formats, date and more Notifications
Configure notifications. Applications
Configure default applications, file associations, and more. Accessibility
Settings to help users who have difficulty hearing audible cues, or who have difficulty using a keyboard. Online Accounts
Add your google, ownCloud or Twitter account, for a better integration.
Network
Connections
Preferences for your network connections. Settings
Additional settings about your connection, Konqueror and SMB shares Bluetooth
Preference about Bluetooth.
Hardware
{{{3}}}
[[File:{{{2}}}|48px|link=Special:myLanguage/System Settings/Input Devices]] Configurează-ţi desktop-ul,mouse-ul şi joystick-ul. Display and Monitor
Configuration of your monitor(s) and screensaver settings. Multimedia
Configure the handling of audio CDs Power Management
Global settings for the power manager. Printers
Configure your printers to work with plasma. Removable Storage
Configure automatic handling of removable storage media and which actions are available when a new device is connected to your machine.
System Settings
Центр управления для приложений и среды KDE.
Возможности
- Search function helps narrow down relevant settings
- Highlight Changed Settings function displays changed settings
- Pointing at an icon displays a tooltip with more information about it
Поиск
Когда фокус ввода будет на значке окна (выделен), вы можете нажать несколько первых букв названия любого раздела что бы найти и выделить его.
System Settings has a search function to help in hunting down a setting. Simply type in a keyword in the Search field in the toolbar and System Settings will display modules that contain the keyword and hide those that don't.
Searching for "key".
You can also search for and open System Settings modules in KRunner.
Categories
Appearance
Look and Feel
Customize Plasma in one click. Workspace Theme
Customize your plasma theme, cursor theme, and splash theme all from here. Color
Настраивайте стиль, цвет, значки, шрифт и смайлики в ваших приложениях.
Font
Настраивайте уведомления, которые вы хотите получать от операционной системы и от приложений.
{{{3}}}
[[File: Ассоциация файлов
|48px|link=Special:myLanguage/System Settings/Icons]]||Устанавливайте действия и значки по умолчанию для различных типов файлов.
{{{3}}}
[[File:{{{2}}}|48px|link=Special:myLanguage/System Settings/Application Style]] Customize your systems widget style (button themes), window decorations (how your titlebars look), and how GNOME (GTK) applications look..
Workspace
Desktop Behavior
Configure desktop effects such as window animations, transparency, or the desktop cube. Windows Management
Configure Kwin the KDE windows manager. Shortcuts
Configure keyboard shortcuts. Startup and Shutdown
Configure your system behavior when starting up or shutting down. Search
Settings for the desktop search engine and the file indexer.
Personalization
Acccount Details
Manage users and configure password manager. Regional Settings
Configure language, time formats, date and more Notifications
Configure notifications. Applications
Configure default applications, file associations, and more. Accessibility
Settings to help users who have difficulty hearing audible cues, or who have difficulty using a keyboard. Online Accounts
Add your google, ownCloud or Twitter account, for a better integration.
Network
Connections
Preferences for your network connections. Settings
Additional settings about your connection, Konqueror and SMB shares Bluetooth
Preference about Bluetooth.
Hardware
Input Devices
Configure your keyboard, mouse and joystick. Display and Monitor
Configuration of your monitor(s) and screensaver settings. Multimedia
Configure the handling of audio CDs Power Management
Global settings for the power manager. Printers
Configure your printers to work with plasma. Removable Storage
Configure automatic handling of removable storage media and which actions are available when a new device is connected to your machine.
- System Settings/Shortcuts and Gestures/da
- System Settings/zh-cn
- System Settings/Input Devices/uk
- System Settings/it
- System Settings/Locale/How To Install and Apply Interface Translation/uk
- System Settings/pt-br
- System Settings/Shortcuts and Gestures/ro
- System Settings/Shortcuts and Gestures/pt-br
- System Settings/Shortcuts and Gestures/es
- System Settings/Shortcuts and Gestures/ca
- System Settings/Shortcuts and Gestures/it
- System Settings/ca
- System Settings/fr
- System Settings/Shortcuts and Gestures
<translate>
|
Edit system wide keyboard shortcuts and mouse gestures |
Custom Shortcuts
Here you edit settings for input actions, including mouse gestures.
Standard Keyboard Shortcuts
Here you can configure the keyboard shortcuts for a number of actions common to many applications. This includes actions such as Open, Save, Close, Cut, Copy, Paste, Find, and many more.
Global Keyboard Shortcuts
Global keyboard shortcuts are used to interface with applications that do not display an interface. Settings for such shortcuts are edited here.
</translate><translate>
Mouse Gestures
The place where you start is (in KDE SC 4.5 it is )
Enabling mouse gestures
In the bottom left corner of the window there is a button. Make sure that the checkbox is checked. Set the timout as you see fit. The mouse button might be different for you, I chose 3 for using the right mouse button. If you want input actions to be enabled automatically, check the "Start the input Actions daemon on login" above.
Also to have any gestures working you need to have the individual gestures themself enabled.
Creating the Mouse gestures actions group
Right click on the left pane (in an empty area under the list of action groups) and choose , rename that group to "Mouse Gestures" and check the checkbox attached to its name.
Creating a new mouse gesture
From now on I will assume that the new group is called "Mouse Gestures". Right click on and choose (here there are three options but I didn't manage to work with "Send Keyboard Input") using "Command/URL" or "D-Bus Command" you will need to create a gesture and bind an action to it.
To create the gesture
Click on your and select the tab. in the bottom of the screen there is an button (click it). In the box that just opened draw your gesture using the left mouse button.
To bind an action
if you chose simply enter that command/url under the tab at the field.
Examples using Command/URL
Close window
This command will let you close the next window you mouse click on.
Command/URL: wmctrl -c :SELECT:
to close the active window
Command/URL: wmctrl -c :ACTIVE:
Translate clipboard content
This command will display a translation of the current clipboard content.
- Required for this are:
- xclip
- libtranslate
'"`UNIQ--syntaxhighlight-0000019C-QINU`"'
Replace 'en' and 'he' with the desired source and destination language, if you are not sure, a full list of language codes is available from the ISO 639-2 list.
Examples using D-Bus
If you chose D-Bus, here are few examples.
Finding out what to fill where, is done with the help of the "Launch D-Bus Browser", using that browser you can find what method you wish to call in what application object. Using D-Bus we need to fill some fields, the field name will be regular and the content italic.
Runner
This will display the Runner dialog.
Remote Application: org.kde.krunner
Remote Object: /App
Function: org.kde.krunner.App.display
Audacious next/previous/pause/play/stop/repeat track
Remote Application: org.mpris.audacious
Remote Object: /Player
Function: org.freedesktop.MediaPlayer.Next (replace Next with Prev/Pause/Stop/Play/Repeat)
Audacious PlayPause track
If not playing will play, if playing will pause.
Remote Application: org.mpris.audacious
Remote Object: /org/atheme/audacious
Function: org.atheme.audacious.PlayPause
display the actions pop-up. (I am using that to search and translate words)
Remote Application: org.kde.klipper
Remote Object: /klipper
Function: org.kde.klipper.klipper.showKlipperManuallyInvokeActionMenu
See also
- Browser Configuration/Mousegestures for all Browsers - Premade gestures for file and web browsers
</translate>
System Settings
KDE సాప్ట్వేర్ మరియు కార్యక్షేత్రాల కొరకు నియంత్రణా కేంద్రం
విశిష్టతలు
- Search function helps narrow down relevant settings
- Highlight Changed Settings function displays changed settings
- Pointing at an icon displays a tooltip with more information about it
వెతుకు
System Settings has a search function to help in hunting down a setting. Simply type in a keyword in the Search field in the toolbar and System Settings will display modules that contain the keyword and hide those that don't.
Searching for "key".
You can also search for and open System Settings modules in KRunner.
విభాగాలు
సాధారణముగా కనిపించువిధము మరియు ప్రవర్తన
Look and Feel
Customize Plasma in one click. {{{3}}}
[[File:{{{2}}}|48px|link=Special:myLanguage/System Settings/Workspace Theme]] మీ వాడుకరి సమాచారాన్ని, సంకేతపదము మరియు త్రోవలను స్వరూపించండి. అంతేకాకుండా మీ సామాజిక డెస్క్టాప్ సమకూర్పరులను కూడా స్వరూపించగలరు.
{{{3}}}
[[File:{{{2}}}|48px|link=Special:myLanguage/System Settings/Color]] మీ అనువర్తనాల శైలి, రంగు, ప్రతీకలు, ఫాంట్లు మరియు భావాలను స్వరూపించు
Font
Configure which fonts you want to use in window bars, menus, and elsewhere. Icons
Here you can choose which icon theme to use for your workspace, and how large you want them to be. Application Style
Customize your systems widget style (button themes), window decorations (how your titlebars look), and how GNOME (GTK) applications look..
Workspace
Desktop Behavior
Configure desktop effects such as window animations, transparency, or the desktop cube. Windows Management
Configure Kwin the KDE windows manager. Shortcuts
Configure keyboard shortcuts. {{{3}}}
[[File:{{{2}}}|48px|link=Special:myLanguage/System Settings/Startup and Shutdown]] మీ వ్యవస్థను ప్రారంభించునపుడు మరియు మూసివేసినపుడు ప్రవర్తనను స్వరూపించండి. Search
Settings for the desktop search engine and the file indexer.
Personalization
Acccount Details
Manage users and configure password manager. Regional Settings
Configure language, time formats, date and more Notifications
Configure notifications. Applications
Configure default applications, file associations, and more. Accessibility
Settings to help users who have difficulty hearing audible cues, or who have difficulty using a keyboard. Online Accounts
Add your google, ownCloud or Twitter account, for a better integration.
Network
Connections
Preferences for your network connections. Settings
Additional settings about your connection, Konqueror and SMB shares Bluetooth
Preference about Bluetooth.
హార్డ్వేర్
{{{3}}}
[[File:{{{2}}}|48px|link=Special:myLanguage/System Settings/Input Devices]] మీ కీబోర్డు, మౌస్ మరియు జాయ్స్టిక్లను స్వరూపించుకోండి. Display and Monitor
Configuration of your monitor(s) and screensaver settings. Multimedia
Configure the handling of audio CDs Power Management
Global settings for the power manager. Printers
Configure your printers to work with plasma. Removable Storage
Configure automatic handling of removable storage media and which actions are available when a new device is connected to your machine.
System Settings
Kontrollzentrum für KDE Software und Arbeitsplatz
Funktionen
- Kontrollzentrum für globale KDE Plattform Einstellungen
- Anpassen und Verwalten Ihres Desktops an einer Stelle
- Suchfunktionen helfen beim besseren Finden von Einstellungen
- Wenn Sie auf ein Symbol zeigen, wird ein Infofenster mit mehr Informationen angezeigt
Suche
Wenn der Tastaturfokus auf dem Symbolfenster ist, können Sie die ersten paar Buchstaben eines Symbols eingeben, um es auszuwählen.
Systemeinstellungen hat eine Suchfunktion, um eine Einstellung besser zu finden. Tippen Sie einfach ein Stichwort in das Suchfeld in der Werkzeugleiste ein und Systemeinstellungen wird Ihnen entsprechende Module anzeigen, die das Stichwort enthalten und Module ausblenden, die es nicht enthalten.
Suche nach "key".
You can also search for and open System Settings modules in KRunner.
Kategorien
Gemeinsame Darstellung und Verhalten
Look and Feel
Customize Plasma in one click. {{{3}}}
[[File: Persönliche Informationen
|48px|link=Special:myLanguage/System Settings/Workspace Theme]]||Konfigurieren Sie Ihre Benutzerinformationen, Kennwort und Pfade. Sie können ebenso Ihren Sozialen-Desktop-Anbieter einstellen.
{{{3}}}
[[File: Erscheinungsbild von Anwendungen
|48px|link=Special:myLanguage/System Settings/Color]]||Konfigurieren Sie Ihr Programm Style, Farben, Symbole, Schriftarten und Smileys.
{{{3}}}
[[File: Anwendungs- und Systembenachrichtigungen
|48px|link=Special:myLanguage/System Settings/Fonts (Category)]]||Passen Sie hier Ihre Zeichensätze an, die Ihr System verwendet.
{{{3}}}
[[File: Dateizuordnungen
|48px|link=Special:myLanguage/System Settings/Icons]]||Here you can choose which icon theme to use for your workspace, and how large you want them to be.{{{3}}}
[[File: Regionales
|48px|link=Special:myLanguage/System Settings/Application Style]]||Customize your systems widget style (button themes), window decorations (how your titlebars look), and how GNOME (GTK) applications look..
Erscheinungsbild und Verhalten der Arbeitsfläche
{{{3}}}
[[File: Arbeitsflächen-Effekte
|48px|link=Special:myLanguage/System Settings/Desktop Behavior]]||Configure desktop effects such as window animations, transparency, or the desktop cube.Windows Management
Configure Kwin the KDE windows manager. Shortcuts
Configure keyboard shortcuts. {{{3}}}
[[File: Starten und Beenden
|48px|link=Special:myLanguage/System Settings/Startup and Shutdown]]||Configure your system behavior when starting up or shutting down.{{{3}}}
[[File: Desktopsuche
|48px|link=Special:myLanguage/System Settings/Search]]||Settings for the desktop search engine and the file indexer.
Personalization
Acccount Details
Manage users and configure password manager. Regional Settings
Configure language, time formats, date and more Notifications
Configure notifications. Applications
Configure default applications, file associations, and more. {{{3}}}
[[File: Zugangshilfen
|48px|link=Special:myLanguage/System Settings/Accessibility]]||Settings to help users who have difficulty hearing audible cues, or who have difficulty using a keyboard.Online Accounts
Add your google, ownCloud or Twitter account, for a better integration.
Netzwerk und Verbindungen
{{{3}}}
[[File: Netzwerkeinstellungen
|48px|link=Special:myLanguage/System Settings/Connections]]||Preferences for your network connections.Settings
Additional settings about your connection, Konqueror and SMB shares Bluetooth
Preference about Bluetooth.
Hardware
Eingabegeräte
Konfigurieren Sie Ihre Tastatur, Maus und Joystick. {{{3}}}
[[File: Anzeige und Monitor
|48px|link=Special:myLanguage/System Settings/Display and Monitor]]||Configuration of your monitor(s) and screensaver settings.Multimedia
Configure the handling of audio CDs Energieverwaltung
Global settings for the power manager. Printers
Configure your printers to work with plasma. Removable Storage
Configure automatic handling of removable storage media and which actions are available when a new device is connected to your machine.
- Pages using DynamicPageList3 parser function
- Desktop
- System
- Configuration
- Skrivebord/da
- System/da
- Konfiguration/da
- Desktop/it
- Sistema/it
- Configurazione/it
- Bureau/fr
- Système/fr
- Configuration/fr
- Стільниця/uk
- Система/uk
- Налаштування/uk
- 系统/zh-cn
- 系統/zh-tw
- KDE3/zh-tw
- System/ja
- Sistema/es
- KDE3/es
- Система/ru
- Σύστημα/el
- Escriptori/ca
- Sistema/ca
- Configuració/ca
- Desktop/lb
- System/lb
- Configuration/lb
- 桌面/zh-tw
- 設定/zh-tw
- Desktop/ja
- Configuration/ja
- Desktop/ro
- Sistem/ro
- Configurare/ro
- Рабочий стол/ru
- Настройка/ru
- Desktop/te
- System/te
- Configuration/te
- Needs work/te
- Arbeitsfläche/de
- System/de
- Konfiguration/de
- Template